GlobalVision Home(Dashboard)
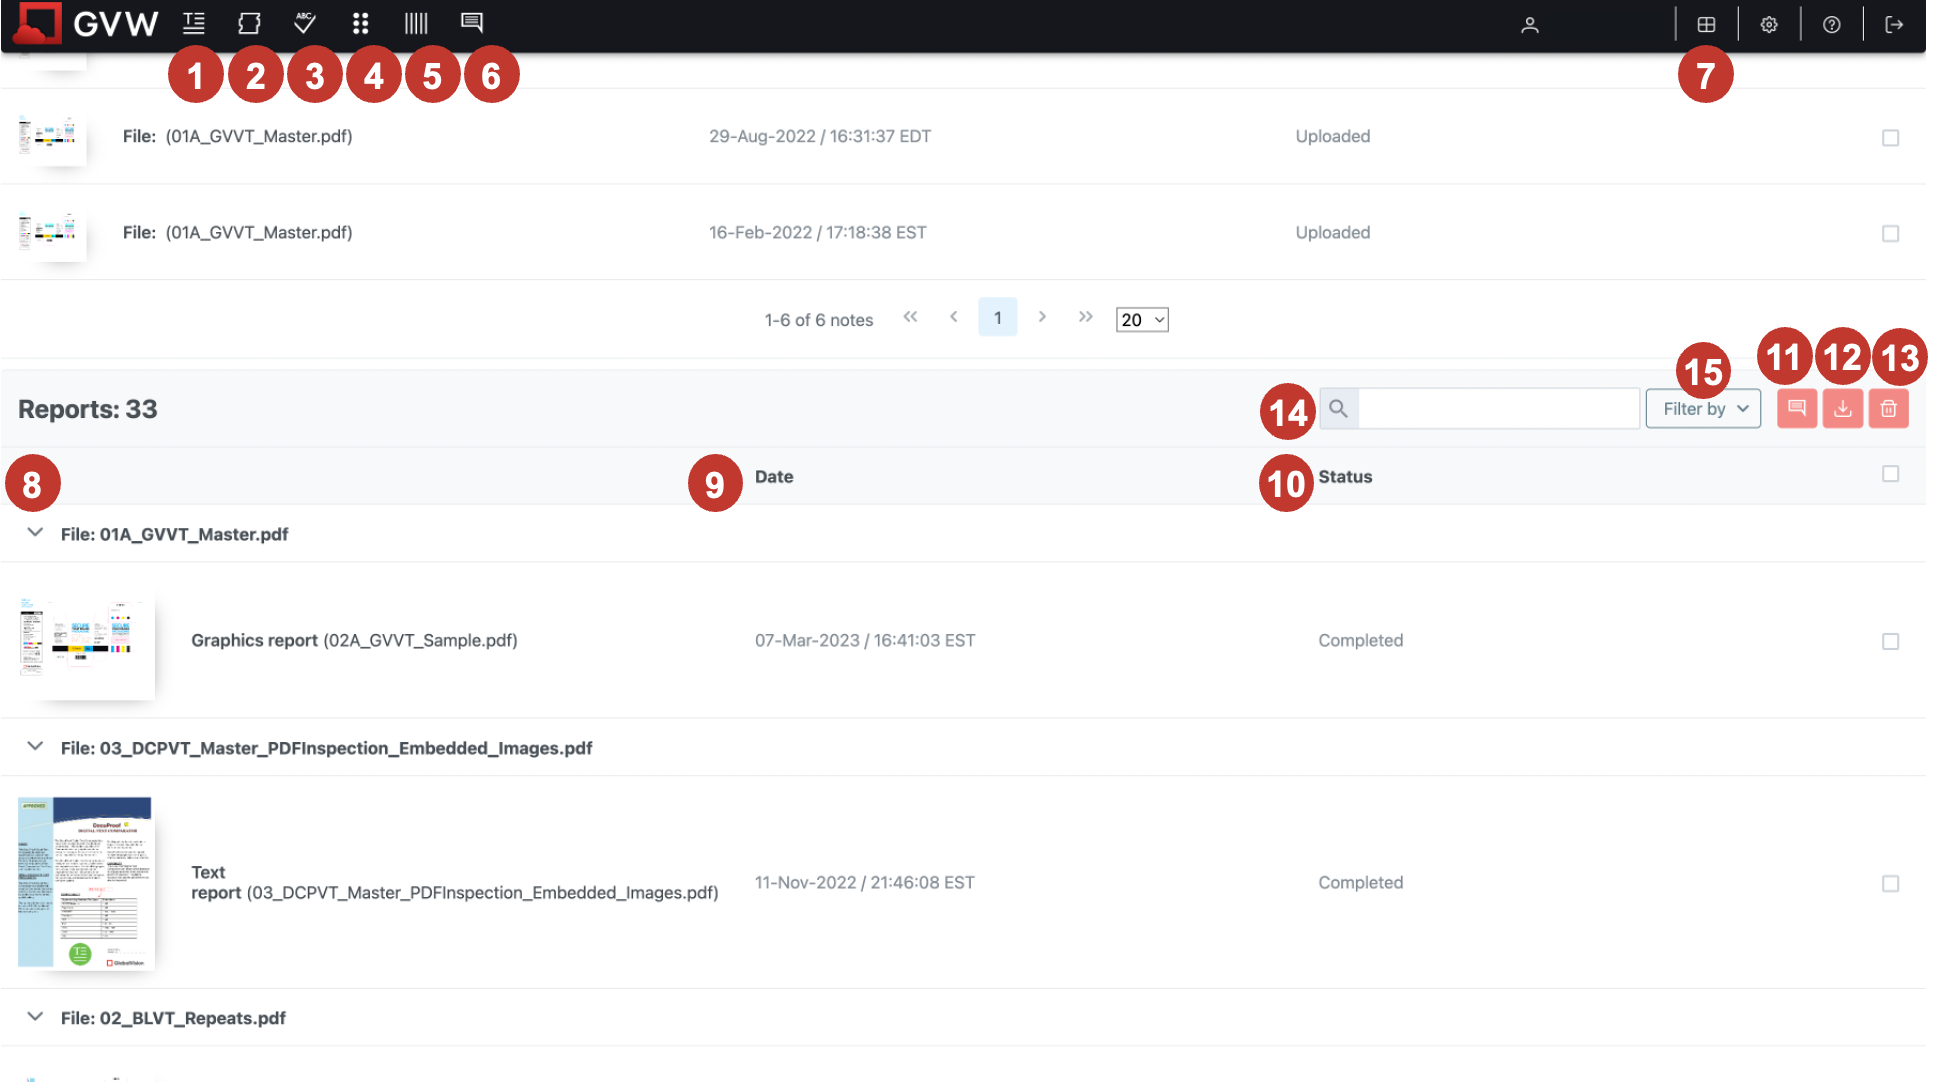
Once you're logged in to GlobalVision Web, the GlobalVision Home displays, with a view of each component available to you.
Inspection Modules
The inspection modes appear in the following order:
Text (1), Graphics (2), Spelling (3), Braille (4), Barcode (5), and Notes (6).

Clicking any inspection icon displays its file-loading page to begin the inspection process, regardless of where you are inside the application.
Dashboard
Clicking the GlobalVision Home (7) will take you back to the dashboard screen.

Loading files and inspections
Note: See the Loading file for the Inspection section of each mode for more information on how to load files.
Once an inspection is done, the file and report appear as a clickable item on GlobalVision Home under Files or Reports, labeled under Project (8) with the timestamp (9) of when it was first loaded or generated appearing beside it.


The Status (10) indicates whether an inspection is either "In Progress", has been successfully "Uploaded", "Completed", “Canceled” or has "Failed".
The maximum waiting period for a report to generate is 60 minutes. If your report could not be generated within 60 minutes, the system automatically marks the report as “Failed”.
Managing Reports
On GlobalVision Home, check a box on the far-right side and:
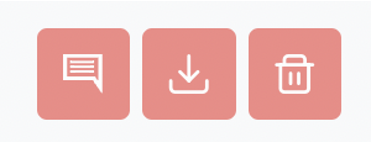
Click Upload the selected file(s) to Notes (11) to load a copy of the selected report(s) in Notes.
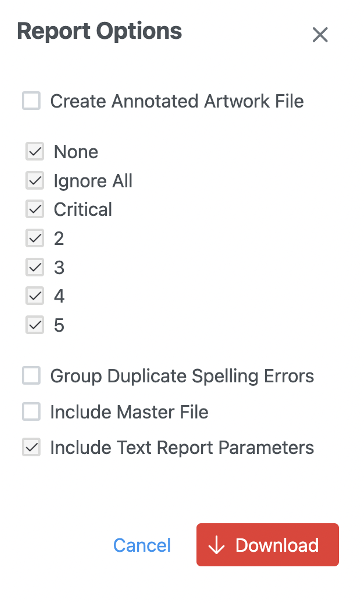
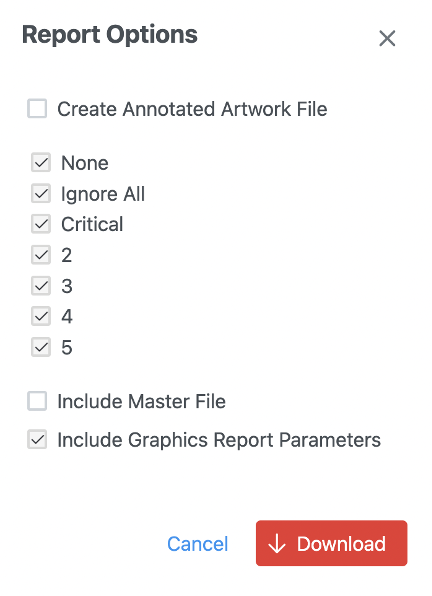
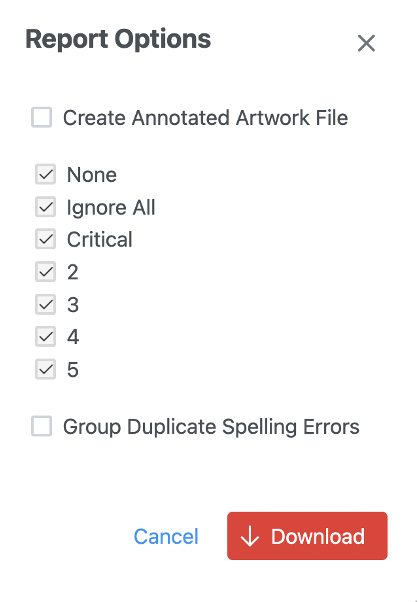
Click Download selected file(s) (12) to download a PDF copy of the selected report(s). Either option will prompt the Report Options window to appear. Before clicking Download Report, some options become available to you:
Click Delete selected file(s) (13) to discard any report you want to delete.
Note: The number of reports is unlimited.
Report Options Breakdown
-
Selecting difference levels to include in the report
In the Report Options window, check the box next to the level(s) to be included. If none of the levels are selected, all of them will be included in the report.
-
Create annotated artwork file
Create annotated artwork file downloads the original artwork file with annotated differences to a PDF file.
Annotations with the inspection results for the selected levels are automatically added to the file. The annotations that you see in the report are notes that are added to each difference. You can view them by clicking the red-numbered tag associated with each difference. If you have PDF-editing software, you can even edit the annotations by double-clicking the numbered tag.

-
Include Master file in the report
To include the Master in the report click Include Master file. It is located at the bottom of the Report Options window.
-
Include Image Report
For Text Inspections, Include Image Report appears as an additional option. To include thumbnails of embedded images that had been compared in the report, click Include Image Report.
-
Group Duplicate Spelling Errors
For Spelling inspections, Group Duplicate Spelling Errors appears as an additional option. To group duplicate differences in the report, click Group Duplicate Spelling Errors.
-
Include (Module) Report Parameters
This section of the report displays the settings used by GVW to run the inspection.
Report Filtering and Searching Functionalities
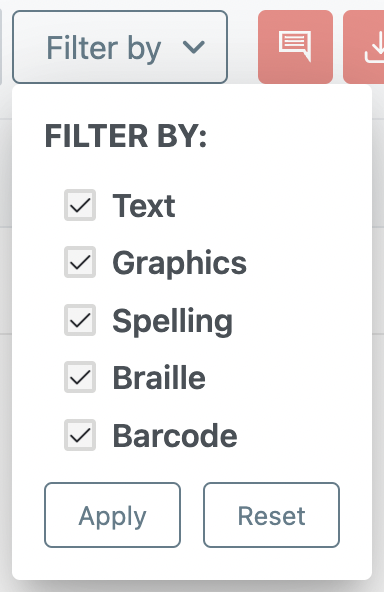
Searching (15) by file name is now possible, allowing easier report identification.

Filtering (15) by module is also supporting easier navigation amongst reports, with the possibility to choose more than one module for more efficient filtering possibilities.