How to Review Verify API Results in the Verify User Interface
These instructions will guide you through enabling the feature to review Verify API inspection results in the Verify User Interface on your Esko AE workflows.
Step 1: Update your workflow to enable the new feature
This example will be based on the graphics comparison workflow, but the steps can be applied to all inspection types.
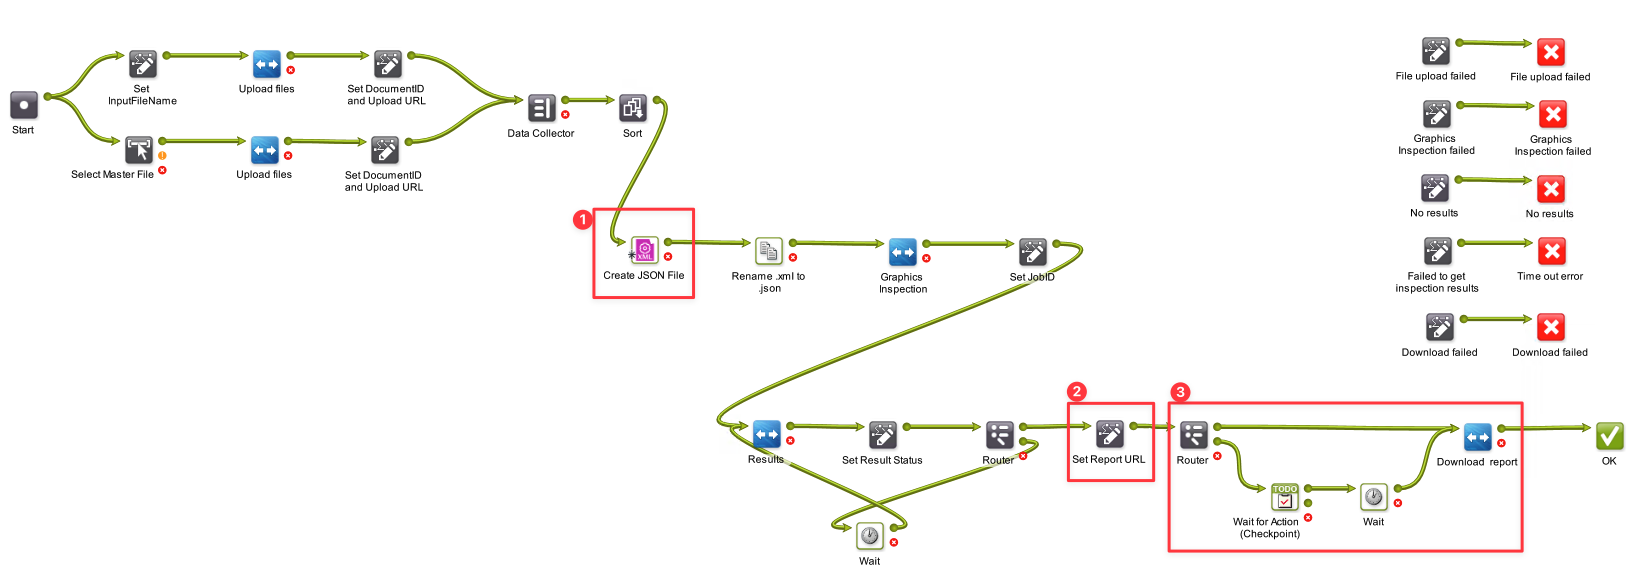
Overview of the changes in the workflow
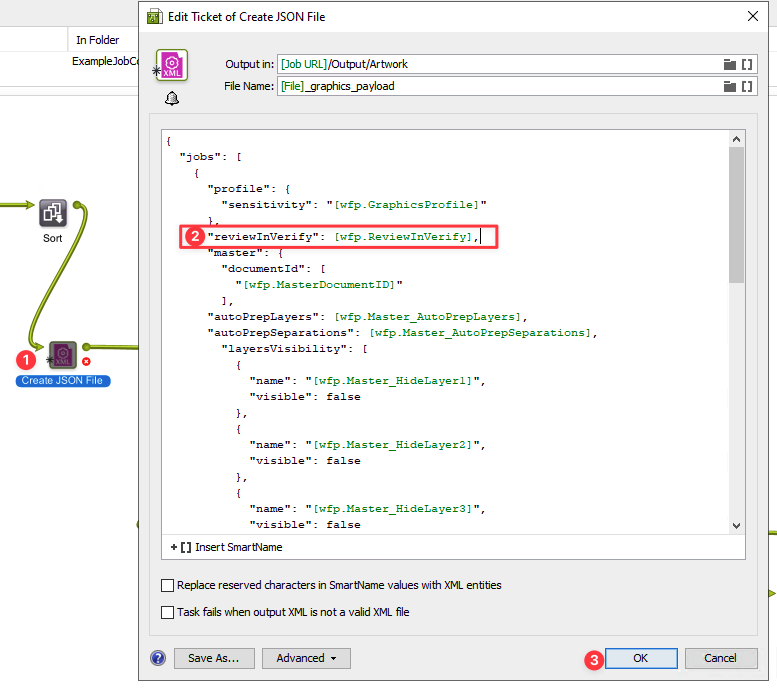
1.1 Update API input
Add a new parameter to the “Create JSON File” input:
"reviewInVerify": true,
This can be added directly in the API input, or as a SmartName/Workflow Parameter.
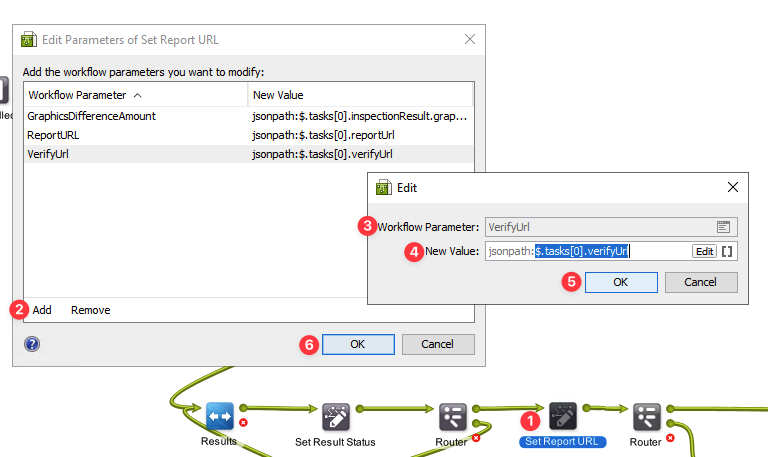
1.2 Retrieve the Verify URL from the inspection results metadata
Add a new parameter to the “Set Report URL Step”:
Name:
VerifyUrlValue:
$.tasks[0].verifyUrl
1.3 Modify the results processing logic to account for the review in the User Interface
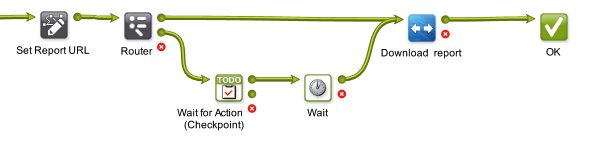
Router ticket:
Can be configured based on your business rules. For example:
Barcodes: review in the UI if the passing grade failed
Graphics compare: review in the UI if there are any results in the comparison
Braille, Spellcheck: review in the UI if the parameter
reviewInVerify = true
Wait for Action ticket:
Configure the action ticket or any other solution that best fits your workflow to provide the VerifyURL to the operators. For Example:
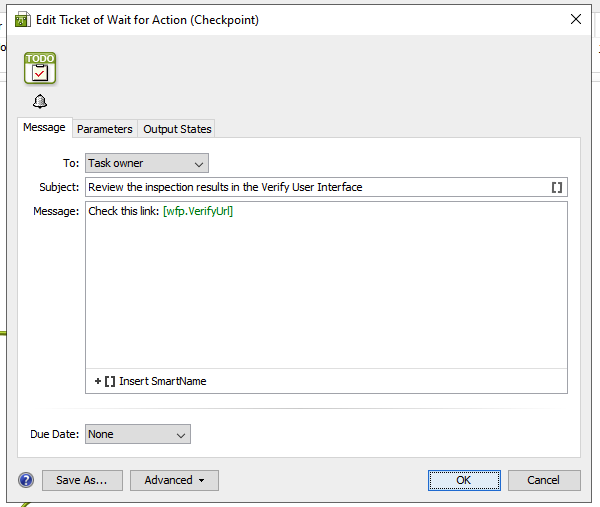
Wait Ticket:
Configure a wait of at least 10 seconds to ensure the updated report will be generated.
Step 2: Add users to Verify
All operators who review results in the Verify User Interface need to be added to your Verify team. This will enable them to log in to the UI and track who reviewed each inspection’s results.
Only Tenant Admins can add/manage their team in Verify.
Go to Verify: https://verify.globalvision.co/
Click on your user name (in the upper right corner), and navigate to My Account.
On the My Account Menu, click on My Team.
Add your team members here, one by one or in bulk.
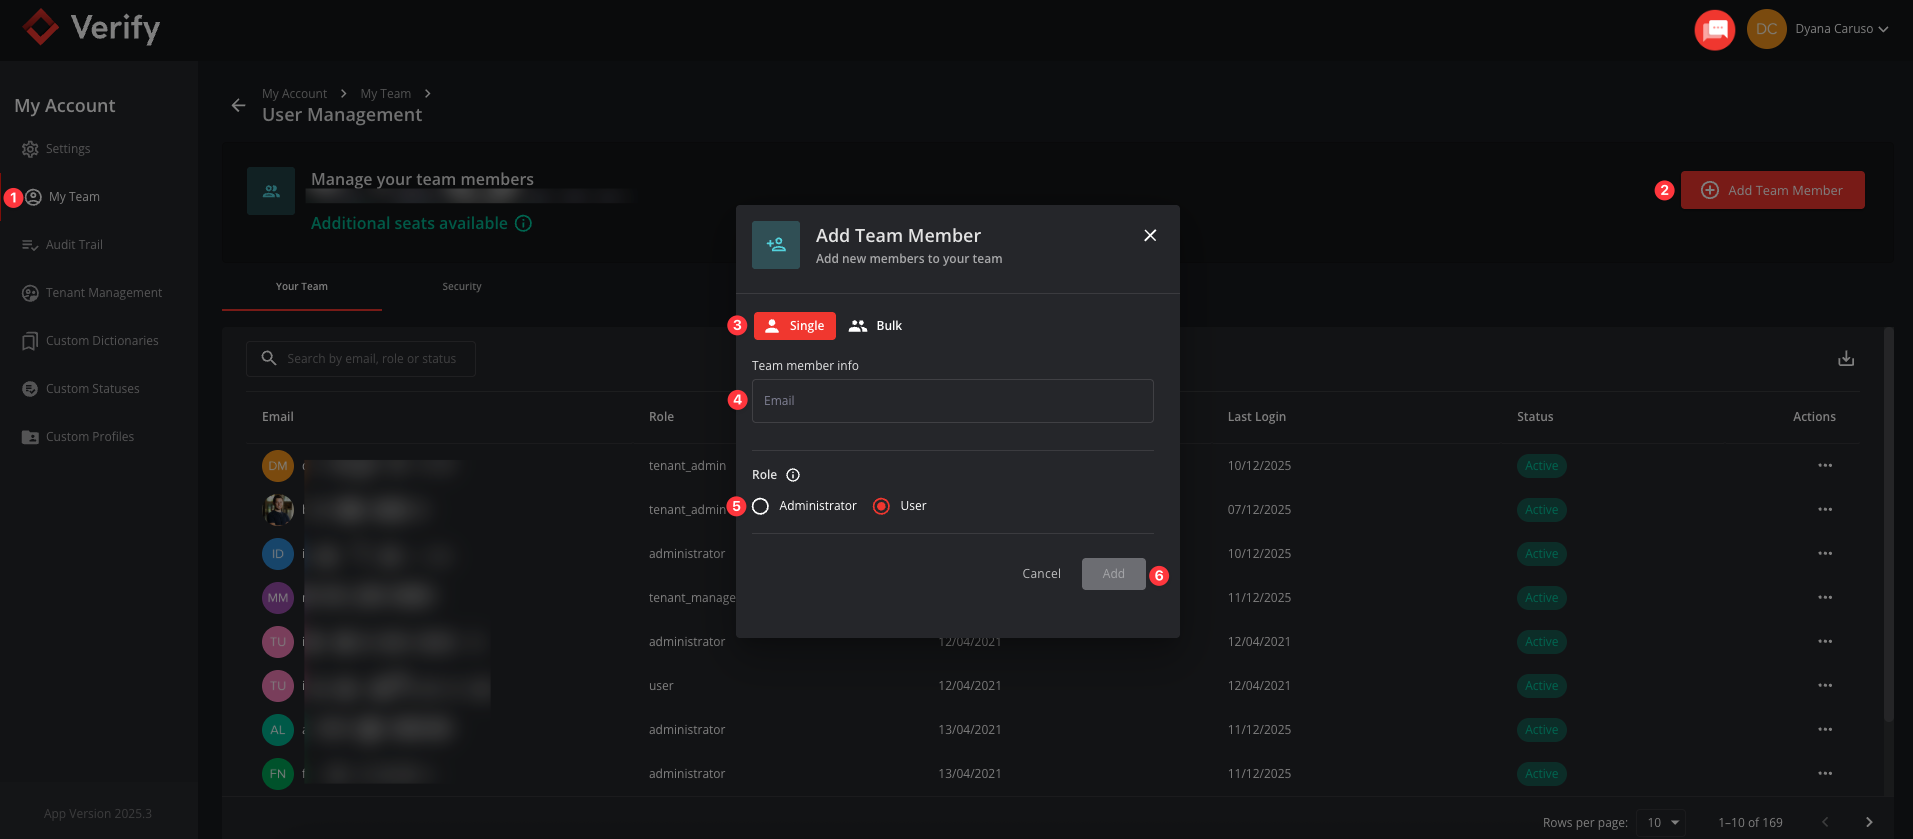
All added users will receive a welcome email and be prompted to set up their password.
Step 3: Train your operators on the new process
Every time the workflow flags the need to review the inspection results, a manual task will be triggered.
The operator will click on the Verify link and log in to the user interface.
Once logged in, they will be able to review the inspection results, assigning status, adding comments, merging results, flagging false positives, adding new results, etc.
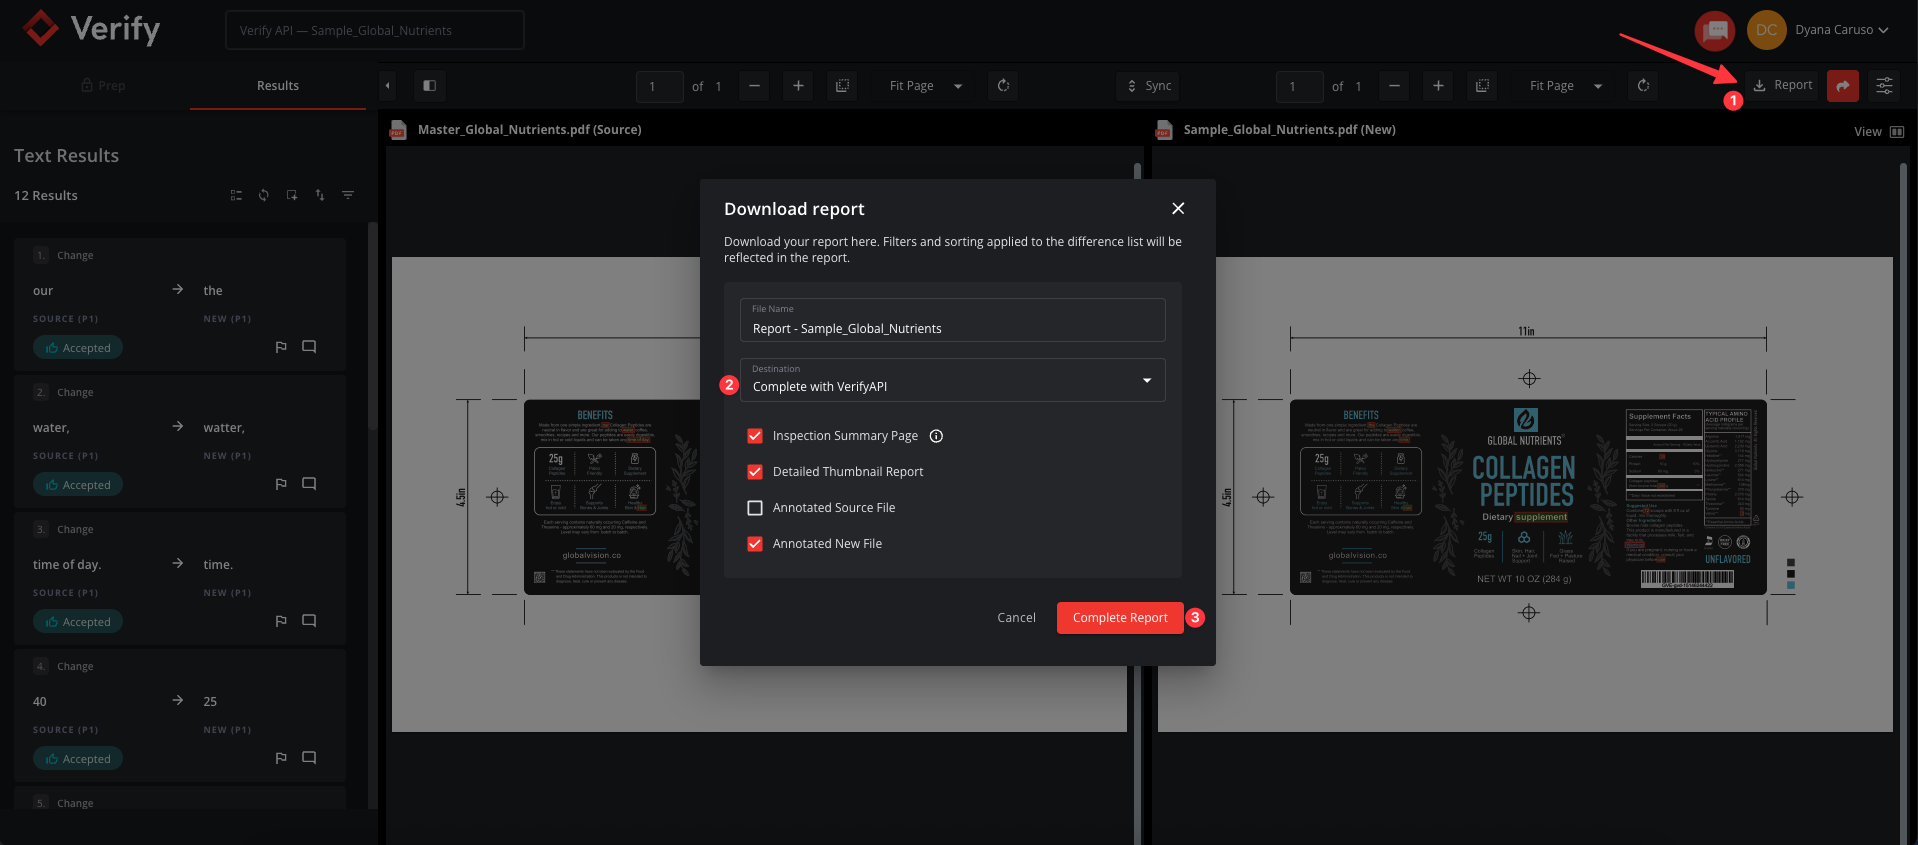
After completing the review, they must generate the report to complete the integration with the workflow:
Click on the Report button
On the report modal, the option to “Complete with Verify API” will be automatically selected.
Click on OK to generate the report.

Once the report has been generated, they can go back to Esko AE and flag the manual task as “Accepted/Rejected”.
The workflow will complete its steps by downloading the updated report to the configured location.