Step 4: Select Areas to Inspect
There are multiple ways of selecting the inspection area to restrict the detection of differences to certain parts of your documents.
Crop specific areas of your files
The cropping feature enables you to pinpoint and crop specific areas of an artwork file for inspection, especially when the master and sample files have varying layouts.
Use the Crop to Contents tool to align the selection as closely as possible with the content.
Modify the shape from a rectangle to a circle if required, and apply it to all pages if necessary.
When dealing with Crop and Trim selections, additional choices are available in the Context menu, accessible by right-clicking:
Opt to apply the selection to all pages, even pages only, or odd pages only in a multi-page document.
Select Change to circle to switch from a rectangular selection to a circular one.
Opt for Clear all pages to eliminate the current selection.
See it in Action
When you use the Crop feature to select an area, the Scale & Shift option becomes visible at the bottom of the selection box.
You will need to establish an anchor point on the Master file to locate the corresponding area in the Sample file.
After selecting the anchor point on the Master file, the Sample file prompts for the same anchor point to be identified.
With both anchor points in place and the selection executed, you can start the inspection process.
See it in Action
For additional information, visit: Cropping Best Practices
Use the shape of the artwork to set the inspection area
If the shape of an artwork is complex, set a Layer/Separation as a Set as Shape Region and Hide to prepare files for inspection without using the cropping tool.
You can use the shape of the artwork to set the inspection area, when a dieline is available to use.
Right-click on a Layer or Separation, and select the Set as Shape Region and Hide option, so you can perform an inspection based on the shape of the artwork.
Select the option Set as Shape Region and Hide when there is a Layer or Separation to define the shape of the inspection.
Test Layers and Separations by turning them on and off by clicking on the eye icon to see what impact it has on the file.
See it in Action
You can also set the inspection region on default which will define the shape automatically when a file with the same dieline title is loaded. This reduces file preparation time pre-inspection.
See it in Action:
For additional information, visit:
Define an inspection area using a visible shape
Use the Shape by Region feature to define the inspection of complex shapes when a dieline cannot be used the option of using Layers or Separations is not possible.
This tool is typically used when the Layers and/or Separations are not created properly in the PDF.
This feature helps prepare files for inspection without using the cropping tool for complex shapes.
It is also used to define the inspection area based on the largest area being selected. This allows for less pre-inspection work and for a more efficient inspection process.
You need to click on the centre of the target and this function will identify the largest area from the point of your selection
Note: You will not be able to use the Shape by Region function with flattened files.
See it in Action
For additional information, visit: Define Shape by Region
Draw a custom shape for the inspection area
To define a Custom Shape for precise content selection during inspection, employ the Lasso Selection Tool.
Initiate by selecting any location on the Master file to trigger the appearance of a red dot, indicating the starting point.
Proceed by dragging and clicking to outline the initial segment, repeating this action as needed.
Upon completing the loop, a mask corresponding to the shape will be automatically generated.
Use the Lasso Selection Tool to eliminate specific areas from the Master file during inspections. Simply click on the Lasso Selection icon, choose the drop-down menu, and opt for ‘Remove from inspection’.
See it in Action
For additional information, visit: Graphics Inspection - Pre-Inspection Tools
Align a selected point between your files
The Manual Alignment tool is use to align a specific point on the Master file with a chosen point on the Sample file.
This tool prepares the imported images for a pixel-to-pixel comparison by selecting a reference point on both uploaded files.
It instructs the software to superimpose the Master and Sample files based on the designated reference point.
To use Manual Alignment:
Click on Manual Alignment
Establish a reference point by using the crosshair on the Master file
Identify the identical reference point on the Sample file
Review the alignment
For additional information, please visit: Graphics Inspection - Pre-Inspection Tools
Clear your selections
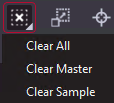
If you wish to begin anew, you have the option to clear all your selections.
Simply click on the Clear button to eliminate any markups on either the Master or Sample files.
Click on the Clear button
Choose Clear All to erase markups on both the Master and Sample files
Opt for Clear Master to delete markups solely on the Master file
Opt for Clear Sample to eliminate markups only on the Sample files

