What Are Verify's File Limits?
Verify's performance can be optimized by following these file limitations:
Type | Limit |
|---|---|
File Size | 1GB |
Page Count | 200 |
Page Dimensions | Maximum page height or width of 10,000 px (approximately 33.33 in, assuming a resolution of 300 DPI) |
If your file exceeds these limits, Verify will still allow you to proceed. However, performance might degrade, and inspections might fail.
How can you avoid reaching Verify’s performance limit?
The best way to avoid reaching Verify’s performance limit is to prevent it at the source itself. We highly recommend sharing the above limitations with the design department creating the artwork files that will eventually be inspected within Verify to prevent any potential future complications. Respecting the above-stated thresholds during artwork creation is the best way to achieve great results.
That being said, we’re well aware that changing another department’s process or way of doing isn’t always possible. If you still have to deal with files above the software limitations, please try the below Tips & tricks or Troubleshooting Methods that apply to your use case.
General tips & tricks
Your inspection is failing or running slowly. What can you do?
You can use the following tips during your file preparation to optimize your inspection:
Exclude all unnecessary pages that you don’t need to inspect
Cross out all extraneous text you don’t care about
Crop the regions of interest you want to inspect
Specific limit troubleshooting
Your file is above the File Size limit. What should you do?
As mentioned above, files above 1 GB in size might encounter performance issues when inspected within Verify. To simplify the inspection and increase your chances of success, we recommend trying to compress your document to reduce its size under the limit.
NOTE It is not always possible to reduce the size of a PDF. If the document has already been optimized and compressed, extra compression might only reduce the size by a few MB.
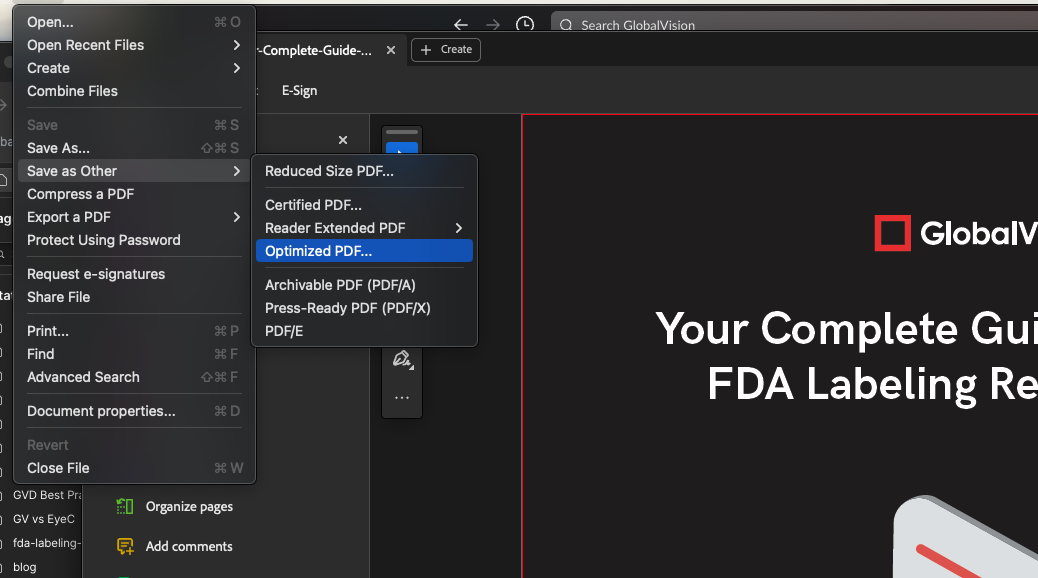
Abobe Acrobat Application
Ensure your PDF has been optimized
Open your PDF document in Adobe Acrobat
Click on File > Save as Other
Select Optimized PDF
Click OK
Reduce PDF Size
Open your PDF document in Adobe Acrobat
Click on File > Save as Other
Select Reduced Size PDF
Click OK

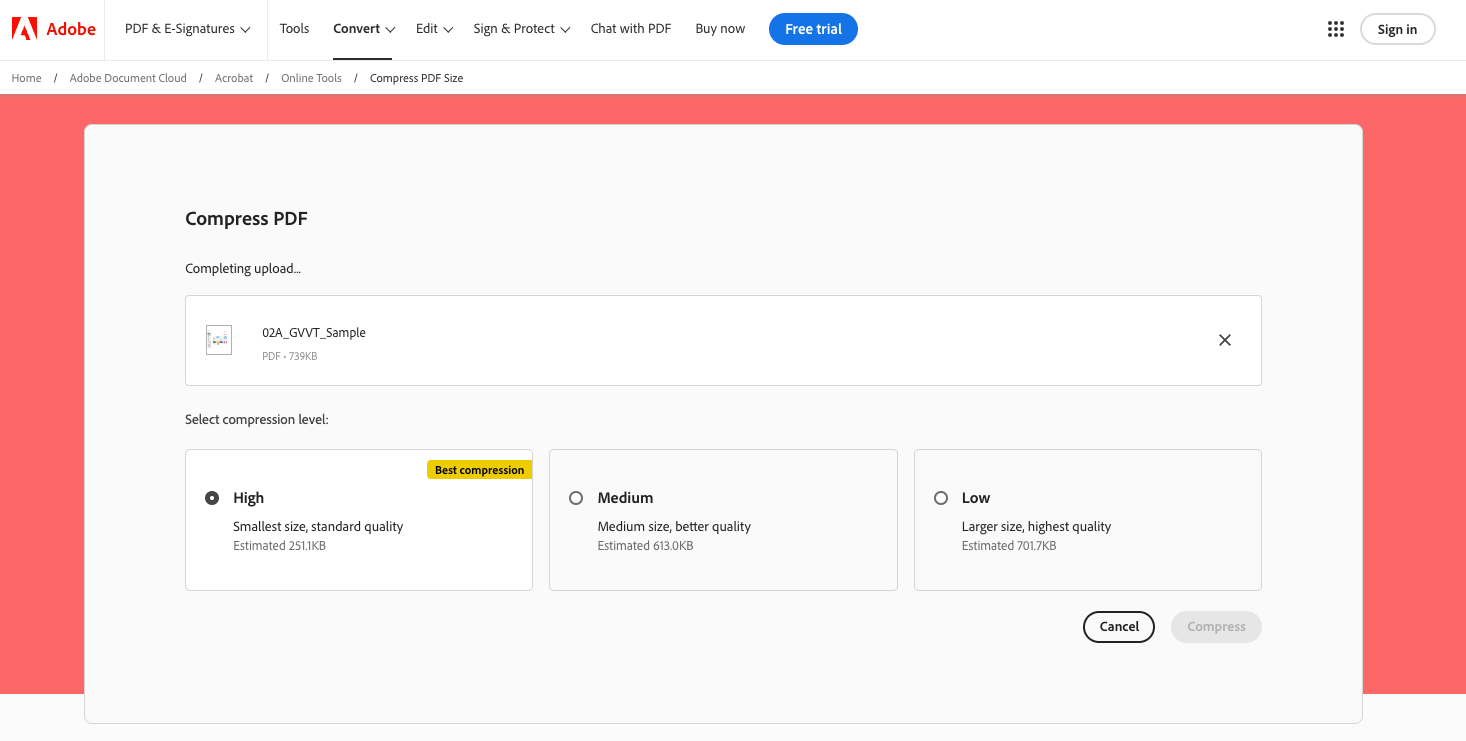
Adobe Acrobat Online Compress Tool
Go to the following link https://www.adobe.com/ca/acrobat/online/compress-pdf.html
Upload the PDF document you want to compress
Select your desired compression level
High → Compresses to the smallest file size but also has the lowest quality
Medium → Compresses to medium file size but has better quality
Low → Compresses to the largest file size but keeps the best quality
Click Compress
Download your compressed file
Your file is above the Page Count limit. What should you do?
As mentioned above, files that are more than 200 pages long might encounter performance issues when inspected within Verify. To simplify the inspection and increase your chances of success, we recommend trying to exclude unimportant pages or split your inspection into smaller individual inspections.
Verify Application
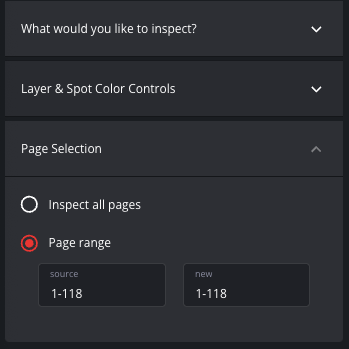
Page Selection Tool
Upload your file(s) in the Verify application as usual
Click on the Page Selection tool
Select Page Range
Ensure the selected page range is under the 200 pages limit for both files
By either excluding unimportant pages
Or by splitting your inspection into smaller individual inspections
For example, first inspect pages 1 to 150 then run a new inspection for pages 150 to 300
Run your inspection as usual
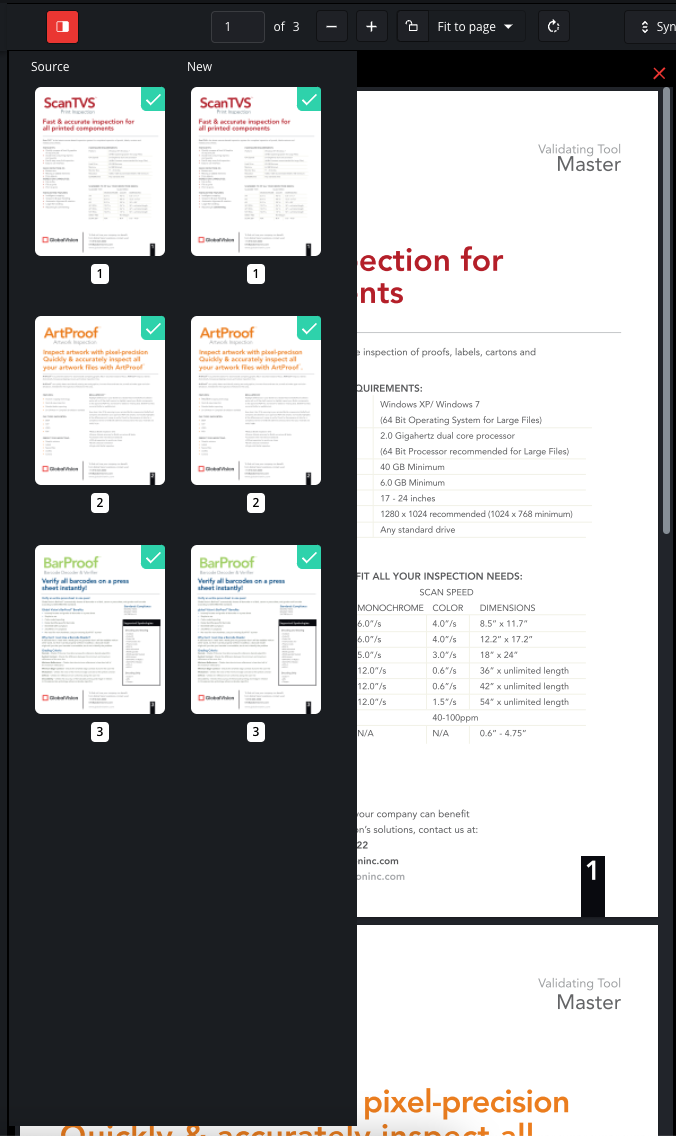
Thumbnail Panel
Upload your file(s) in the Verify application as usual
Open the Thumbnail Panel
Manually exclude pages to make sure the selected page range is under the 200 pages limit for both files
By either excluding unimportant pages
Or by splitting your inspection into smaller individual inspections
For example, first inspect pages 1 to 150 then run a new inspection for pages 150 to 300
Run your inspection as usual
Adobe Acrobat Application
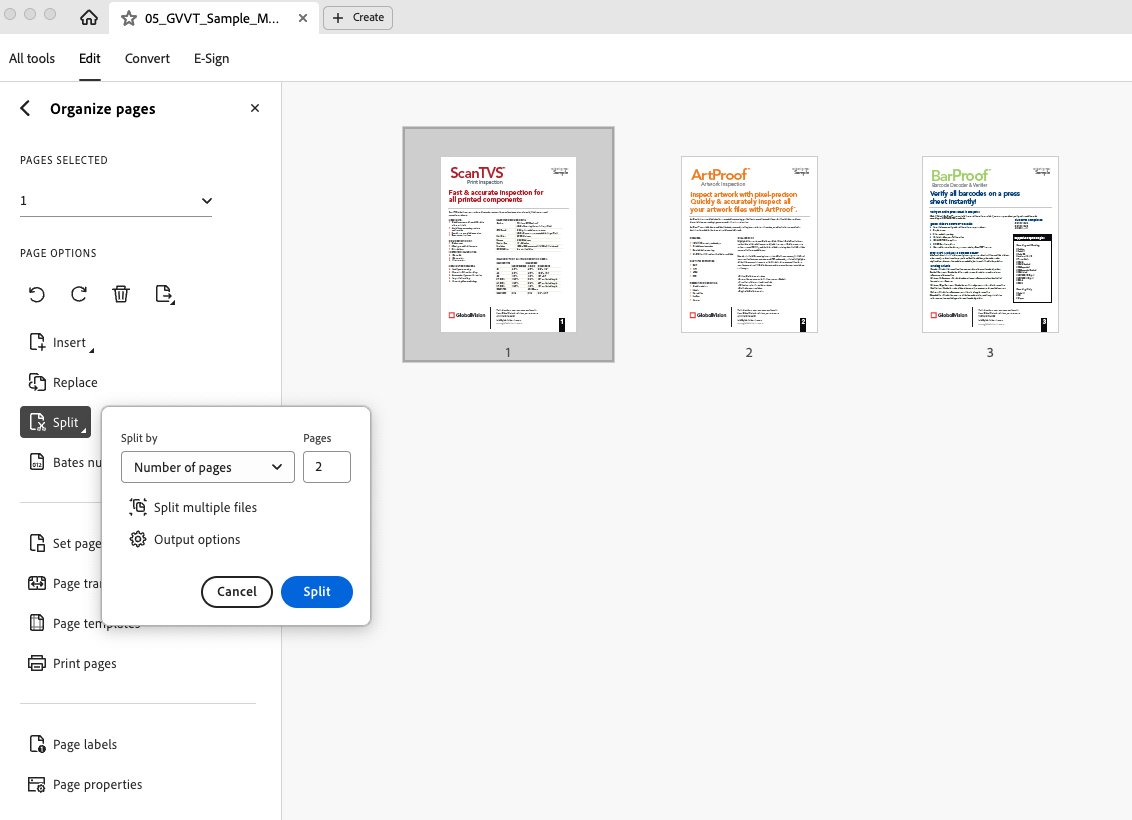
Open your PDF document in Adobe Acrobat
Click on the Tools option
Select Organize pages
Select Split documents
Enter the number of pages or maximum by which you want to split the document
Click OK
Rename individual files and repeat if needed
Your file has pages above the Page Dimensions limit. What should you do?
As mentioned above, pages that are more than 10,000 px in width or length might encounter performance issues when inspected within Verify. To simplify the inspection and increase your chances of success, we recommend trying one of the following options.
Verify Application
NOTE: Using the crop tool isn’t always the right solution when reaching the Page Dimensions limit. It will only work if the actual content you are trying to inspect is under the set limit when cropped. This is mostly for files that are really close to the limit and have extra information/space around the area of interest.
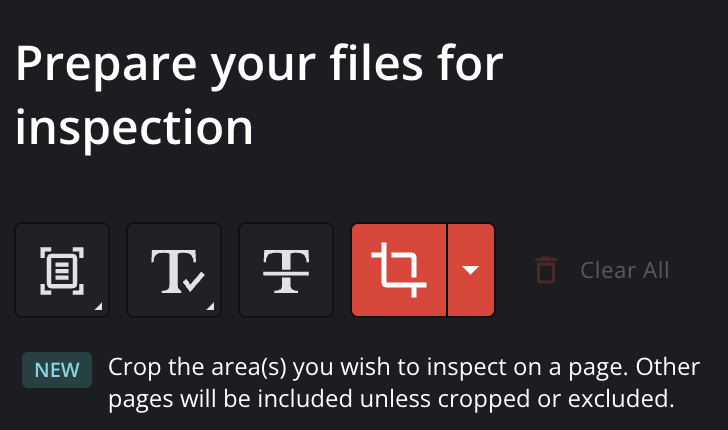
Crop Tool
Upload your file(s) in the Verify application as usual
Click on the Crop tool
Use it to crop only the content you are interested in inspecting
Exclude any extra information such as print slugs or unimportant headers/footers if applicable
Run your inspection as usual
NOTE: If one or a few pages exceed the page dimension limit while others are within it, excluding the oversized pages can allow users to successfully inspect the remaining pages in the file.
Exclude Pages Above Dimension Limit
Upload your file(s) in the Verify application as usual
Exclude the pages that are above the page dimension limit
Inspect the rest of the pages
Adobe Acrobat Application
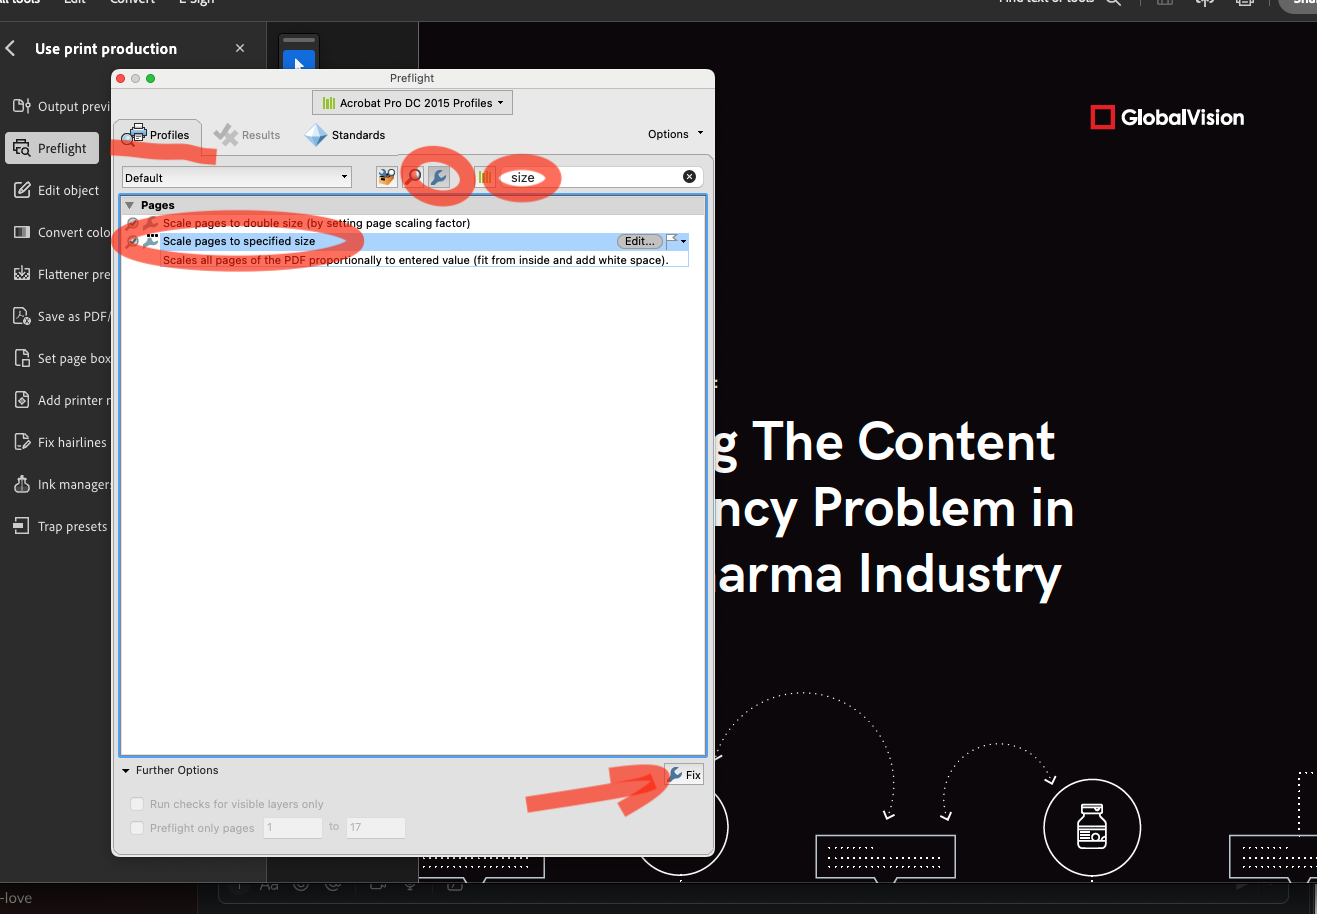
Open your PDF document in Adobe Acrobat
Click on the Tools option
Select Use print production
Select Preflight
Select Acrobat Pro DC 2015 Profiles
Select Single fixups
Search for Size
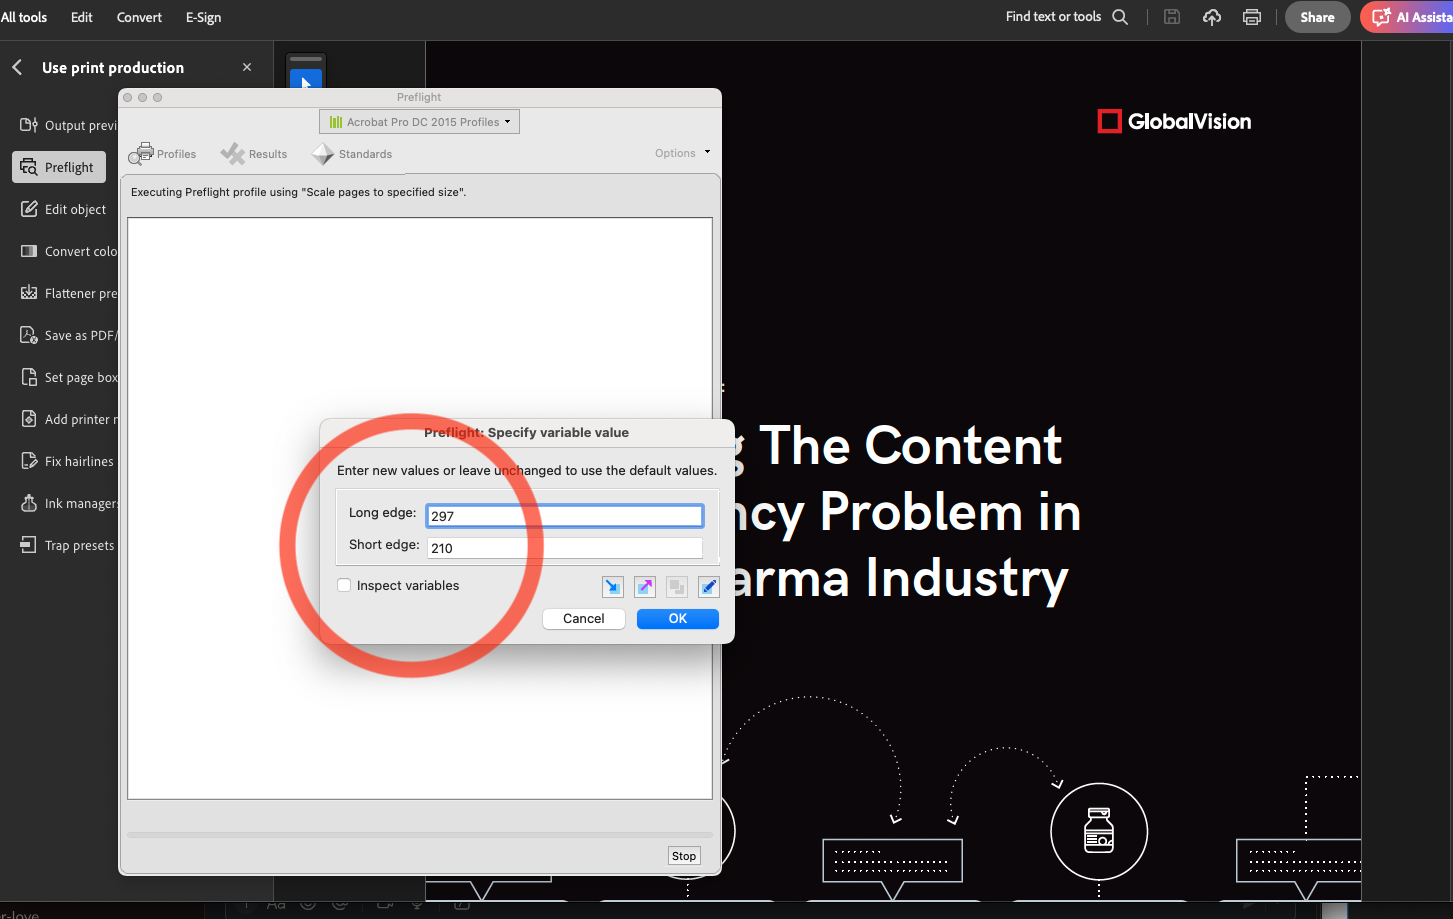
Select Scale pages to specified size
Enter the desired size value
Click OK
Save the new resized PDF