Verify - Azure Entra SSO Configuration Guide
This guide describes the overview of the typical steps required to configure Single Sign On (SSO) using Azure Entra.
It is possible that such setups require company-specific steps that may not be covered by this description.
Please note that in order to complete this process, the person that is setting up the connection on the customer’s side needs to:
be a Tenant Administrator in Verify,
have access to their company’s Entra Dashboard as admin
Please follow these steps for a base setup:
Please log in to Verify.
Navigate to My Account
To access My Account, click your account name at the top-right corner of the screen, at any point while logged into Verify.
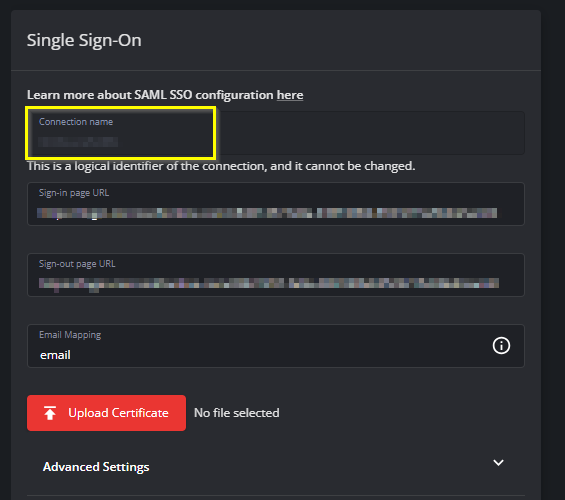
Go to the Single Sign-On details, which can be set under the Security tab within My Team.
Set the Connection Name in the Verify App:
Login to Azure Entra using the URL: https://entra.microsoft.com/ .
Navigate to Enterprise Applications →
Indentity→Applications→Enterprise Applications.
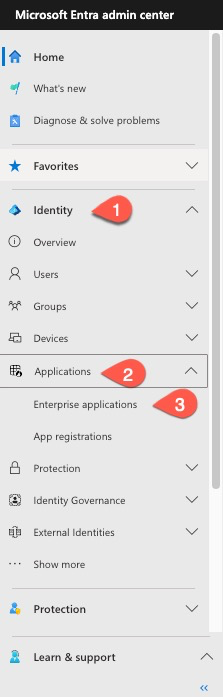
Select
New Application.

Please note that Verify does not have a built-in App in the Azure Entra catalog.
Select
Create your own application.Enter a name for the APP
Select
Integrate any other application you don't find in the gallery (Non-gallery).Select
Create.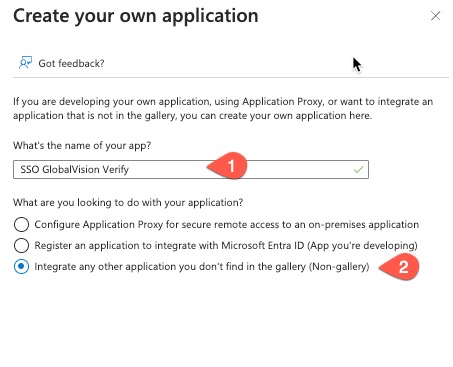
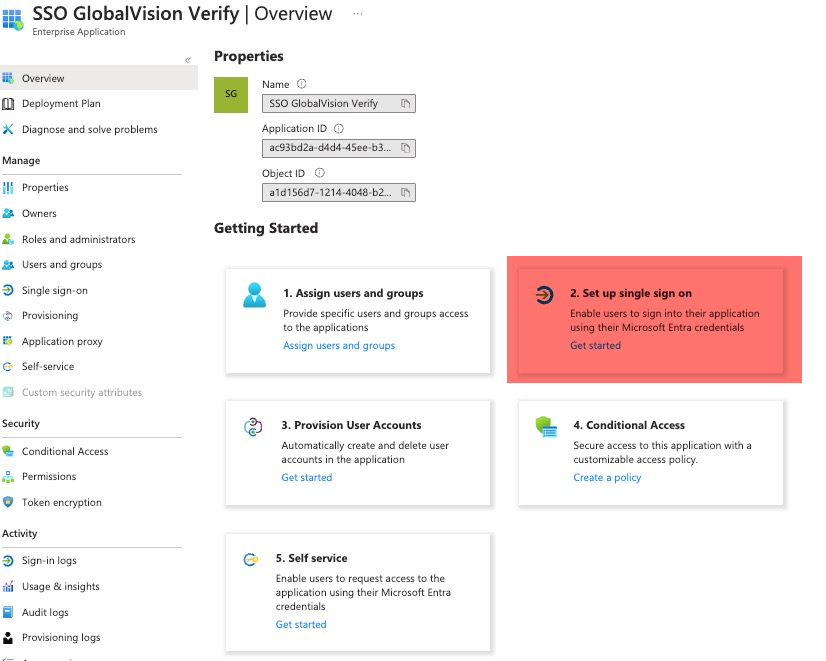
Select
2.Setup Single sign on.
Select
SAML.
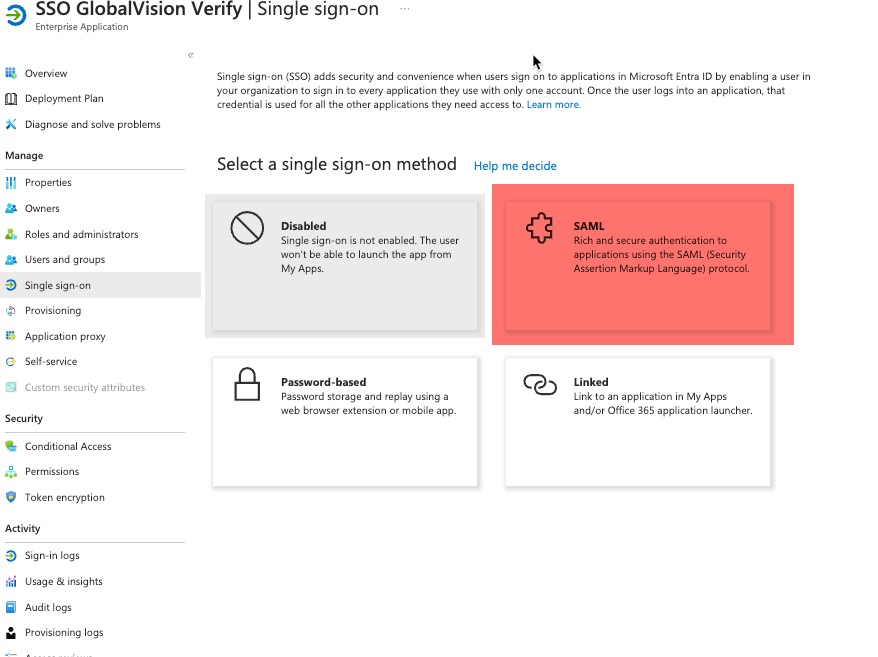
Typical setup is similar to the one illustrated Below.
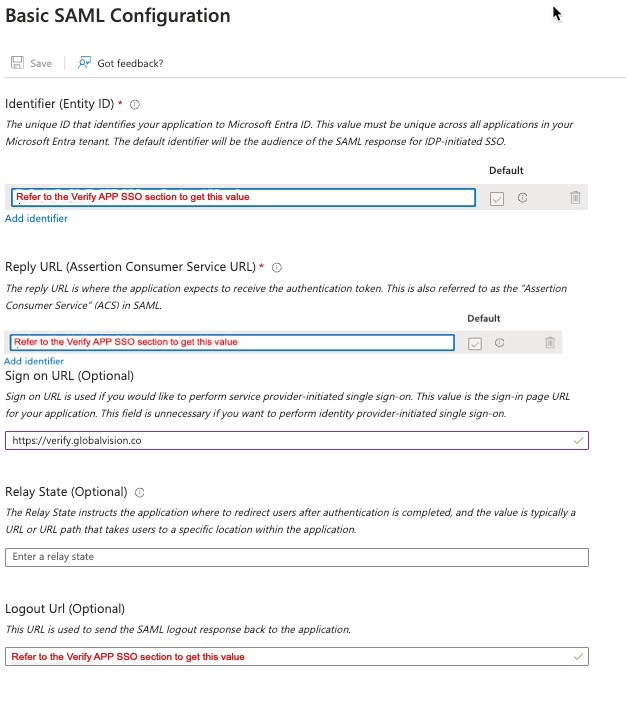
Edit Basic SAML Configuration to include the following from the Verify App:
Reply URL - which is called Reply URL (Assertion Consumer Service URL)
in Azure Entra,
Entity ID - which is called Identifier (Entity ID) in Azure Entra,
Sign on URL: https://verify.globalvision.co
Select
Save.
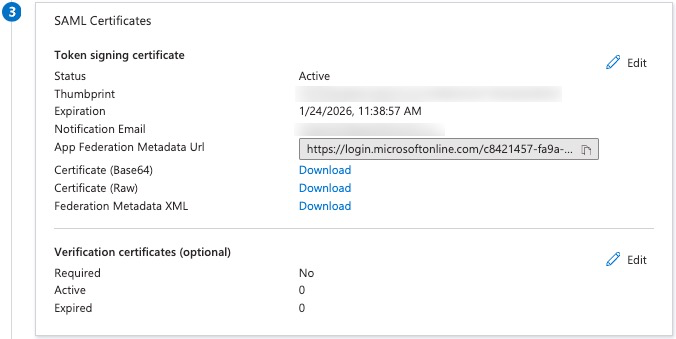
Navigate to
Section 3:SAML Certificates.Download the base64 certificate (to upload to Verify).
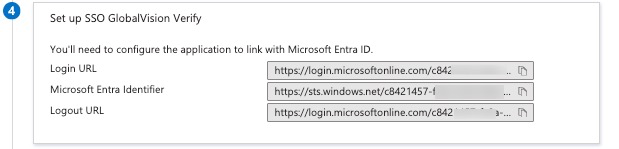
Navigate to section 4 to copy the URLs then paste them in the proper sections in Verify.
Make sure the section 2
Attributes and claimsmatch the image below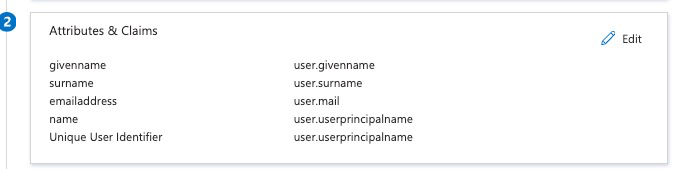
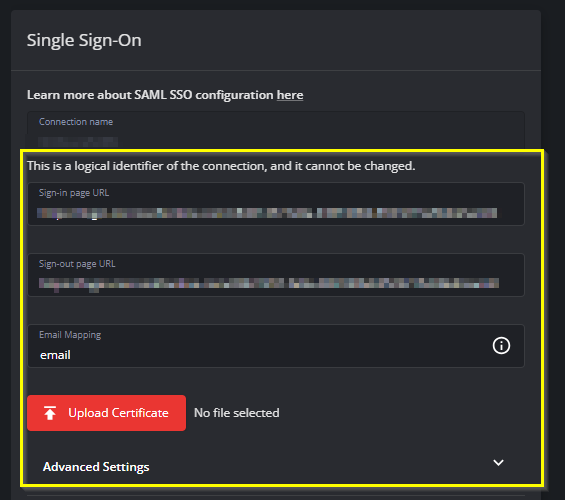
Return to Verify App and fill in the following items:
Sign In Page
Sign Out Page
Email Mapping
Certificate
Advanced Settings (if needed)
This description is based on SSO configuration examples, parameters may differ by company, sometimes requiring additional steps and special settings to be applied for proper operation. Please reach out to us through our support channels for any enquiries about the process.