Verify Administration Guide
The instructions in this guide cover the options available to Team Members with Administrator as their assigned role.
Note: The Administrator role allows for creating and editing team members while Users have role-only rights
Please note, Guides are available for the latest version only.
We do not maintain older versions. Please reach out to support if you have any specific questions or to our customer success team to upgrade your version.
Verify Role Access Matrix
Permissions | Tenant Administrator | Administrator | User |
|---|---|---|---|
Configure Single Sign-On (SSO) | ✅ | ❌ | ❌ |
View SSO configuration | ✅ | ✅ | ❌ |
User Management (My Team tab) | ✅ | ✅ | ❌ |
View Audit Trail | ✅ | ✅ | ❌ |
Manage Custom Dictionaries | ✅ | ✅ | ❌ |
Manage Custom Statuses | ✅ | ✅ | ❌ |
View Account Settings (General Tab) | ✅ | ✅ | ✅ |
Upload files | ✅ | ✅ | ✅ |
Run inspections | ✅ | ✅ | ✅ |
Generate reports | ✅ | ✅ | ✅ |
Number of accounts per tenant | 1 (assigned at tenant creation) | Unlimited (0 to all licenses) | Unlimited (based on licenses) |
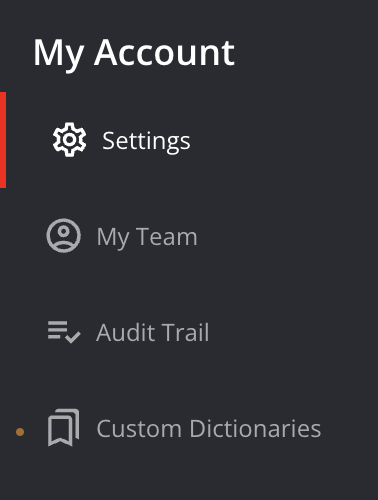
My Account
My Account houses the necessary tools and functionalities related to operational tasks such as account settings, Verify team management, and the Audit Trail.
To access My Account, click your account name at the top-right corner of the screen, at any point while logged into Verify.
Then select My Account from the drop-down list.
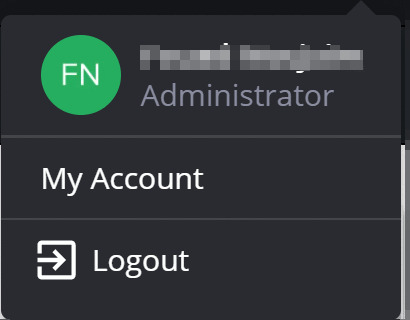
My Account window displays.
Settings
The Settings tab allows users to view/modify their account information.
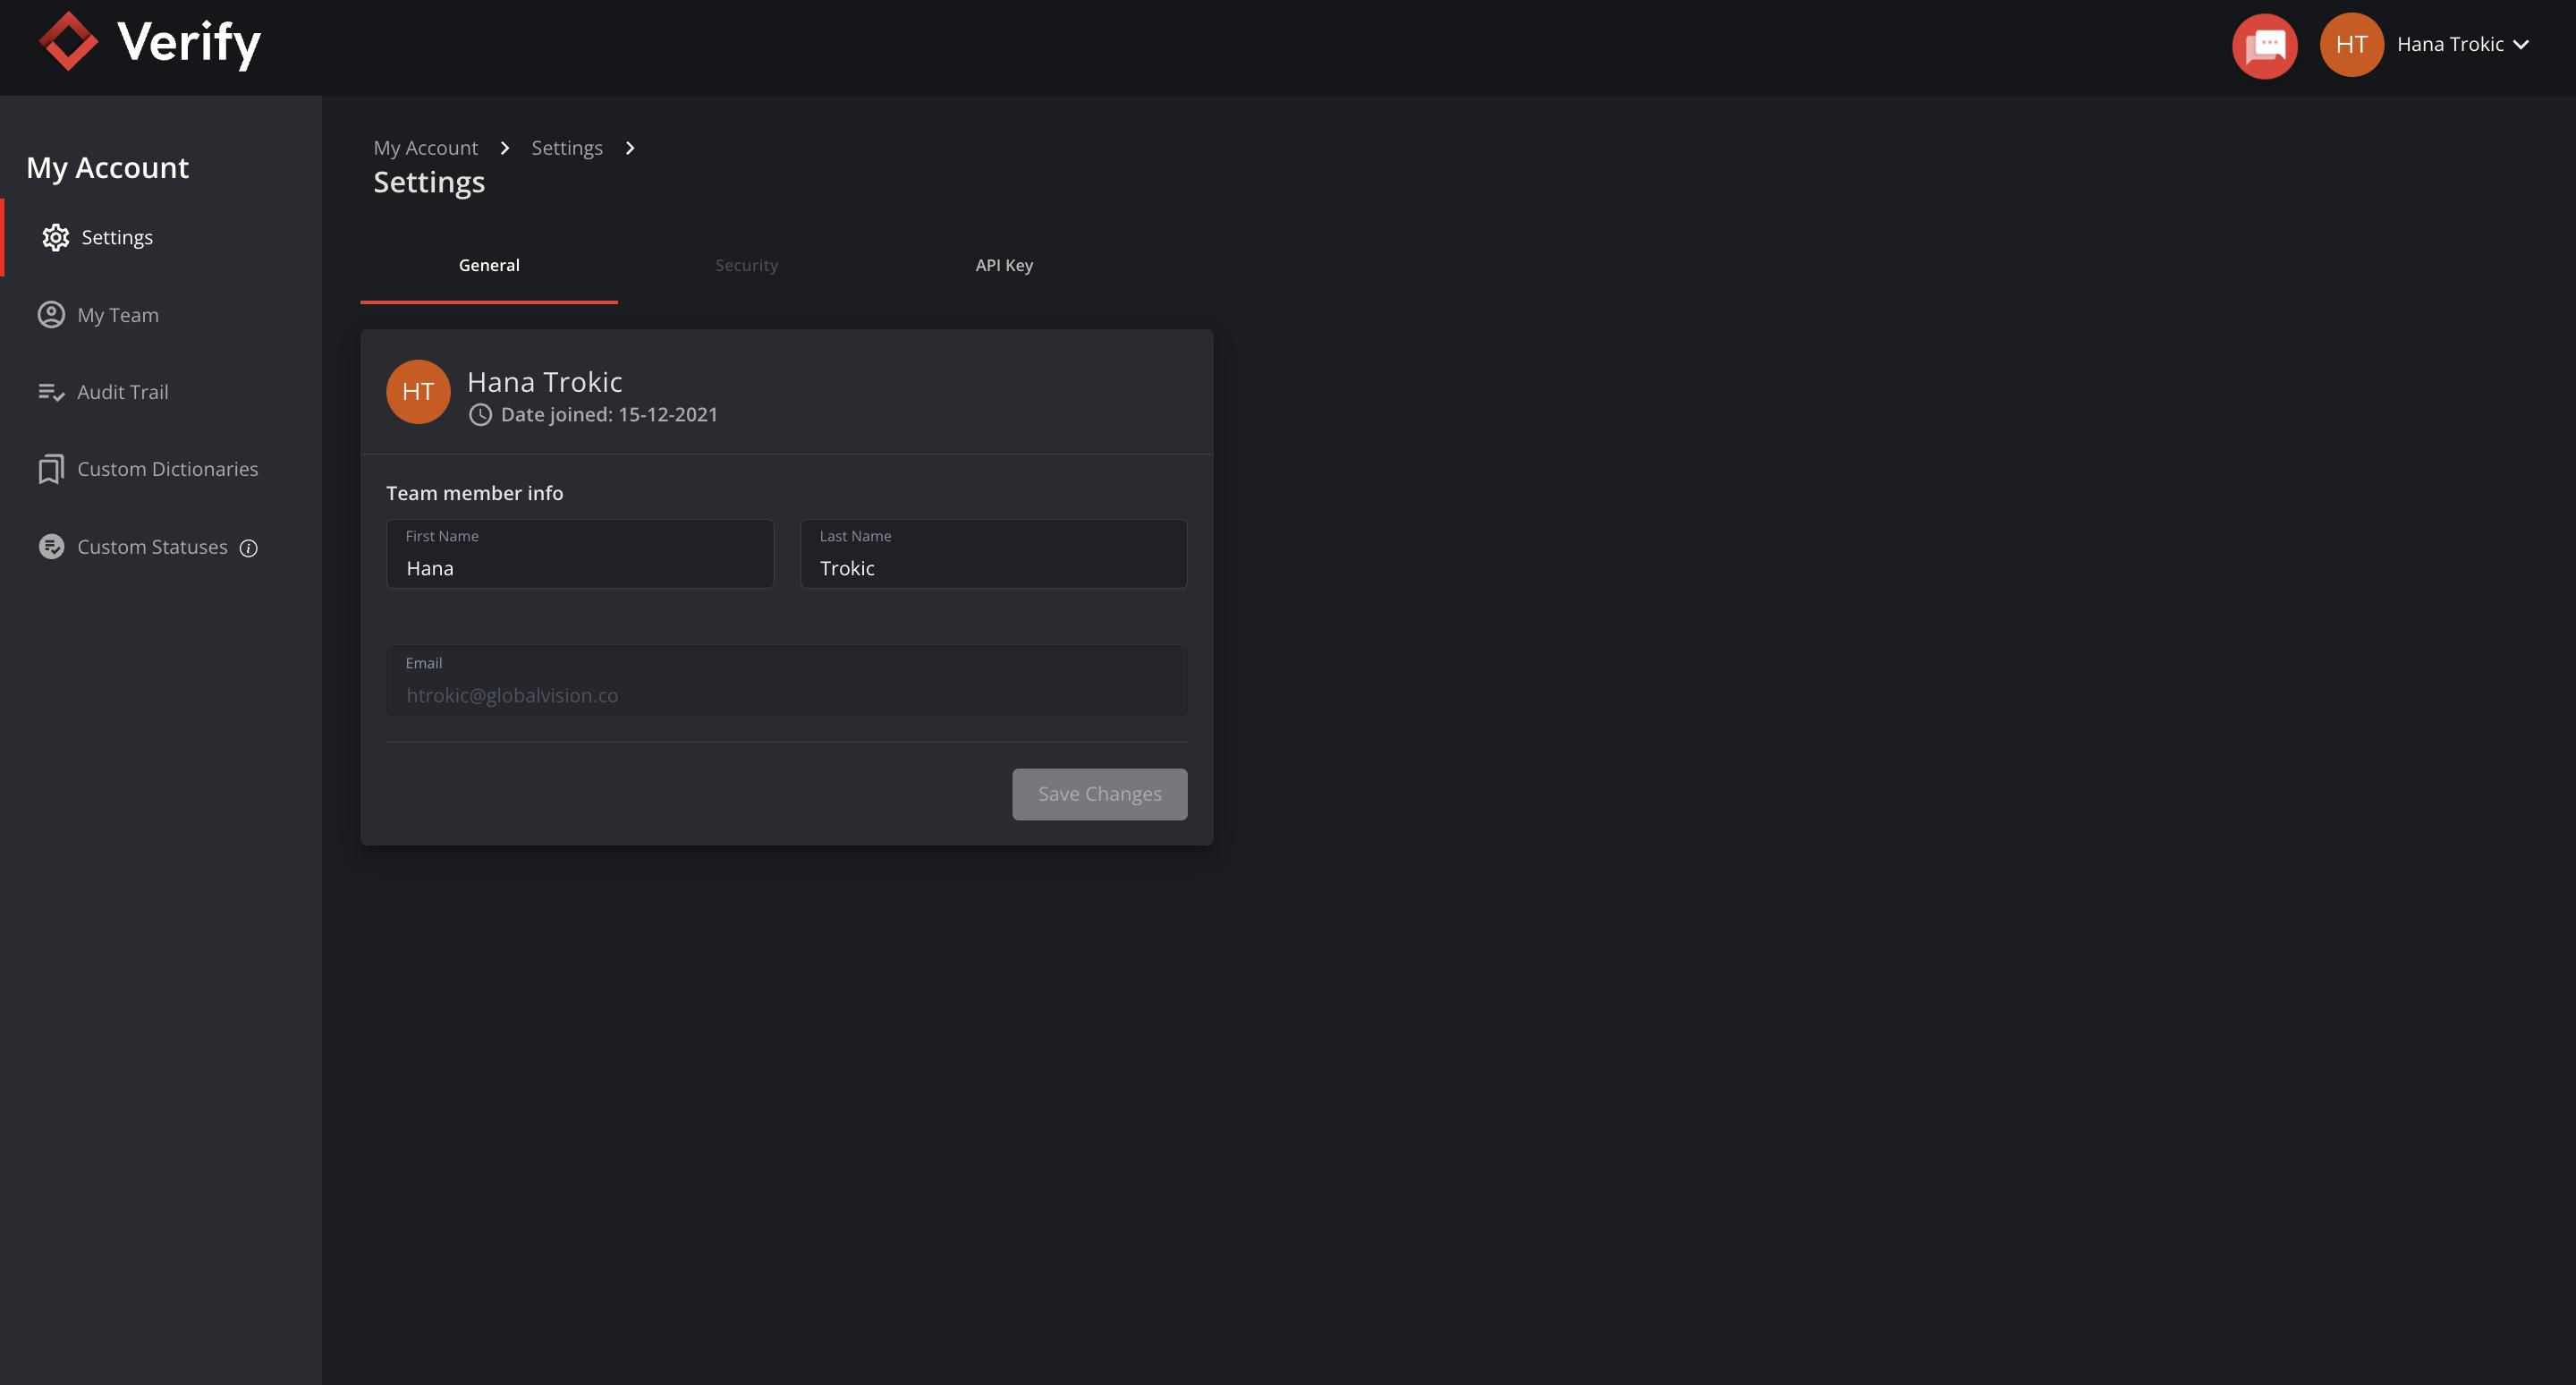
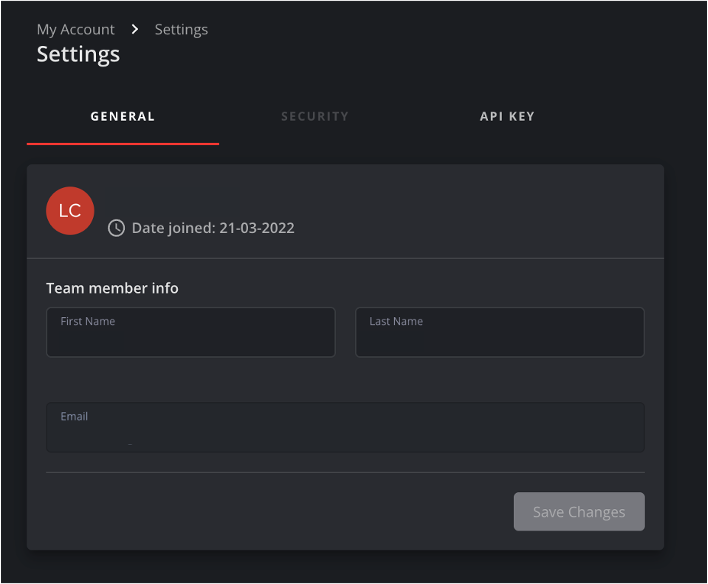
General
Under the General tab, the Team Member Info section displays user information such as First Name, Last Name, and Email address.
Note: The email address cannot be changed.
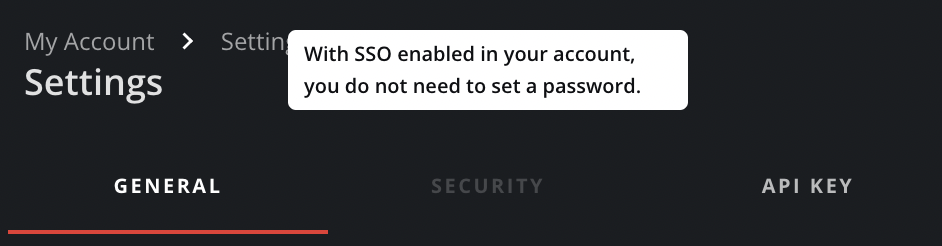
Security
Under the Security tab, the user can change their current password.
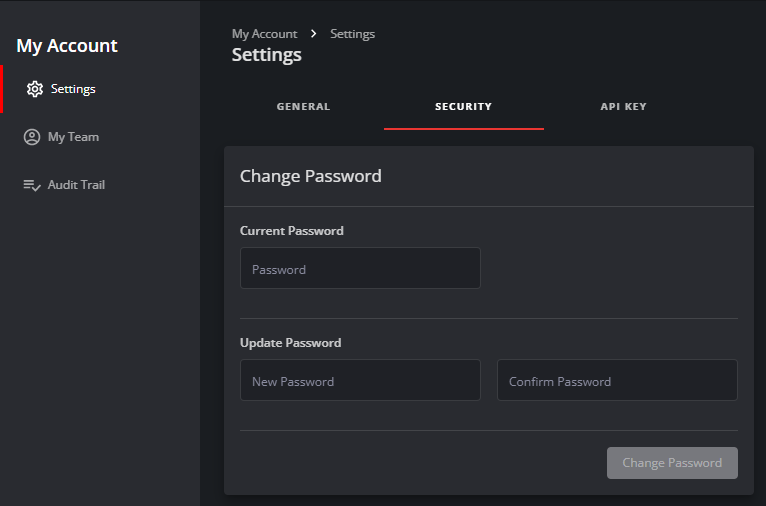
With SSO (Single Sign-On) enabled, the Security tab is disabled.
API Key
Programmatically uploaded files and download reports with the Verify APIs.
Once the API key is generated, it can be pasted into the third party app.
My Team
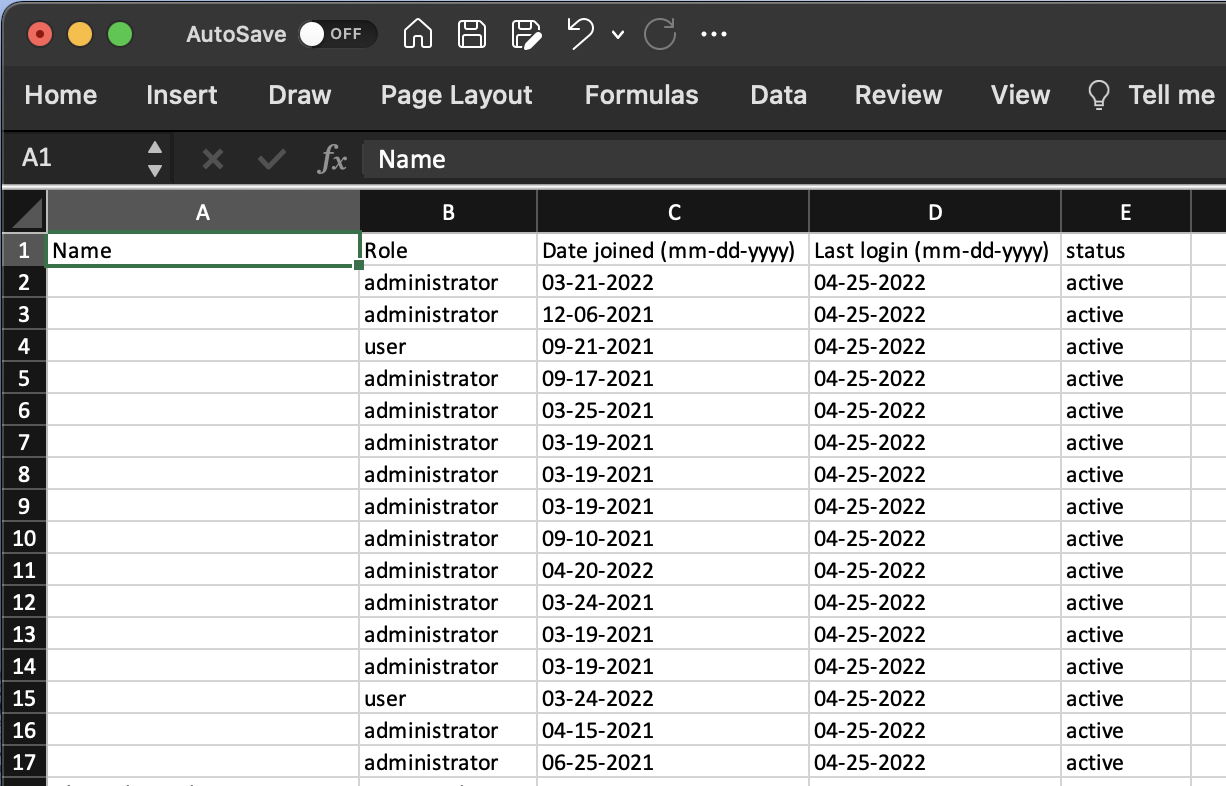
Your Team tab consists of information on all currently available users including their name, roles, date joined, and current status in the system.
Under Manage your team members, you can see the number of seats available based on your user limit.
The number varies according to the Team Members added over time.
As visible in the screenshot below, various details are available for current users that are assigned to any given team.
Note: This view and level of information is only available to Administrators.
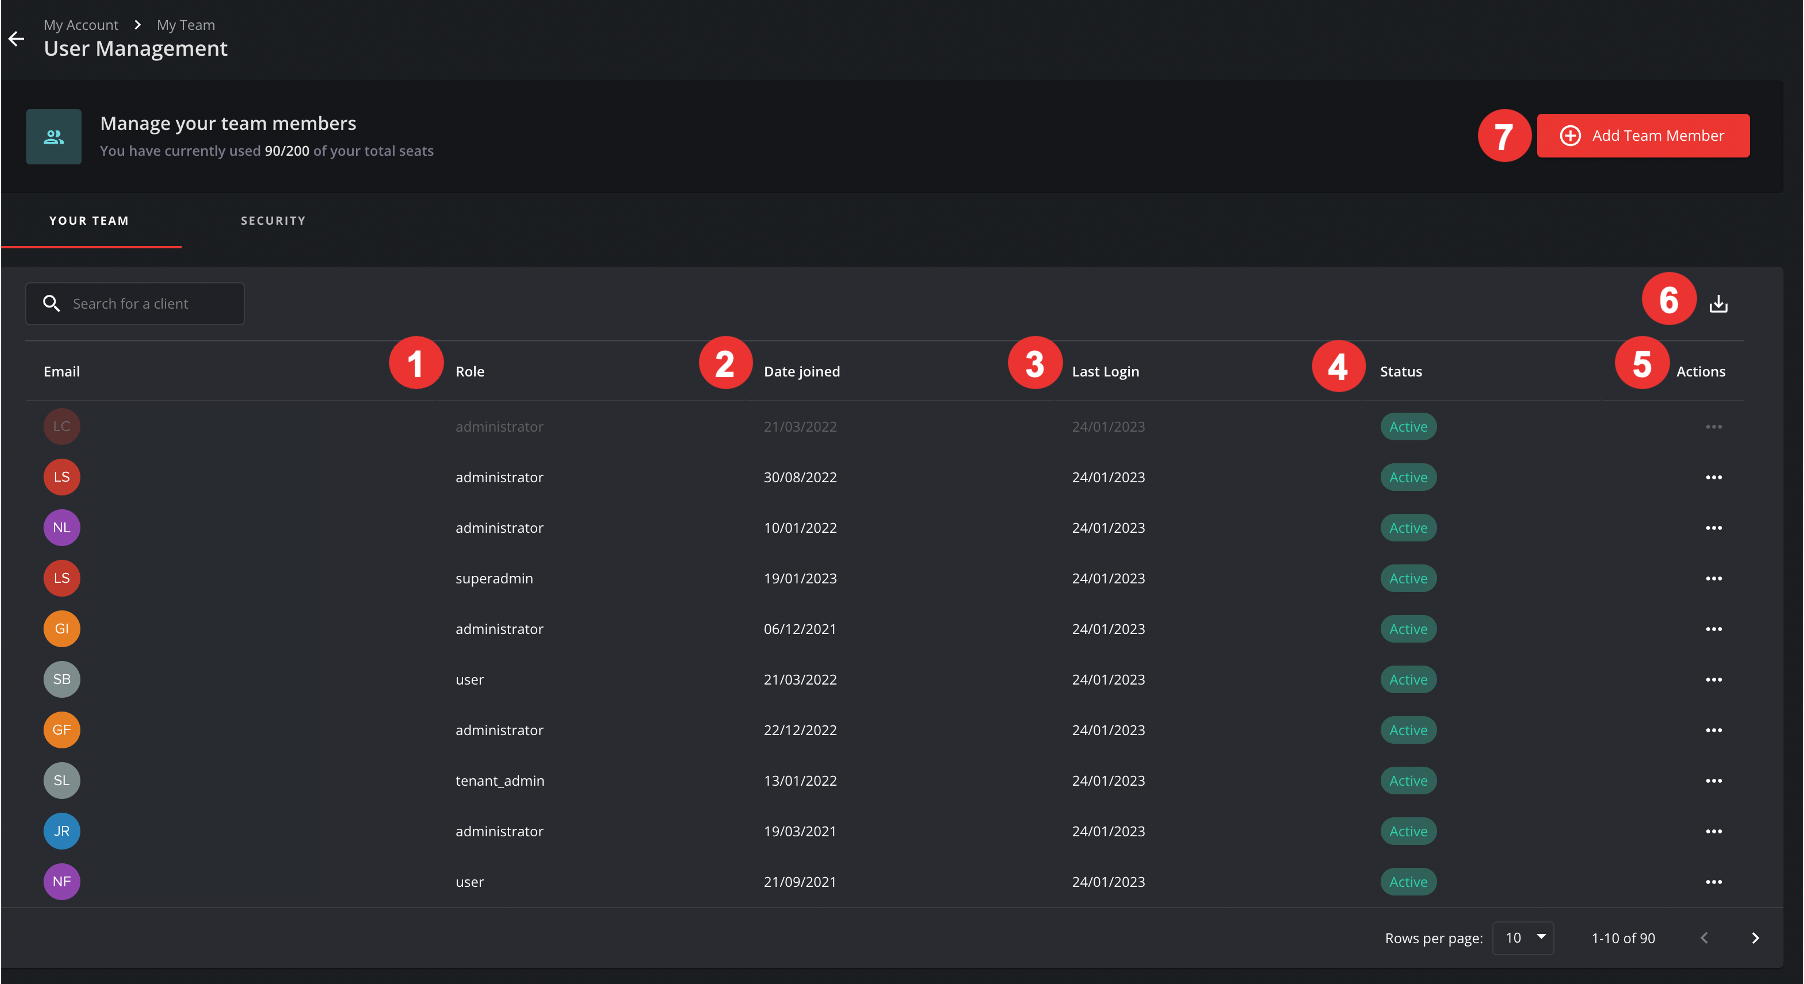
In this view of the team, you can see information relevant to the status of the user as for:
Role of the user (description available later on),
Date of first joining the system as a user,
Last login into the system,
Current status in the system (description available later on).
Information on Roles and Status descriptions
1. Role
User: Perform all functions associated with uploading files, running an inspection, and generating a report.
Administrator: The admin permission group is a superset of the user permission group. Along with all the functionality a user has, an admin has access to all the features in the My Team, and Audit Trail sections.
4. Status
Pending: The user has received a welcome email but has not set up their account yet
Invite Expired: If an account is not activated within 7 days of receiving the welcome email, the invite will expire and they will not be able to log in. A new welcome email must be resent.
Active: The user can log in and actively user Verify
Suspended: The user is blocked from logging into Verify. An admin must unsuspended their account permitted they are under the seat count.
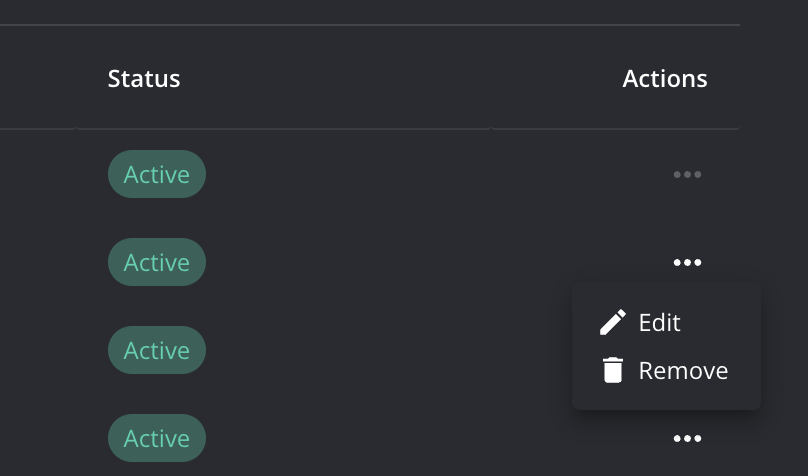
5. Actions
The Actions column allows the Administrator to interact with each user account.
Under the Actions column, click … to perform one of the following:
Edit: Make changes to the user’s information such as First Name, Last Name, and Role.
Remove: Removes the user from the list while maintaining data integrity. Deleted users can no longer access Verify.
6. Download the report in .csv format
It is possible to also download this report in a table format by clicking the :download: button. Downloading will be prompted in our browser, and a .csv file will be shown within our downloaded files.
The file follows the same structure as it is visible in the application:
Name,
Role,
Date joined,
Last login, and
Status.
7. Add a Team Member
To add a new team member:
Click Add Team Member

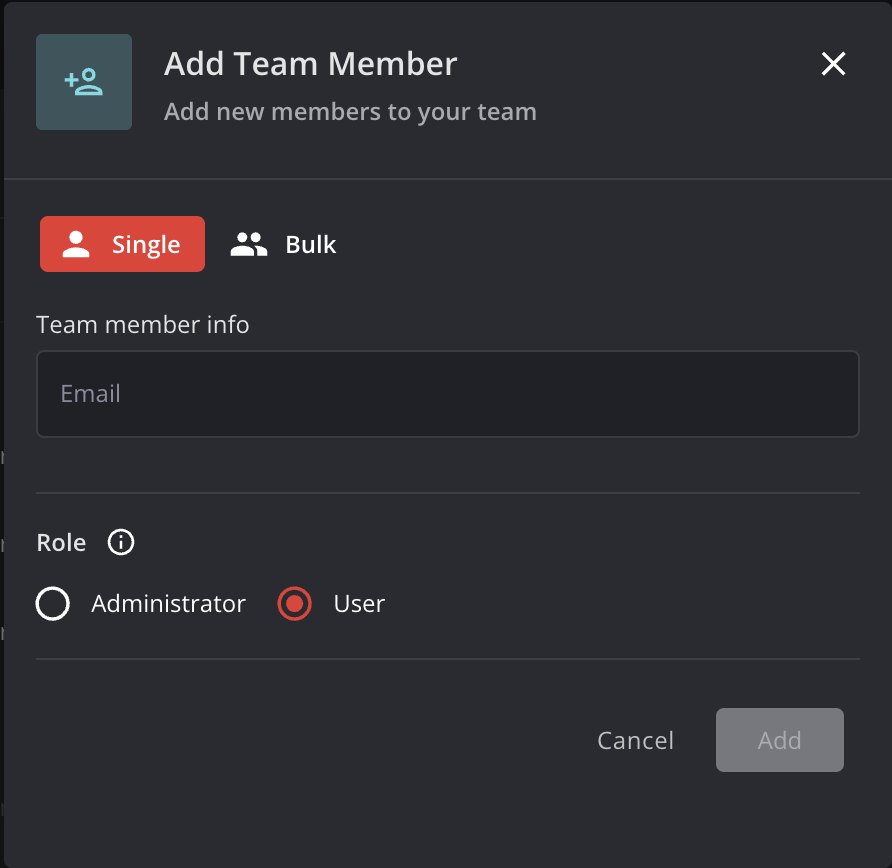
Single addition
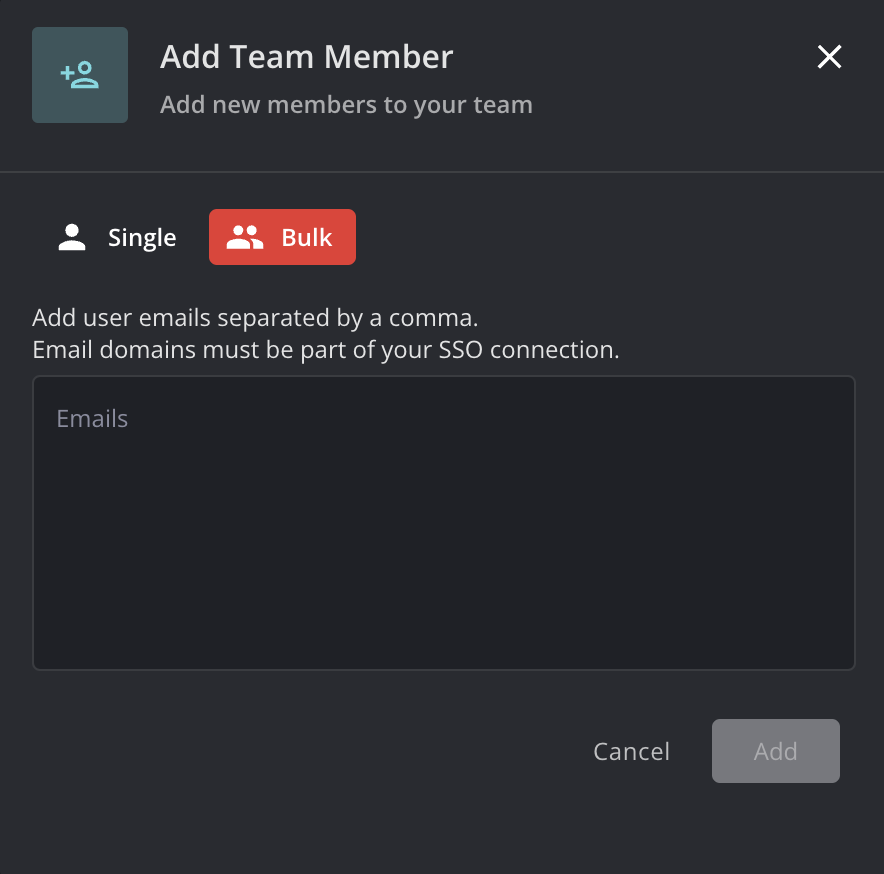
Bulk addition
Whichever input method you choose, you’ll need to provide the email address for the users that are to be created. For single users the required role also needs to be set.
When users are created in a bulk method, all of them will be created with only a user role, not admin. Admins need to be created individually.
Once the user accepts the invitation, they will be listed under the Your Team tab where the entire user list resides.
Note: The invitation link expires after 7 days, if not triggered.
The Name and Date joined columns will be populated automatically.

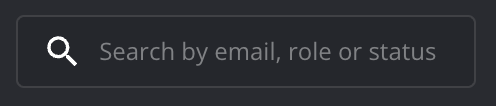
To search for a user, in particular, use the Search by email, role of status field by typing in relevant information about their account.
Note: Deleted and suspended users do not impact data in the Audit Trail. Data always remains intact. Furthermore, these users do not count towards the seat count.
Single Sign-On
Single Sign-On details can be set under the Security tab within My Team.
SAML (Security Assertion Markup Language) SSO configuration details are stored here.
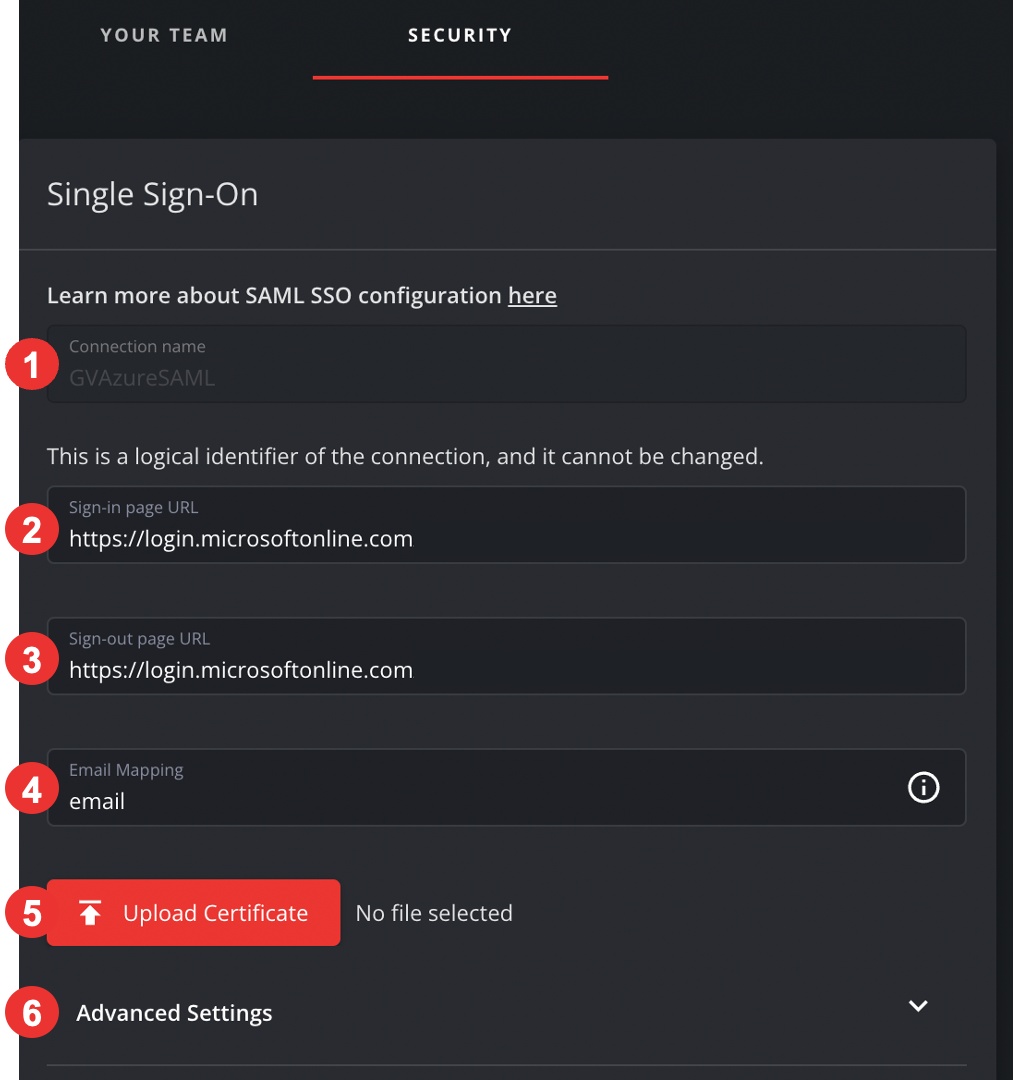
Connection name is shown,
Sign-in page URL that enables connection,
Sign-out page URL that enables sign-off,
Field name to store email address,
Digital Certificates may be uploaded
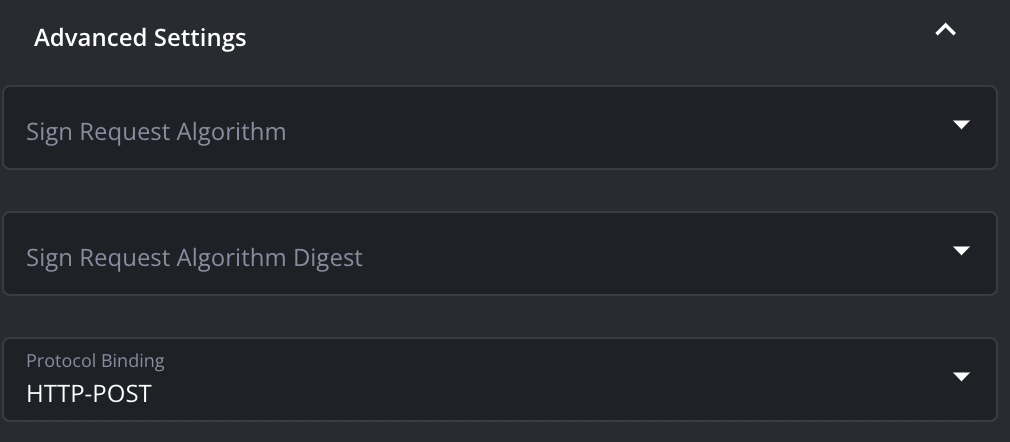
Advanced Settings can be set:
Configuration Settings are available below:
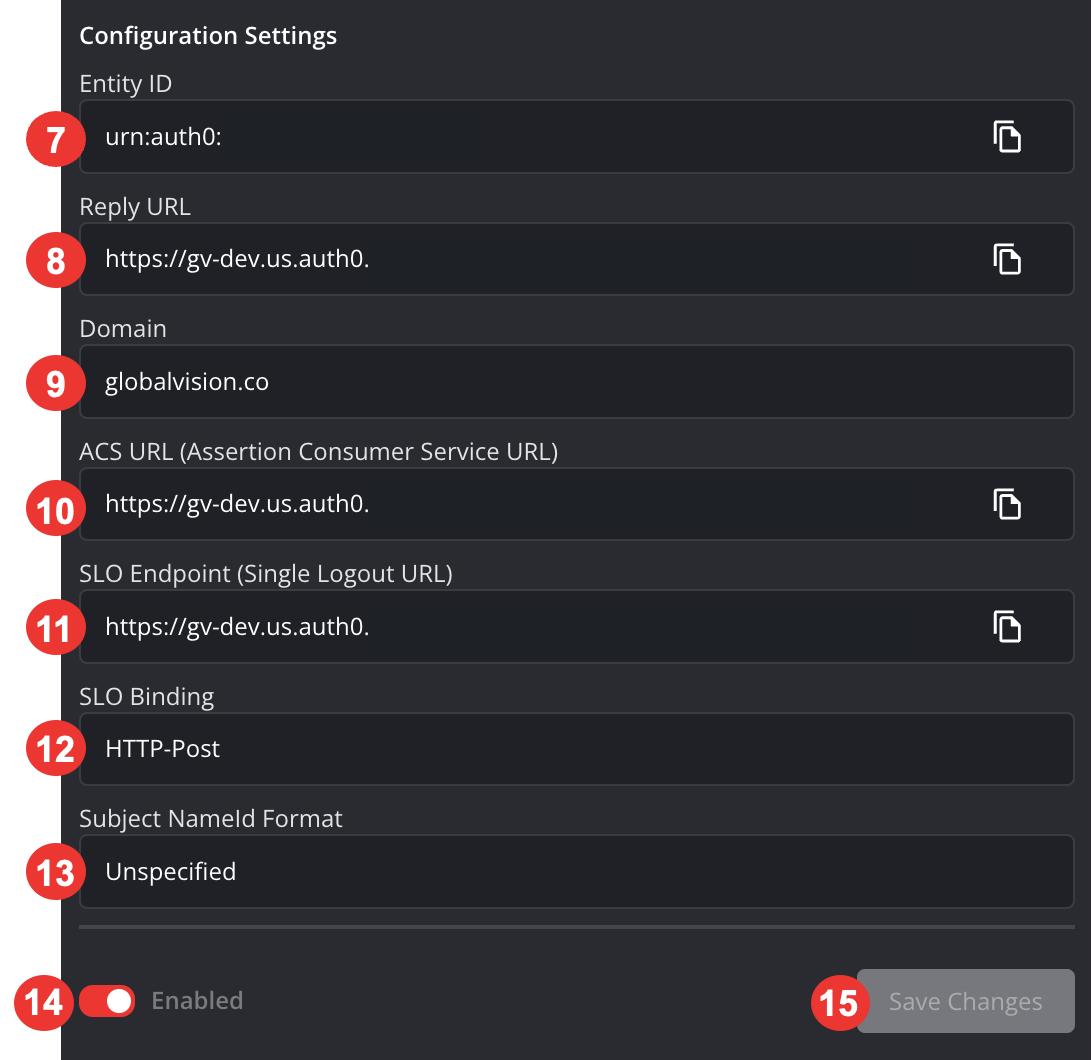
7. Entity ID is shown,
8. Reply URL is available,
9. Domain of the settings,
10. Assertion Consumer Service URL is shown,
11. Single Logout URL is shown,
12. SLO Binding is shown,
13. Subject NameID Format details are available,
14. Enabled SSO on the account (the setting cannot be changed on this view),
15. When every change was set, click on Save Changes (the button is only active in case changes are effectuated on the SSO settings).
SSO Configuration
SSO configuration setup is a Service Provider Initiated SSO, as such the login process starts in Verify, rather than from the identity provider.
In order to start the SSO configuration, the Connection Name needs to be set by the Verify Administrator on the customer’s side.

Once the Connection name is set, this will be used to generate the EntityID, Reply URL and ACS URL values.
These are required to setup the connection on the Identity provider end, with the help of the IT team on the customer’s side. As such, the customer will need to copy the generated values to their SSO Provider before completing setup.
Audit Trail
The Audit Trail is a secure, computer-generated, time-stamped log that independently records the date and time of operator entries and actions.
Generate Audit Trail
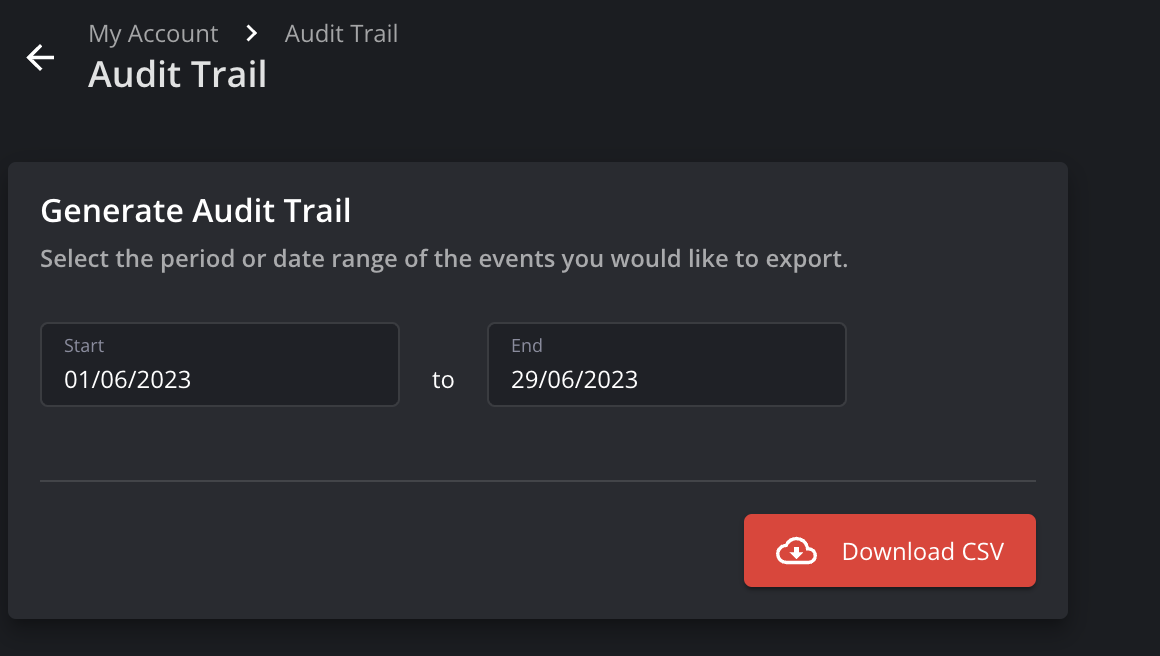
To generate an Audit Trail report for a given period of time:
Enter the Start and End Date
Click Download CSV
Audit Trail is downloaded as a CSV file that can be opened on your computer.

Note: Audit Trail is only available to Administrators.
Custom Dictionaries
Custom Dictionaries enable users to create a list for various set of words that should not be considered in Spelling inspections.
List of suggested words entail company specific words, abbreviations, specific industry jargon, etc.
Users now have the possibility to make suggestions for addition while reviewing inspection results. These requests will appear in the upper box available in the Custom Dictionaries screen for administrators.
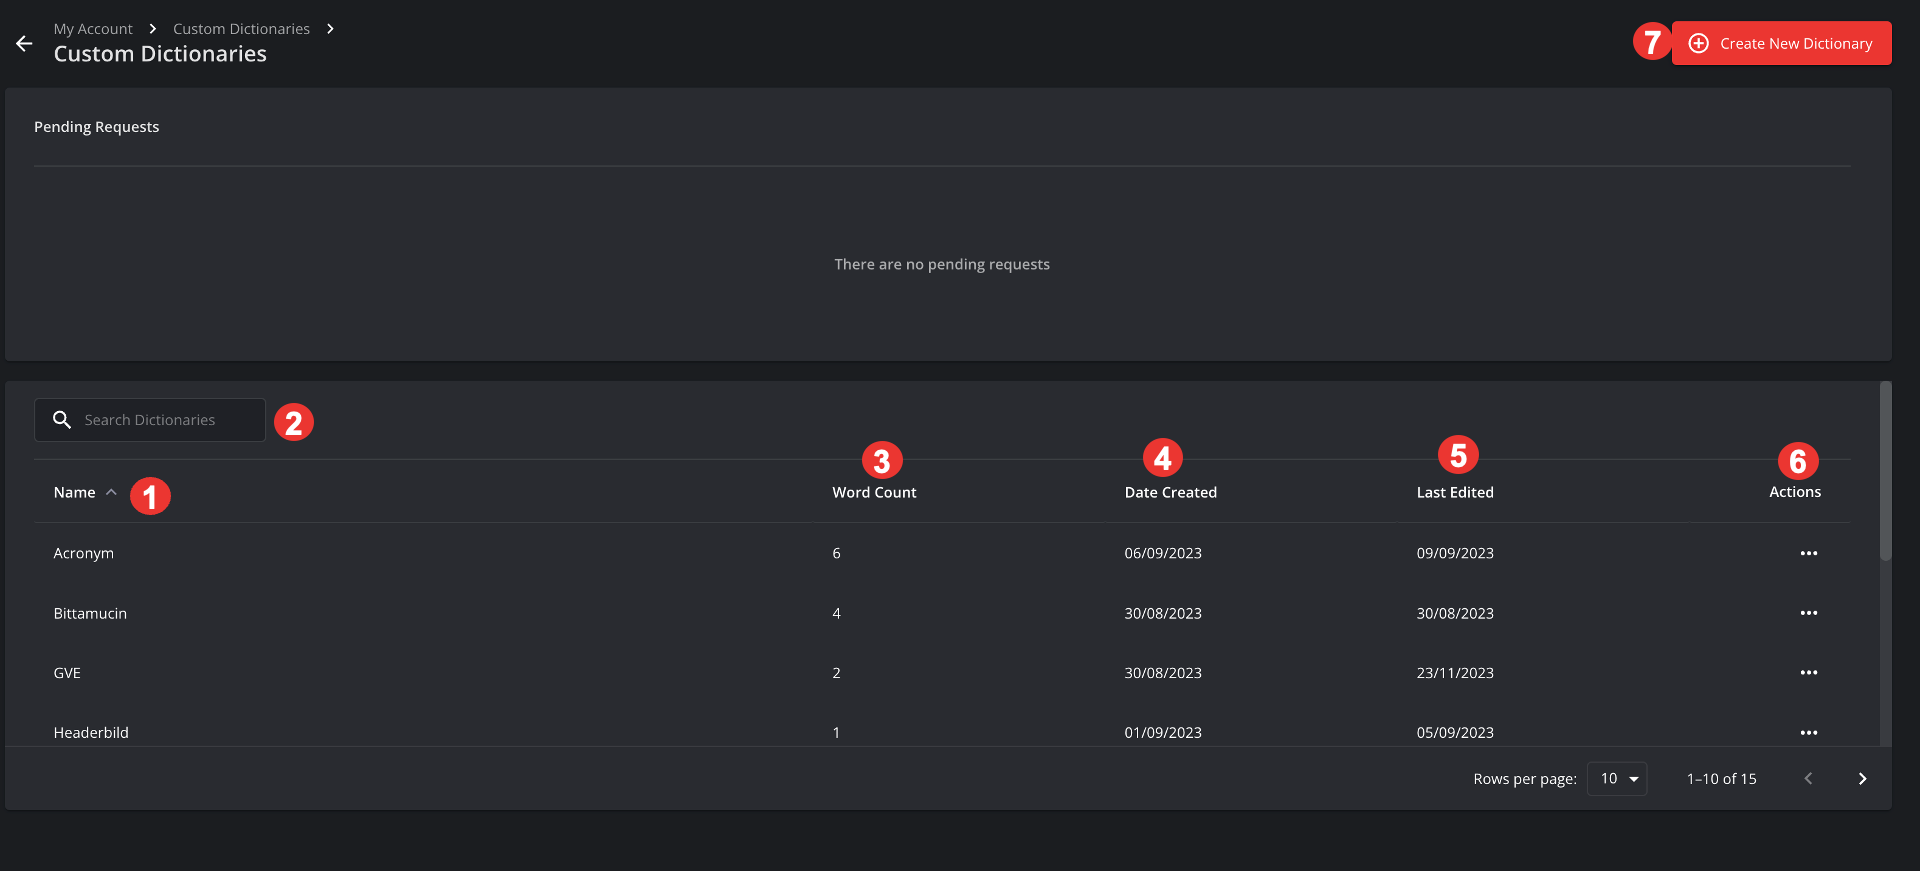
Pending Requests
Pending requests will appear in the upper section, and the administrator will receive a notification to their user. The notification will highlight that it is regarding a custom dictionary request once the admin checks the menus.

When going in to Custom Dictionaries, the pending items will be listed on top. Admins should assign the proper dictionary and then accept or deny the suggestion.

A confirmation message shows up at the bottom of the screen of the successful addition or rejection.
Manage Dictionaries
The available dictionaries are shown in a list format:
Name of the dictionary,
Searching for a given dictionary by its name,
Word count of the dictionary,
Date of creation,
Last edit date of list.
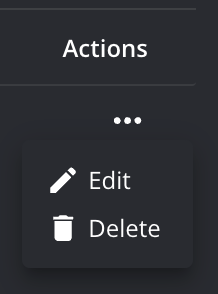
By clicking the 6. Actions marked with …, it is possible to 1️⃣ Edit the dictionary or 2️⃣ Delete it.
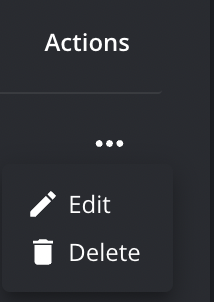
Clicking 1️⃣ Editing takes us to a new screen, where you can remove from or add words to the list. You have the option to edit items individually or in bulk way.
Individual update
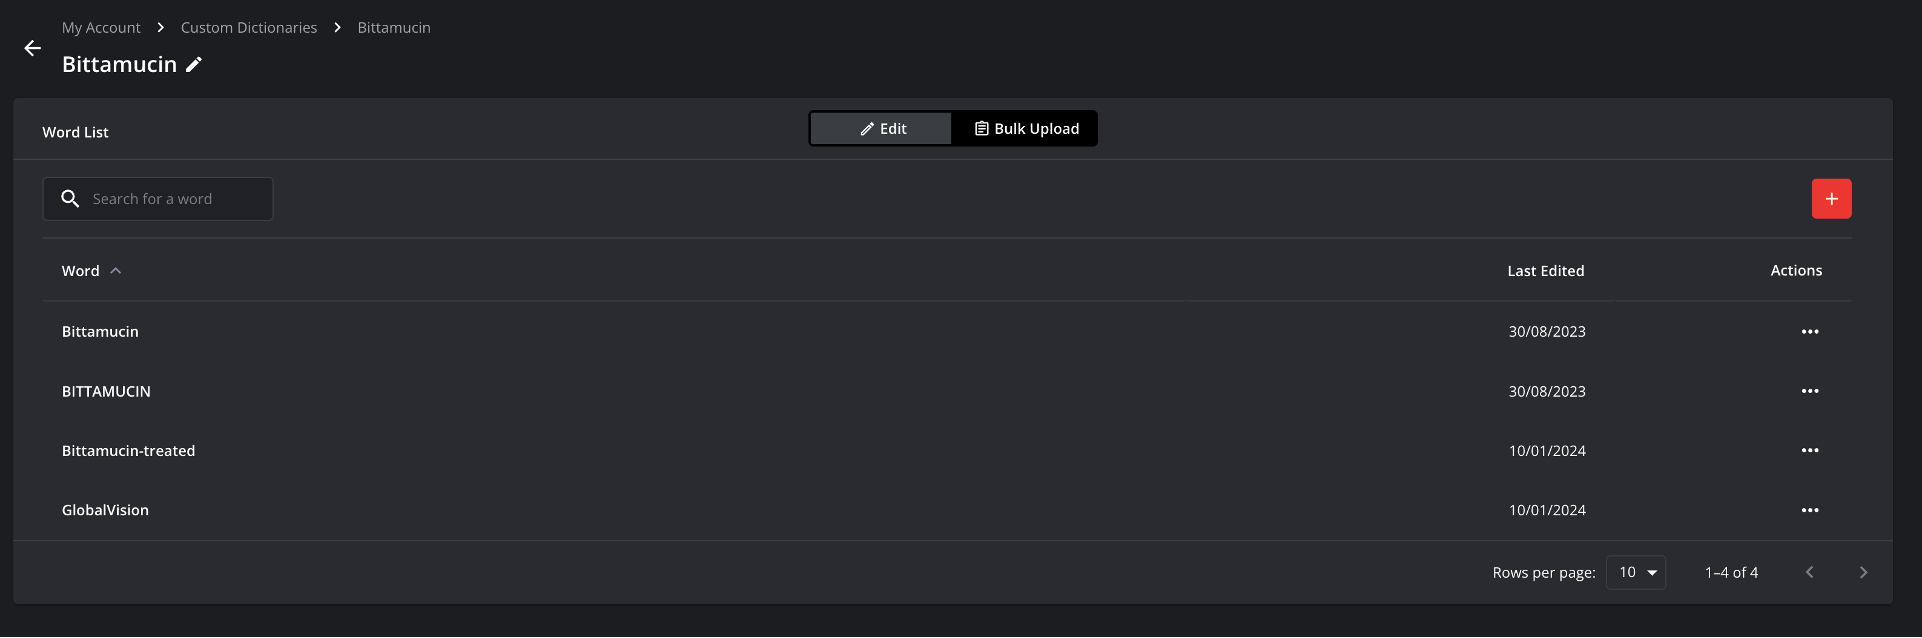
To edit or delete a previously added item, you need to click on the Action button, which is represented by the … sign,
To add new items, you need to click on the red square with a + sign, which will prompt a new row for us to fill in, as visible below. Once we have added the new input, we need to click on
Confirm.

Remarks for editing the word list:
Latin special characters are allowed in the listed words (i.e. accented vowels, such as á, à, é, è, í, ì, ó, ò, ú, ù, etc.).
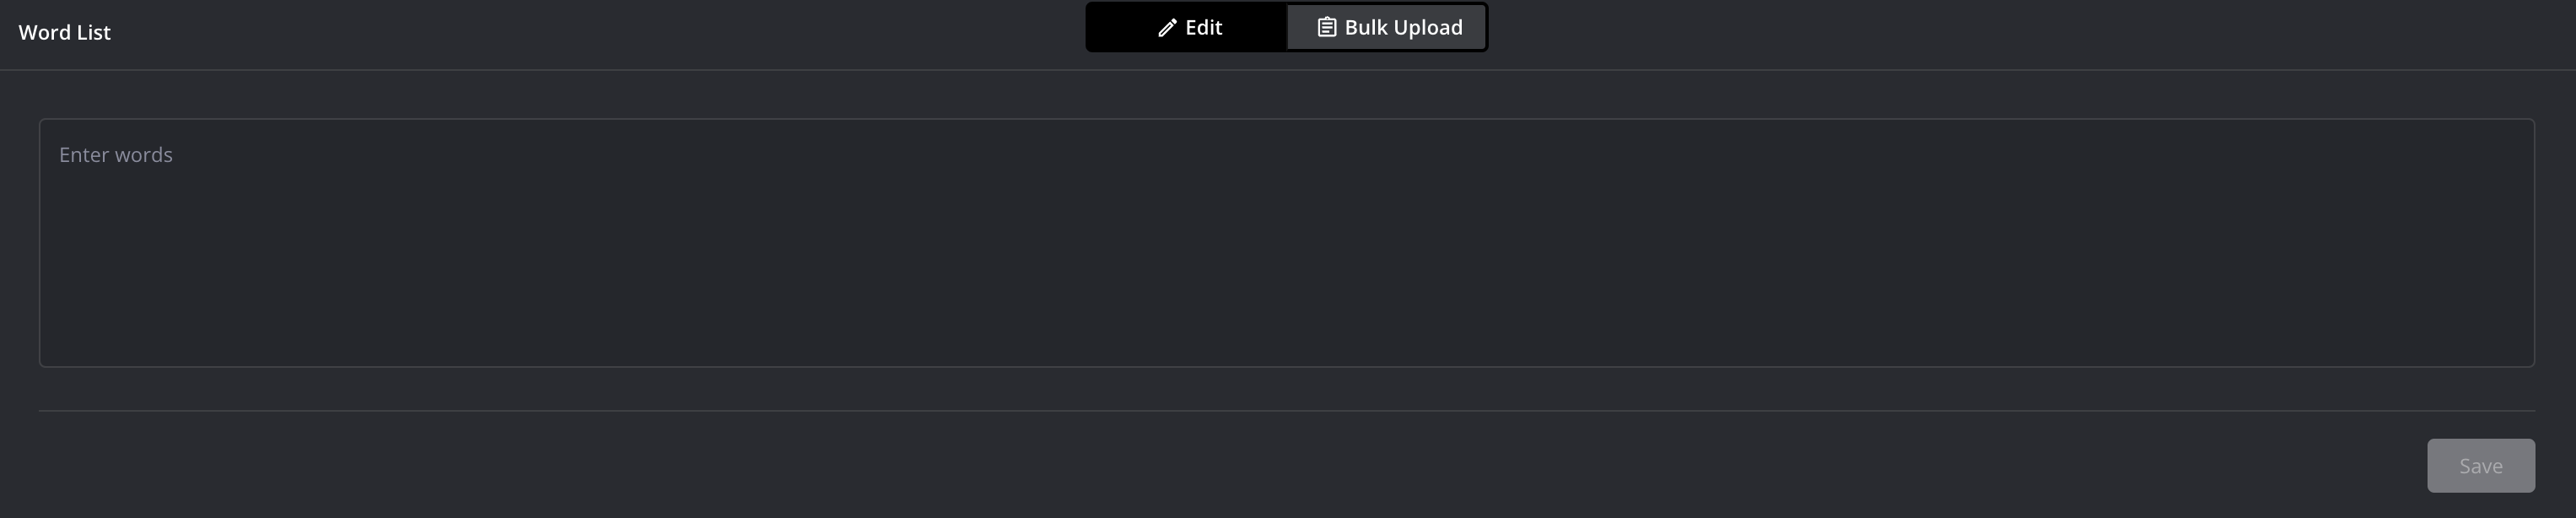
Bulk update
When trying to update in a bulk manner, we’ll receive the previously known field where we can edit all items at the same time.
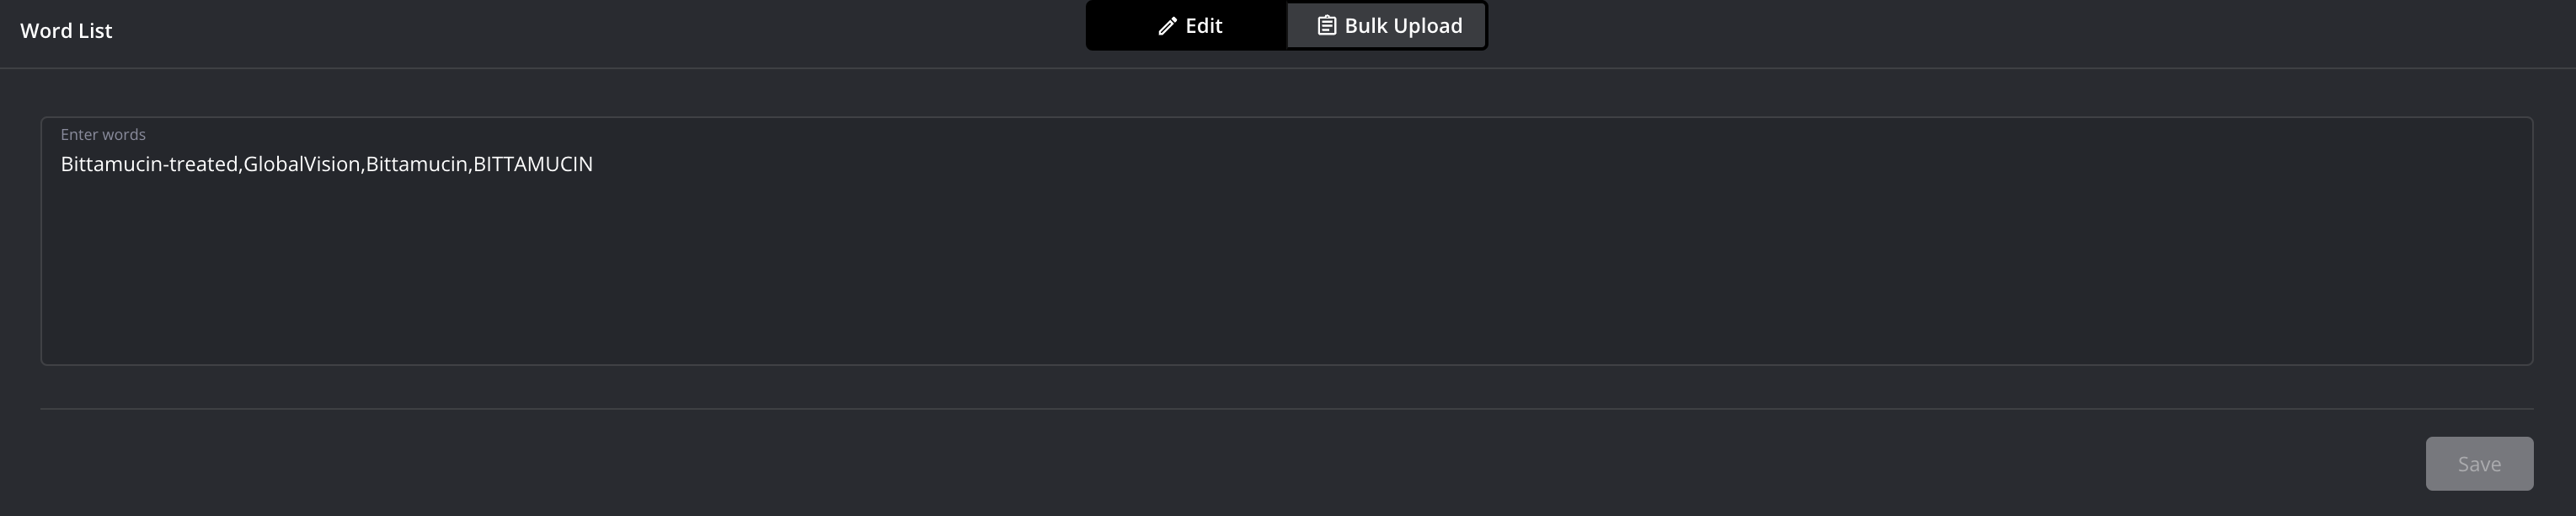
Remarks for editing the word list using bulk upload:
The words need to be listed without any enter, space or special characters (such as $, %, !, etc.),
The words should be separated by a sole comma, no spaces, like this: one,two,three
Do not put any comma after the last word in the list, as the application will be expecting another word and it will not allow saving your list.
Warning: The Confirm button will be unavailable until the application can detect unsupported characters and will not allow for it to be saved, as visible on the picture above.
A warning message will show under the Enter words section, as a reminder to list the words appropriately: “Unexpected character, please remove any spaces, special characters (#, %, /, etc.) and separate words with commas only.“
2️⃣ Deleting the dictionary is also possible by clicking the Action button, represented with …, and click on Delete. A message will pop up to confirm our intent to delete the dictionary.
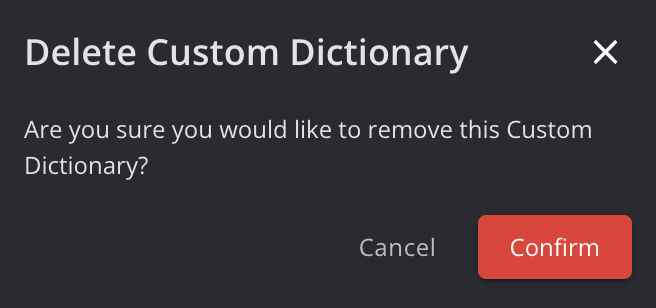
By clicking Confirm, the dictionary will be deleted, and the system will send a confirmation message of the action.
Create a Dictionary
It is quite simple to create a dictionary as well, by clicking on the 7. Create New Dictionary button. The software takes us to a new screen which is identical to the editing window. It is possible to provide the following details to set up the new dictionary. Once again, we’ll have the choice of adding items individually, or uploading in bulk.

As in the editing function, we have the same fields available to be populated:
1. Dictionary title,
Word list, where the same rules apply as for editing.
Individual additions
To add new items, we need to click on the 2. red square with a + sign, which will prompt a new row for us to fill in, as visible below. Once we have added the new input in the 3. field, we need to click on 4.
Confirm.

Bulk upload
When trying to update in a bulk manner, we’ll receive the previously known field where we can edit all items at the same time.
When all items have been added, following the remarks outlined below, we can Save our work by clicking on the Save button.
Remarks for setting up the word list using bulk upload:
The words need to be listed without any enter, space or special characters (such as $, %, !, etc.),
The words should be separated by a sole comma, no spaces, like this: one,two,three
Do not put any comma after the last word in the list, as the application will be expecting another word and it will not allow saving your list.
Warning: The Confirm button will be unavailable until the application can detect unsupported characters and will not allow for it to be saved, as visible on the picture above.
A warning message will show under the Enter words section, as a reminder to list the words appropriately: “Unexpected character, please remove any spaces, special characters (#, %, /, etc.) and separate words with commas only.“
Custom Statuses
Set a Status for each result of your inspection to easily communicate what action needs to be taken next.
Default statuses are: APPROVED (F1), REJECTED (F2), IGNORE (F3).
When Custom Statuses are enabled, users will be able to set the appropriate status to each difference on the difference list by clicking on the following icons:

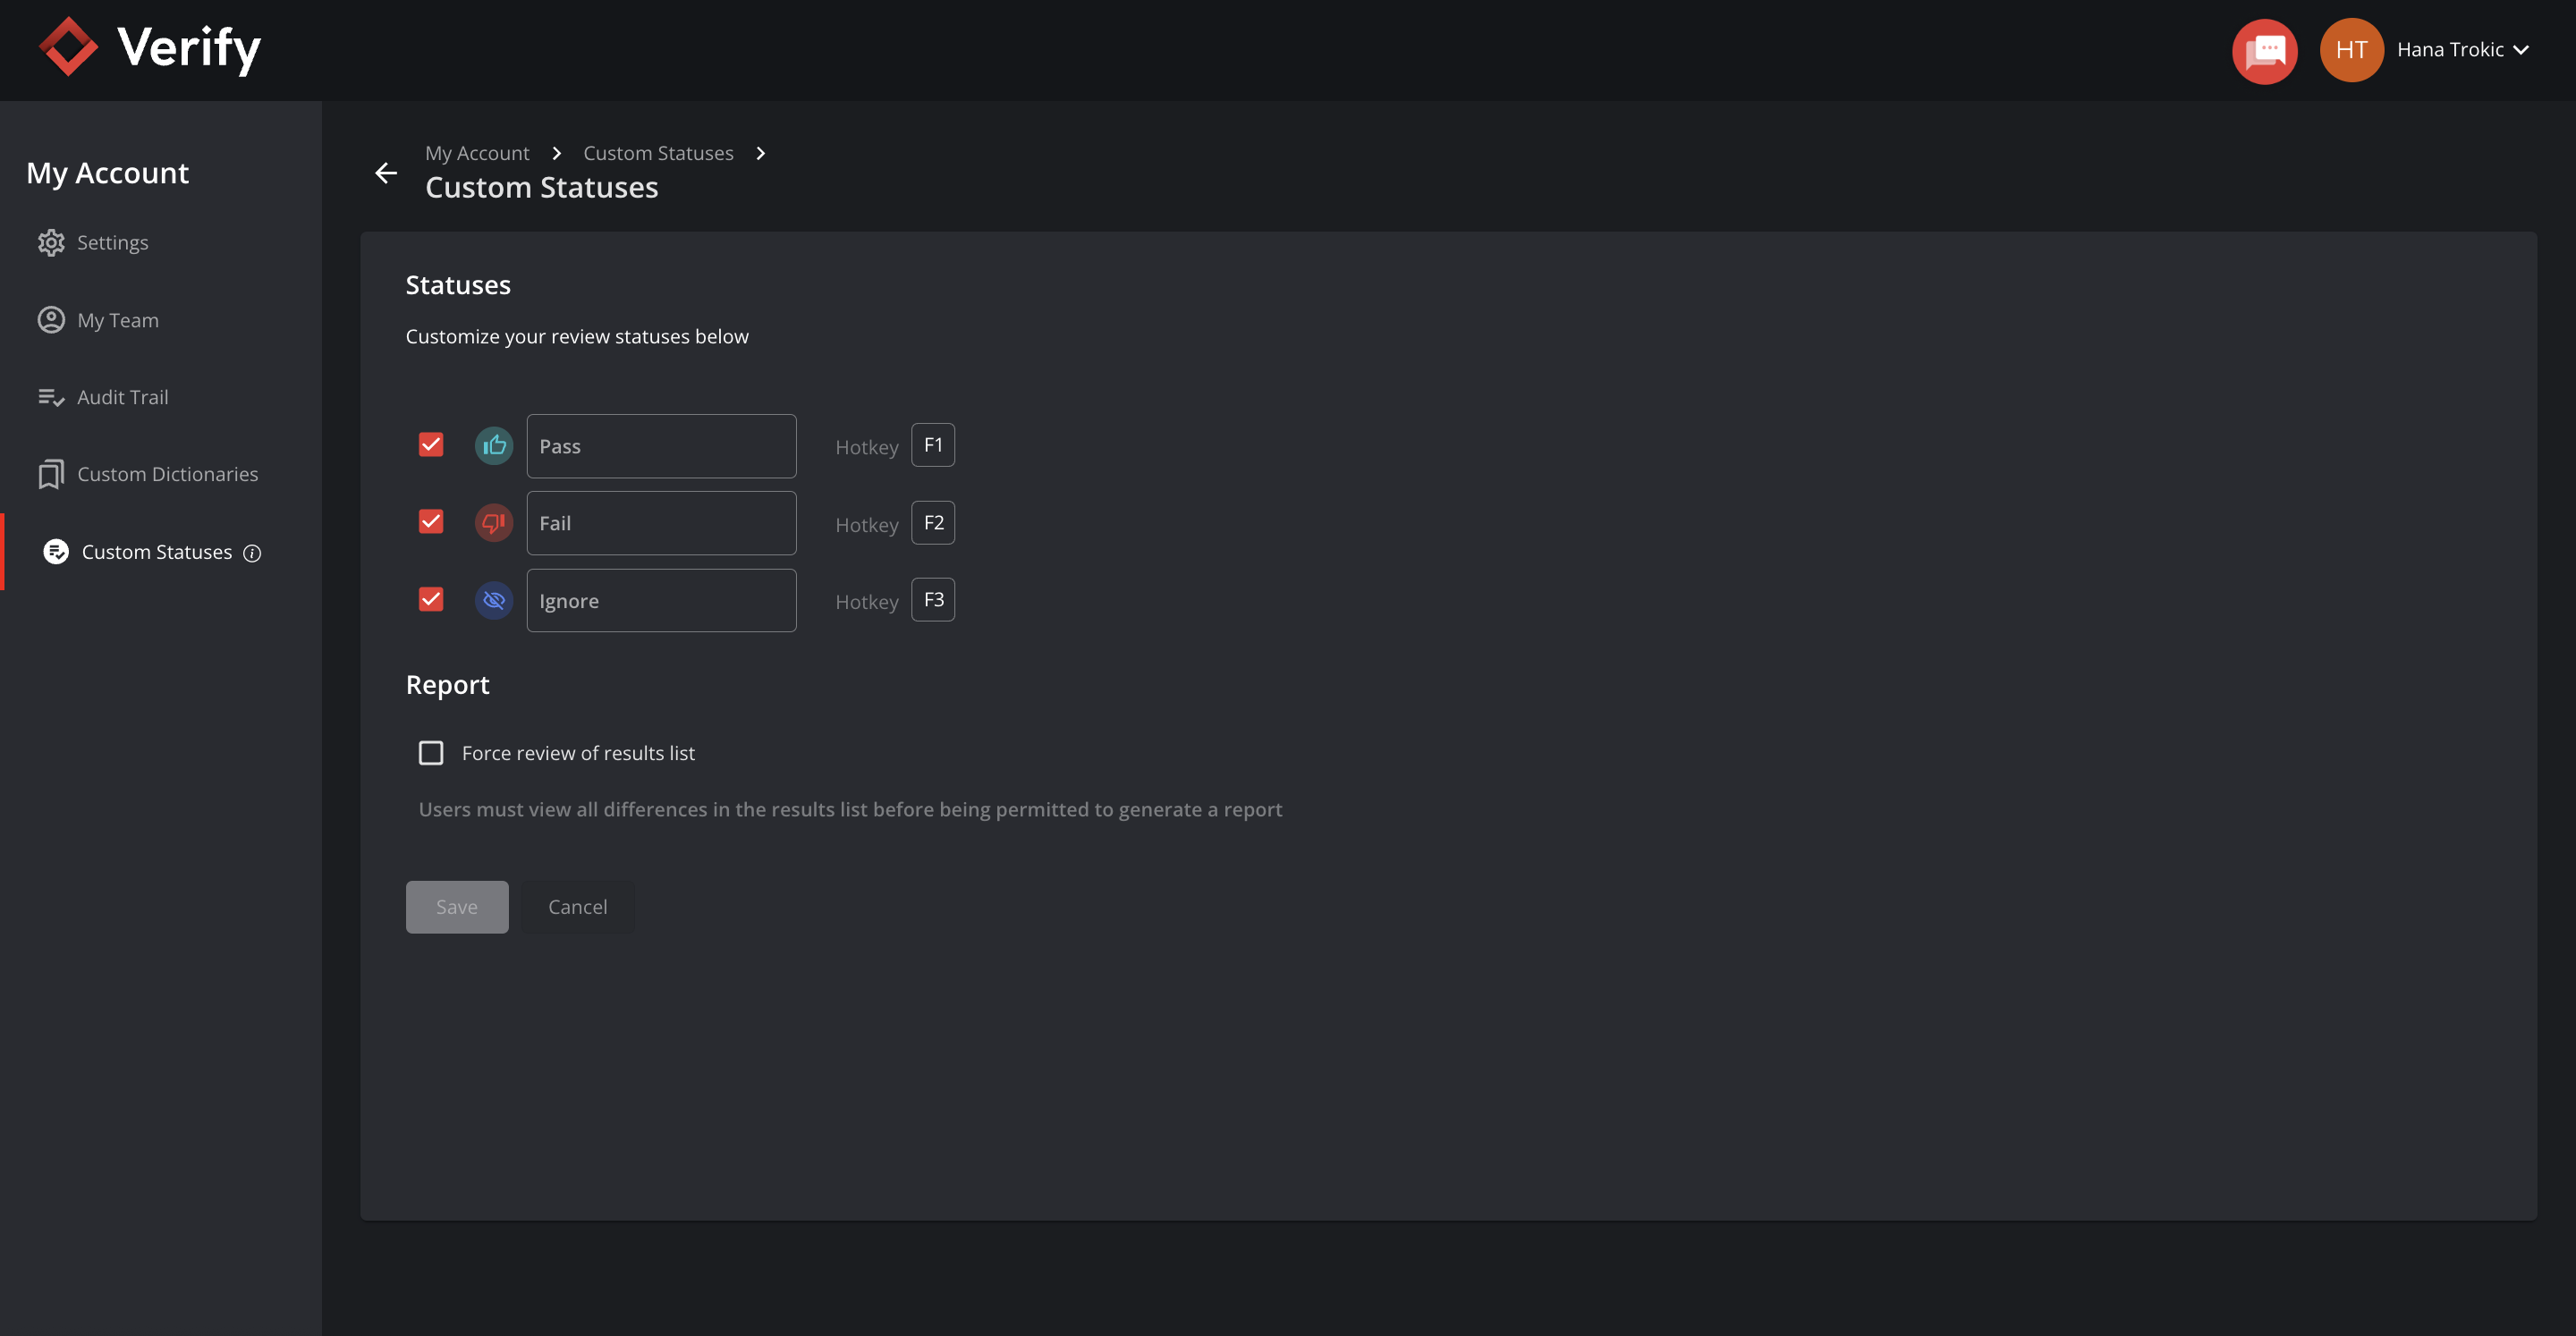
You will also have the option to “Force review of results list” which will trigger users to go through and acknowledge every difference found during an inspection.
This is an optional feature that Administrators have the power to turn this on or off.
Please note: Custom Statuses are turned on by default while Force Review of Results List is turned off by default.