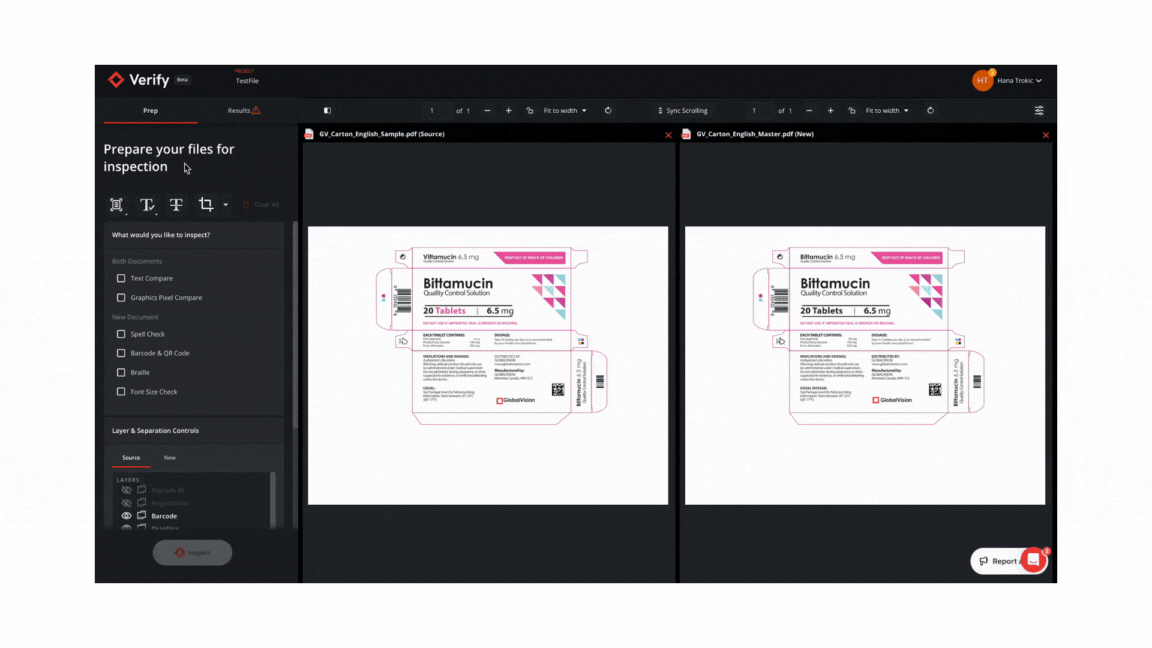
Step 2: Preparing Files
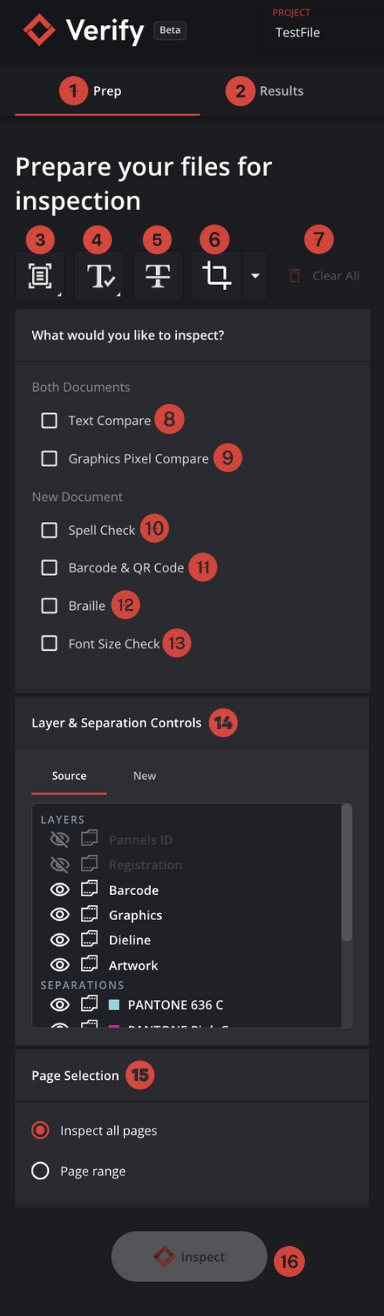
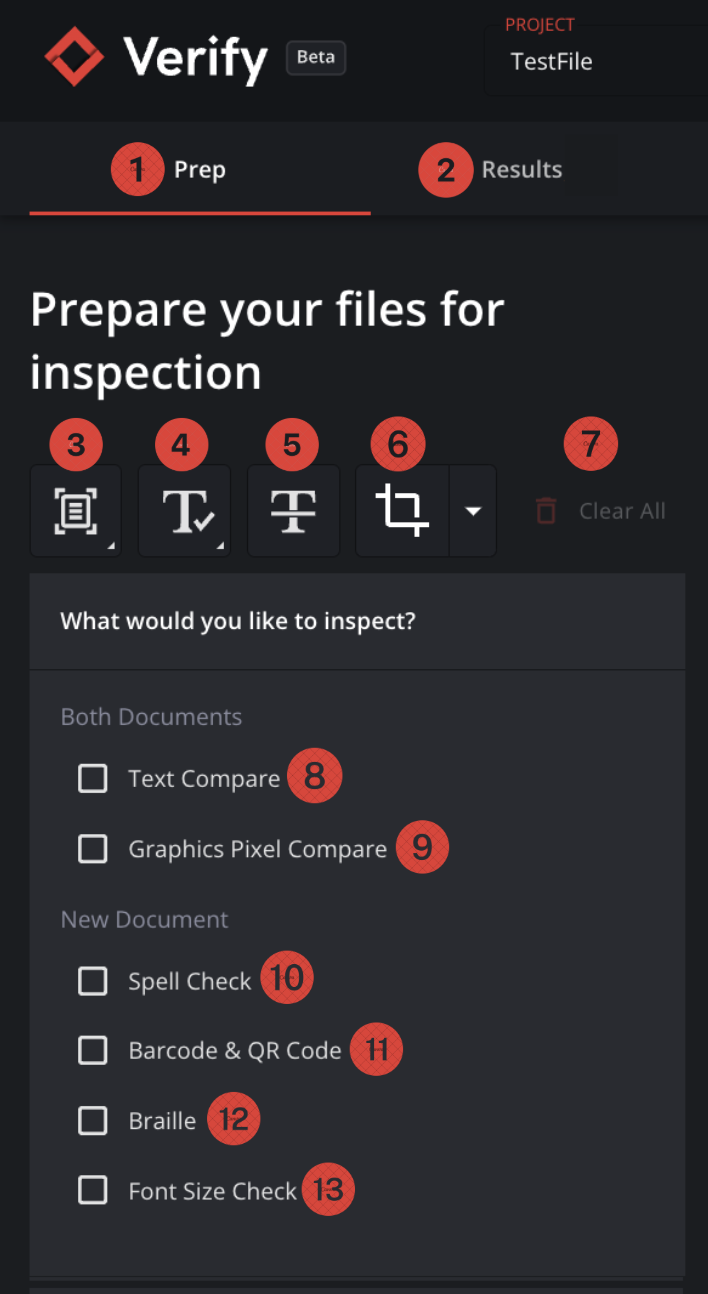
Prepare Your Files for Inspection
Once your files are loaded, following the instructions from Step 1: Loading Files, the Prep tab is automatically enabled, allowing you to interact with the uploaded files to prepare them for inspection.
Reminder: The inspection process goes through three stages:
1. Prep
2. Results

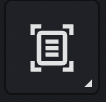
The tools in this section allow you to mark up their files for partial or targeted inspections, limit the file comparison to a specific number of pages, and enable additional inspection types like Processing Flattened Text (OCR) (3), Create Text Zones (4), Ignore Text (5), and Crop (6).
Process Flattened Text - OCR Tool
This feature is particularly useful with scanned documents.
The 3. Process Flattened Text is useful whenever there is no instantly identified text in the document meant for inspection or when only part of the file does not contain live text.

You may run OCR on only the Source or New file, or on both files.
In such cases, a warning message will appear indicating that either OCR can be run or only a graphics compare is possible.
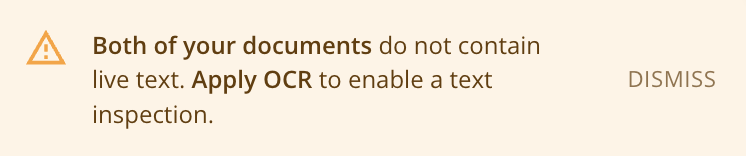
Once OCR is run on either the Source or New file, but not both files, another warning message will appear, requesting another OCR or a graphics compare to proceed.

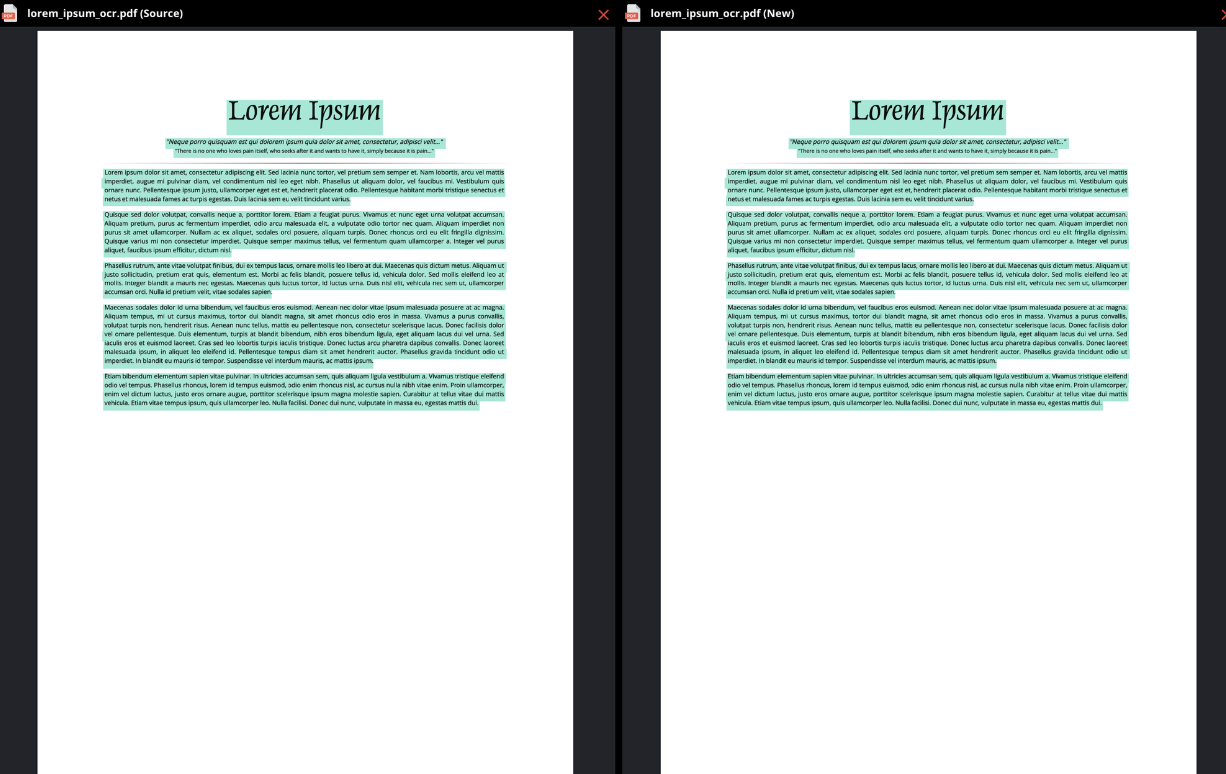
To be able to proceed with a text-based inspection, OCR needs to be applied on both files.
Once both files have OCR applied to them, the identified text will be highlighted in green.
Verify’s OCR engine accurately detects special characters, symbols, and characters with accents as well as Non-Latin scripts:
Special characters: ( ), [ ], { }, &, *, #, \, / ,~, ^, _
Symbols: ∑ , ∫ , √ , $ , € , £ , ¥
Characters with accents: á, é, í, ó, ú
Non-Latin scripts: Arabic, Hebrew, Cyrilic, etc.
To learn more about OCR, read our blog post, OCR: Everything You Need to Know About Optical Character Recognition
Text Zones
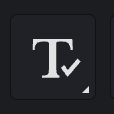
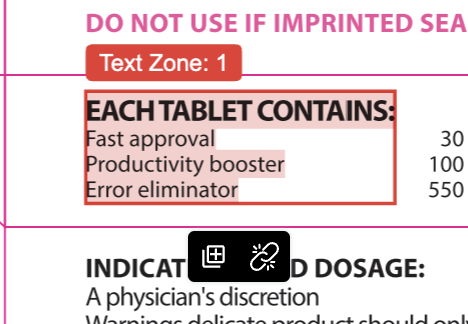
The 4. Text Zones tool is used to perform partial or targeted inspections of text. You can specifically select sections of a given document to perform a Text Compare (excluding all other text) and compare directly to the corresponding Text portions in the other panel.
There are two Text Zone options:
Text Select
Marquee
Create a Text Zone Using Text Select
To use Text Select, click and drag the cursor over the desired text in the Source panel. If the selected text exists in the New panel, it will automatically be matched, highlighted, and a Text Zone will be created.
Note: Automatic text detection on the New file only works when using Text Select.
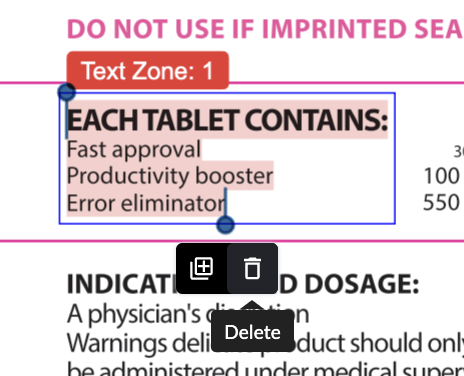
Once a Text Zone is created and the matched text is highlighted in the New panel, you can:
Create a new Text Zone
Add to an existing Text Zone
To create a new Text Zone, simply highlight the text you wish to inspect.
To add to an exisiting Text Zone, click on Add to Zone.
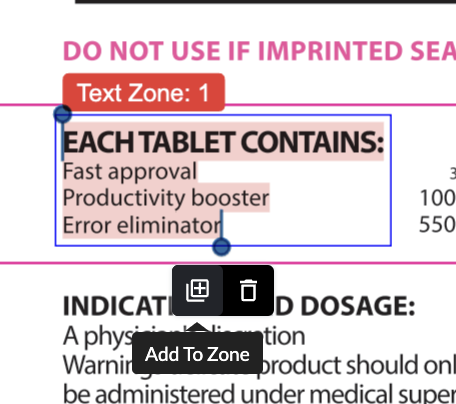
This function gives you the ability to add to a pre-existing text zone. You can create different text zones throughout a file, linking zones from multiple pages, difference formats, etc. and compare them against a single zone in their Source/New file.
Once the desired Text Zone/s are created, you will have the option to:
Unmatch the Text Zone in the New Panel by clicking:
Delete the Text Zone in the Source File by clicking:
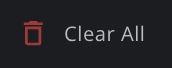
You may also select Clear All to clear all markups.
See How to Add to an Existing Text Zone Using Text Select Below
Create a Marquee Zone Using Marquee
To use Marquee, drag and drop to select the Marquee Zone you wish to inspect in the Source and New Panel.
Note: Marquee requires you to create Marquee Zones on both files. Automatic text detection will not occur on the New file.
Once a Marquee Zone is created in both the Source and New Panel, you can Add to Zone or Delete the Zone.
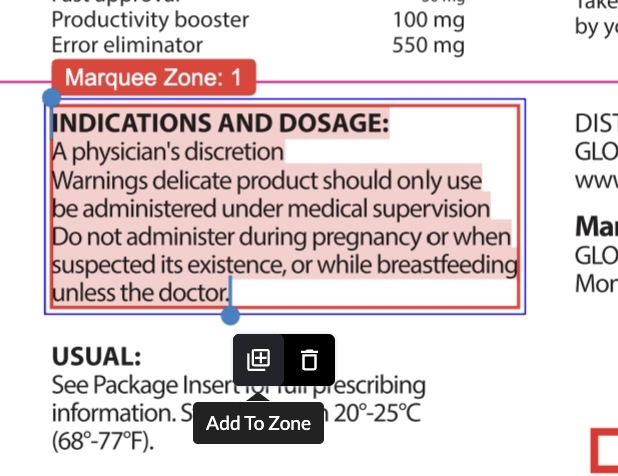
You may also select Clear All to clear all markups.
Note: Multiple Marquee selections can be made.
Ignore Text
The Ignore Text (button 5) allows you to strikeout text on your Source and New document that you wish to ignore and exclude during an inspection - all other text will be included. The selected text is crossed out in red.

To Use Ignore Text
Click Ignore Text.
Click and drag the cursor over the text to be excluded in either the Source or New panel.
Note: Ignore Text Zones created in the Source Panel will not automatically be created in the New Panel. Create separate Ignore Text Zones as needed in the Source and New Panels.
To Modify or Delete Ignored Text
To modify Ignore Text, click and drag the blue dots on the corners of the Ignore Text Zone.
To delete Ignore Text, click on Delete.
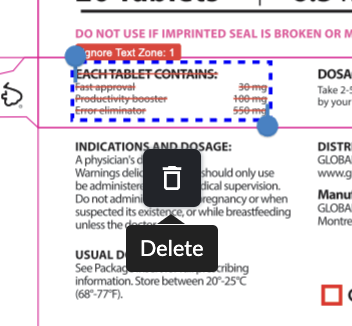
Select Clear All to clear all markups.
Note: Multiple Ignore Text selections can be made.
Warning: Ignore Text and Zone Text cannot be applied together. Only one text tool can be used at a time.
Crop
The Crop Tool (button 6) tells Verify which area/s to inspect with a single click, drag, and drop. It works on all inspection types and you can apply the crop to all pages in prep.
When this feature is selected, Verify will show an info box highlighting that all non-selected areas will be ignored during the inspection.

To Use Crop
Click the Crop button. Teal rulers will appear on both the Source and New Panels to help you crop and select which areas of your file you wish to inspect with precision and ease.
Once the selection/s are made, the system will confirm the cropped zone.
The selected area will be marked with a red box. The rest of the document will be greyed out.

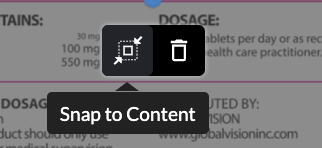
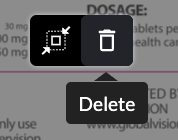
After creating a crop, you will see these two options at the bottom of your cropped area.
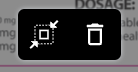
They are:
Snap to Content: Tightens a crop to the content of your file and automatically creates a more precise crop.
Delete: Deletes the cropped area on your file.
Multi-Crop - Adding Multiple Crops per Page
You can add multiple crop regions on your page. Verify will treat each crop as its own inspection region and search for a match on your new file.
This is useful when you need to breakdown a page into multiple regions, especially when the layout of the comparable documents are different.
Note: If your file has multiple pages, you must exclude pages you haven't cropped. Cropping a page excludes all other content within that same page, but uncropped pages below or above it remain included.
More Crop Options for PDF Files
Verify offers More Crop Options that help make inspecting PDF files more intuitive. To view more Crop Options, click on the Crop dropdown menu.
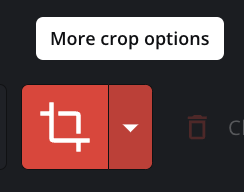
The More Crop Options for PDF Files include:
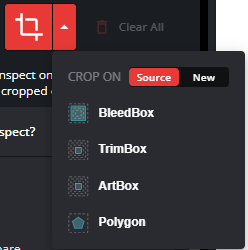
BleedBox: Defines the region inside which the graphic elements need to be clipped in. Usually the graphic is extended about 2 mm beyond the TrimBox.
TrimBox: The TrimBox is the final size of the trimmed label and packaging after cutting.
ArtBox: Indicates the area covered with the graphic. It is known as the the area where it is safe to put graphic elements.
Polygon Crop: Allows you to set points on your document to define a custom crop region.
Once selected, your cursor changes to a crosshair so you can set points on the source document.
Click to place points along the shape you want to crop. When you return to the starting point, the loop closes and a mask appears around the selected region.
polygon crop
You can apply More Crop Options on both the Source and New files by clicking Source/New on the toggle ![]()
Crop to Dieline
Crop to Layer offers the ability to automatically crop a file based on the layers that are set in your file.
Some example of layers that can be cropped through this feature include dieline, cutter, fold, etc.
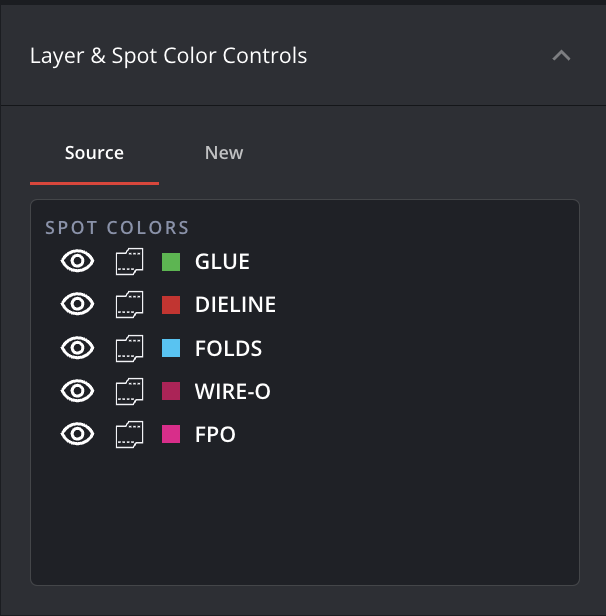
Crop to Layer will differ according to your specific file layers. You will only be able to crop by layers that are set in your file.
To crop by a specific layer, click on the ![]() icon in the Layer & Spot Color Controls dropdown.
icon in the Layer & Spot Color Controls dropdown.
When a layer has been selected, the icon will turn red. ![]()
You can apply Crop to Layer on both the Source and New files by clicking on the Source/New tabs in the Layer & Spot Color Controls dropdown.

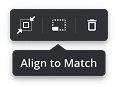
Align to Match
Handling different file sizes and differences in scaling during a graphics inspection can be achieved using the align to match feature. This tool overlays your source crop onto your new file which can then be re-sized to match the scale of the new artwork.
To use the feature:
Crop the specified area on your source
Click on the ‘Align to match’ button
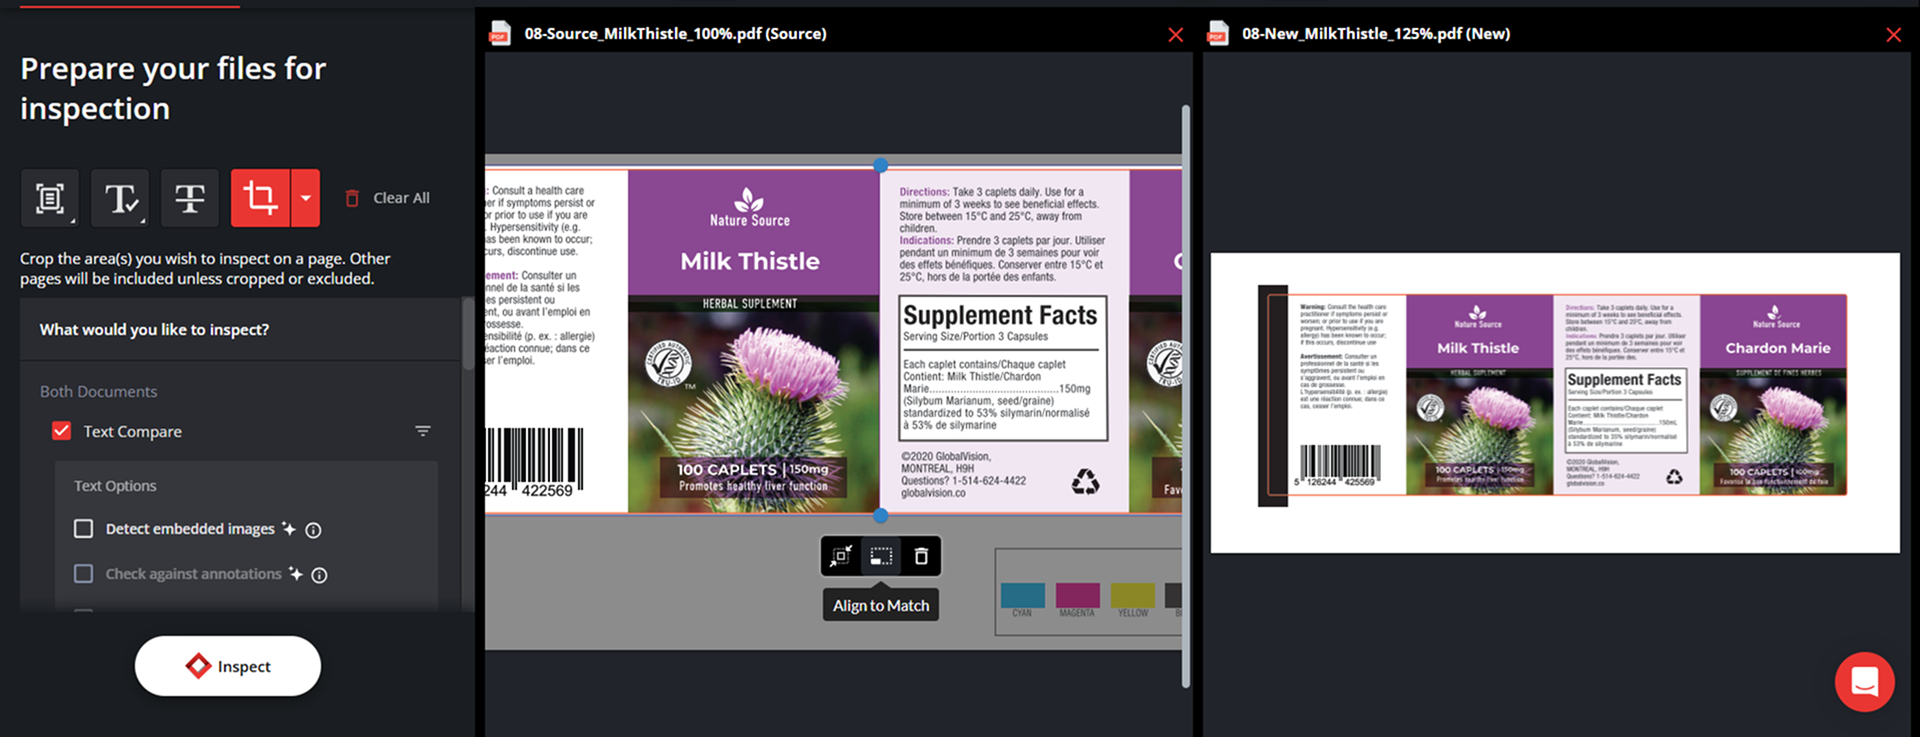
Place an anchor point on your source document and place the corresponding anchor point on your sample file.
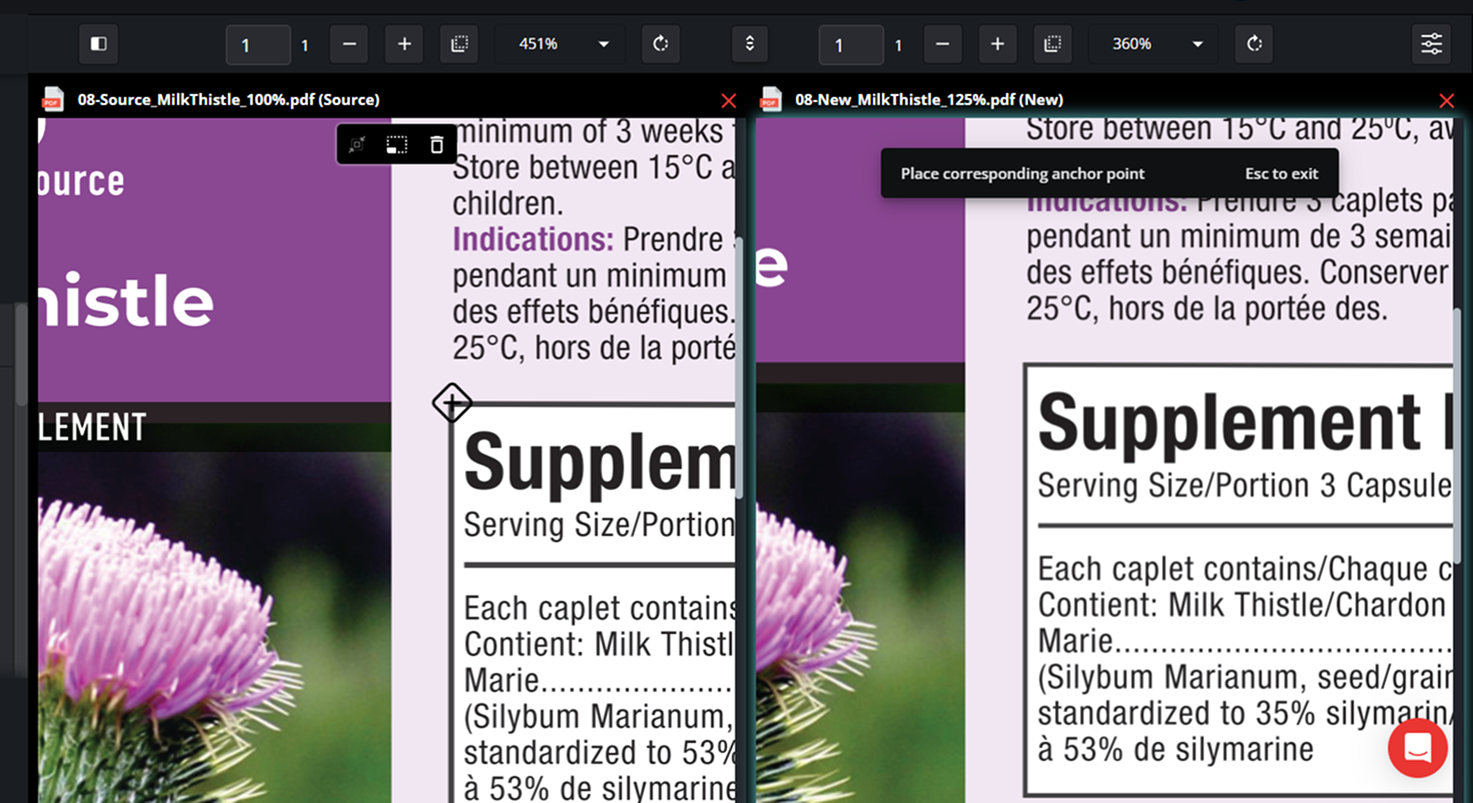
Drag the corners of the transparent overlay to resize it so that it aligns and matches the new file.
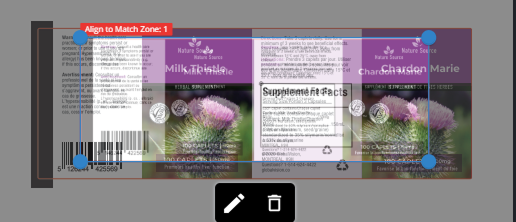
You are now ready to run your graphics inspection.
Clear All
Click 8. Clear All to remove all markups (Text Zones, Ignore Text, and Crop).
Note: The Clear All button is disabled unless you use one of the markup tools (Zone Text, Ignore Text, and Crop).
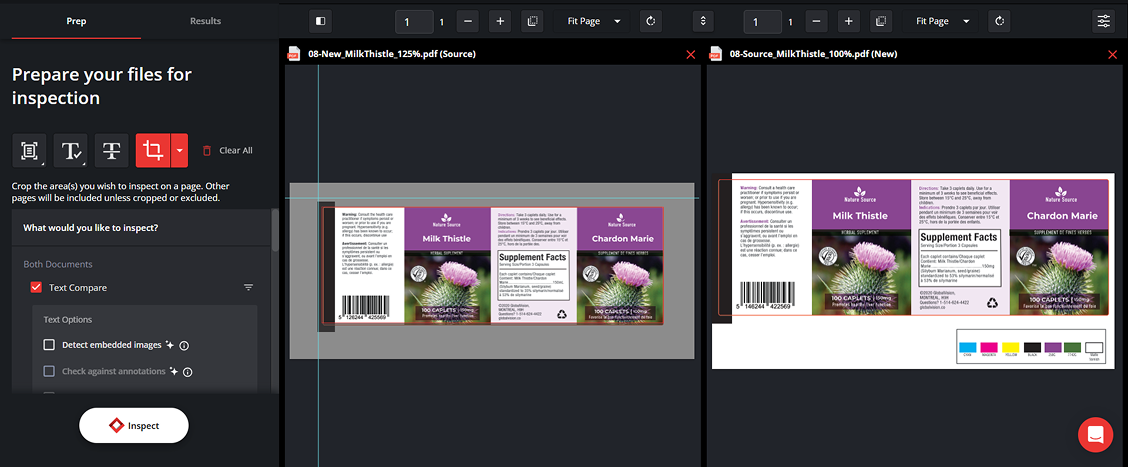
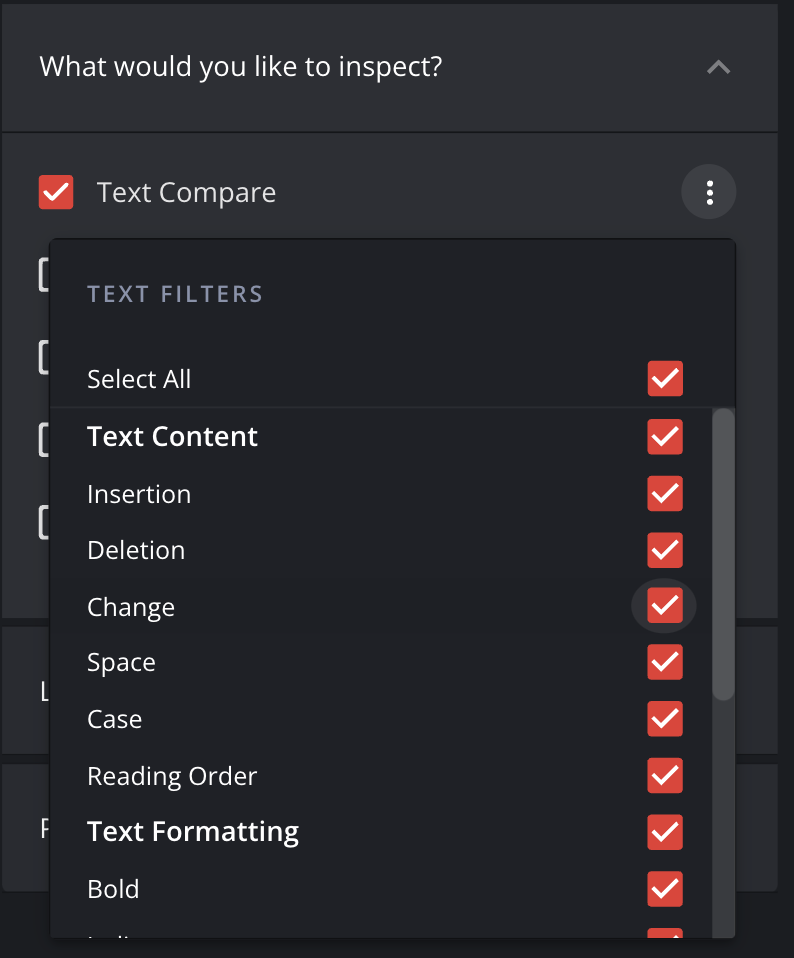
Text Compare
With 8. Text Compare checked, Verify will perform a character-for-character inspection, where the identified text is compared in both documents. For an even more precise inspection, you may choose to filter your Text Compare by different parameters by clicking on the ellipsis icon ![]() on the right.
on the right.
This will not perform a language-based spell check. For that, please refer to the Spell Check section below.
Note: Using text boxes in MS Word documents can result in text becoming hidden or cropped. This is because text boxes do not automatically resize to fit their content.
To ensure that all text is fully visible during inspections, we recommend avoiding text boxes altogether. Instead, consider using tables or other layout options that dynamically adjust to accommodate text content.
Detect Embedded Images
When running a Text Compare, you will also be able to run an automated Embedded Image Comparison. This feature detects and compares embedded images, integrating graphics and text comparison in one seamless step.
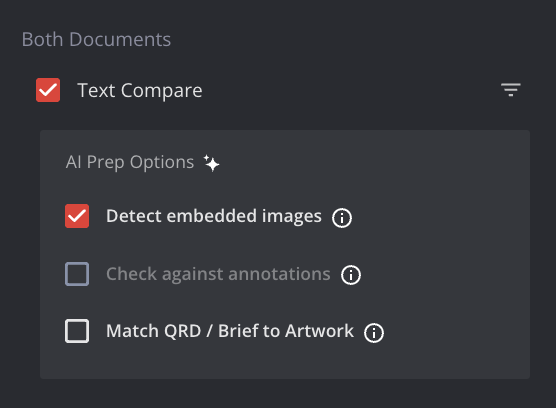
Note that images which are not matched can be matched manually by drawing the comparison.
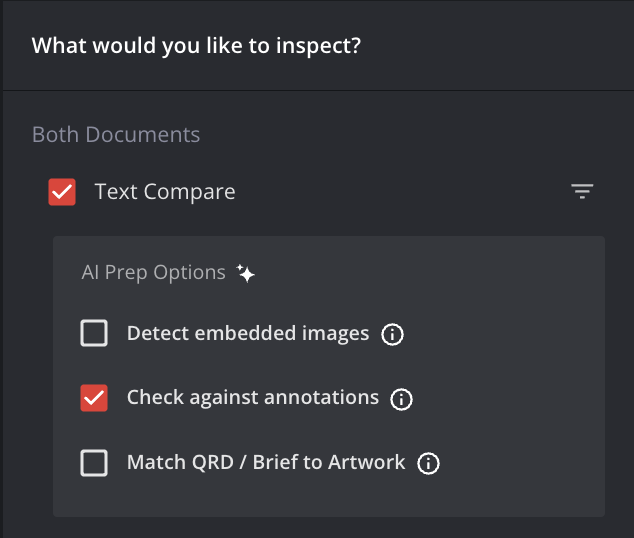
Check Against Annotations
When running a Text Compare, you will be able to check against annotations. This feature checks against annotations to ensure accurate, error-free revisions by detecting if all intended changes have been addressed and implemented in a file when running a Text Compare.
Match QRD/ Brief to Artwork
When running a Text Compare, you will also be able to run an automatic prep and inspection of QRD templates by checking the Match QRD/Brief to Artwork option.
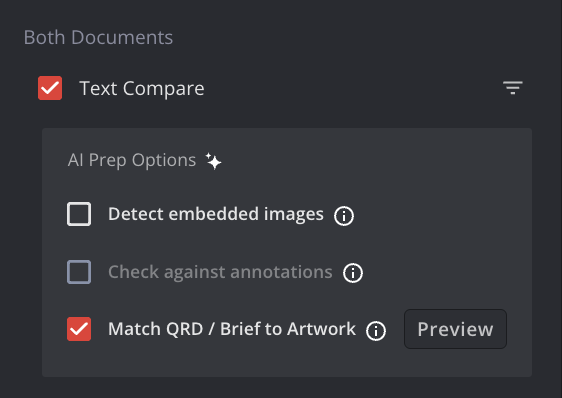
Match QRD/Brief to Artwork allows you to automatically compare QRD templates to outer and immediate packaging artwork files character-by-character, while automatically ignoring headers, greyed out text, and page numbers, and works in all EU languages.
To use Match QRD:
Upload the QRD Annex III document in the Source Panel
Upload your artwork file in the New Panel
Check the Match QRD/Brief to Artwork option
Click Preview
The auto-prep will create marquee zones, matching text from the QRD Annex III to the artwork file. You will then be able to inspect your files.
Pro Tip 1: If you have multiple languages on your carton or label, combine them into a Single QRD Annex Document. This helps improve your inspection’s accuracy by reducing duplicate content and ensuring the system compares against one single source QRD annex doc.
Pro Tip 2: For an even more precise inspection of your QRD Templates, crop the exact zones you wish to inspect.
Graphics Pixel Compare
When checked, 9. Graphics Pixel Compare allows for a pixel-to-pixel graphics comparison to be performed on all the pages available in the uploaded documents.
This inspection is fully automated, and is available at all times. No manual intervention is required to select zones, but rather these areas are created automatically by Verify. Furthermore, Verify will automatically list identified possible graphics differences.
By checking the Graphics Compare selection, you will be given the option to customize your inspection:
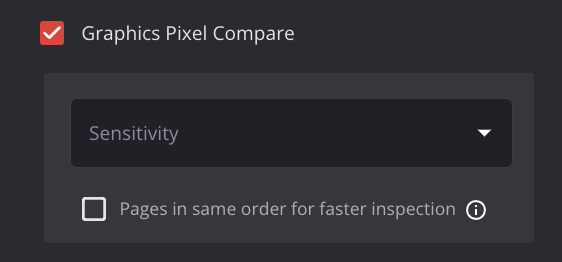
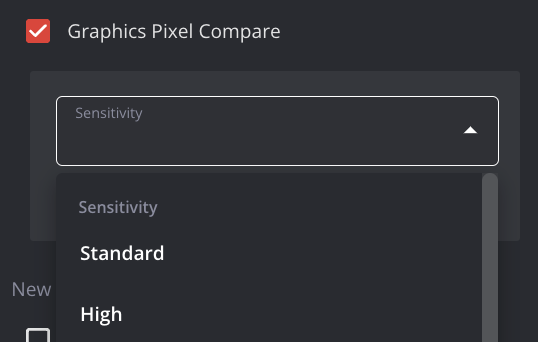
Sensitivity Setting: You will have the option to adjust the sensitivity of your inspection. You can choose to keep the sensitivity to Standard or High.
Pages in same order: You may select this option to make your inspection faster. Tick this option if you are certain that the Source and New files you are comparing have the exact same page order.
Spell Check
With 10. Spell Check enabled, Verify will flag spelling errors that exist in your New document (Comparison Mode) or in the document uploaded in Proofreader mode (single-file inspection).
Check the Spell Check box.
Select the correct language of your files from the dropdown menu. It is also possible to apply Custom Dictionaries to your Spell Check, allowing you to use multiple dictionaries for a Spell Check inspection.
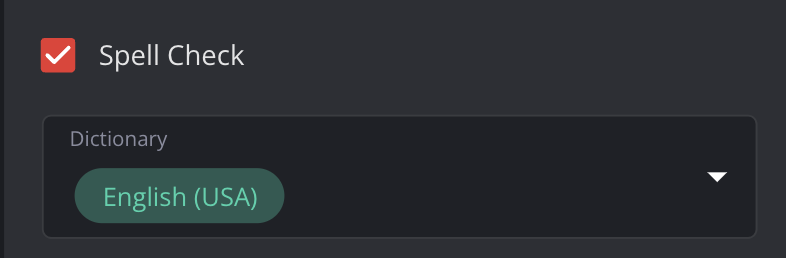
You can select multiple languages when running a Spell Check.
Custom dictionaries allow Latin special characters (i.e. accented vowels) as well.
Once all relevant languages and dictionaries are selected, they will appear in the list as applied dictionaries
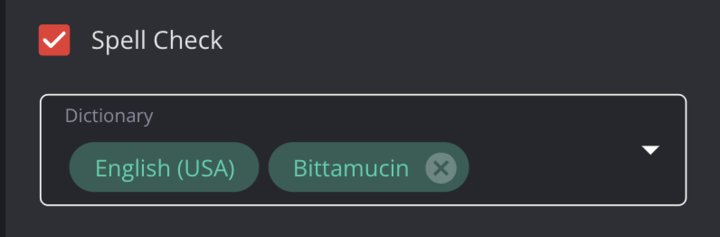
To remove languages or Custom Dictionaries from your Spell Check inspection, click on
 .
. Results will display after you click Inspect.
Note: Custom Dictionaries can be applied by users but cannot be added or modified. However, you have the ability to propose additions to dictionaries while reviewing the inspection results.
An Admin Role is required for Custom Dictionary creation and modification.
Barcode & QR Code Inspection
With 12. Barcode & QR Code checked, Verify will analyse and inspect available barcodes and QR codes in the Source and New files (Comparison Mode) or in your single-file (Proofreader Mode).
This feature can be enabled easily and it will perform the identification and grading of all barcodes and QR codes available in the document.
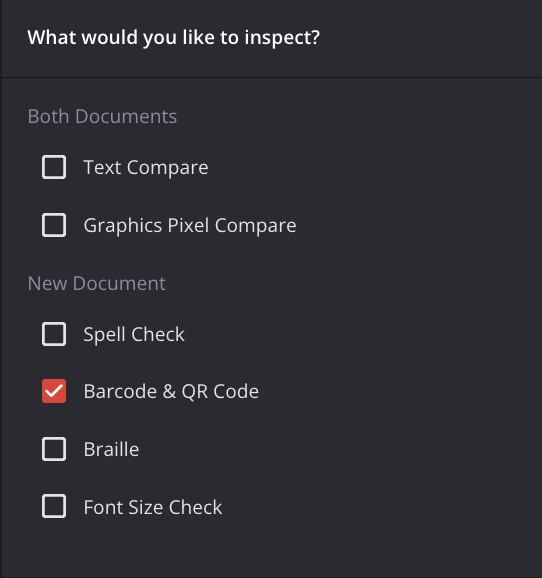
Note: In comparison mode, the inspection is performed solely in the New file. As such, the Barcode annotation/details description will be listed for the New file only.
Barcode Inspection automatically decodes and grades barcodes based on a variety of quality parameters.
The following 1D barcodes are decoded:
Codabar
Code 11
Code 39
Code 128
GS1- 128
Interleaved 2 of 5
MSI
Pharma Code (Rotated 0 and 180 degrees decode values)
RSS/ GS1 Databar
RSS/ GS1 Databar Stacked
RSS/ GS1 Databar Limited
RSS/ GS1 Databar Expanded
RSS/ GS1 Databar Expanded Stacked
TelePen
EAN (13 Digits)
EAN (8 Digits)
UPC-A
UPC-E
The following 2D barcodes are decoded:
Data Matrix
GS1 DataMatrix
QR
Micro QR
Braille Inspection
With 12. Braille checked, Verify will analyse available Braille areas in the Source and New files (Comparison Mode) or in your single-file (Proofreader Mode).
Once selected, the language selection will be prompted on the screen.
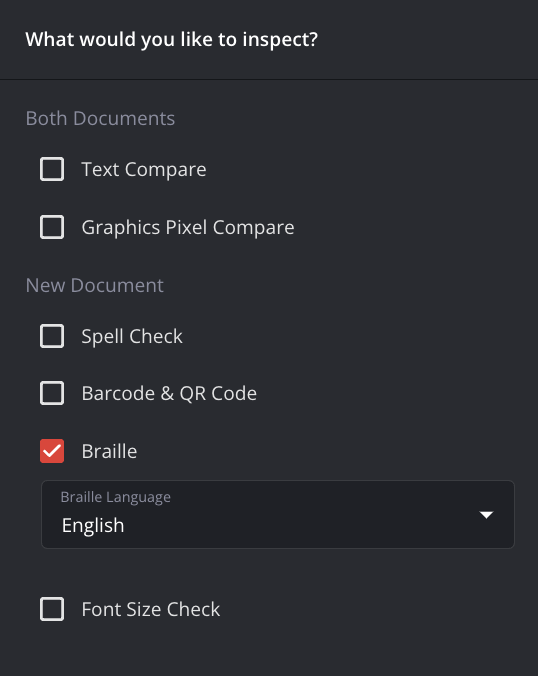
Braille Inspection is available in 44 languages.
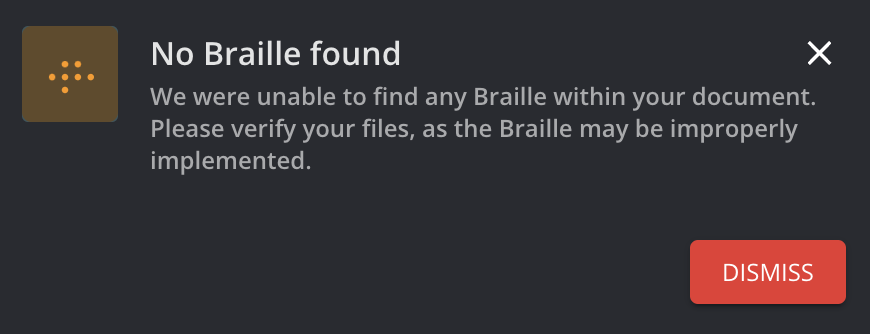
Note: If no Braille area is found, the following message will pop up on screen.
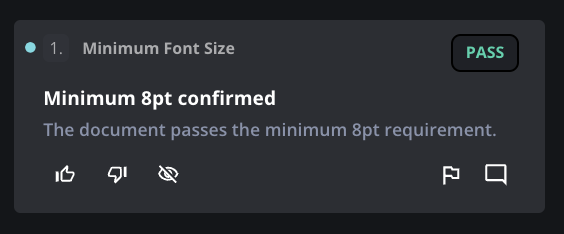
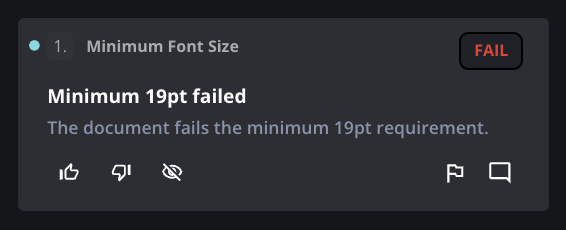
Font Size Check
With 13. Font Size Check checked, Verify will analyse the font size in the New file (Comparison Mode) or in your single-file (Proofreader Mode).
This feature checks against a minimum point size to determine if their document meets the expected size for compliance and regulatory standards.
Once selected, you will be prompted to enter the minimum point size you would like to inspect for in your document.
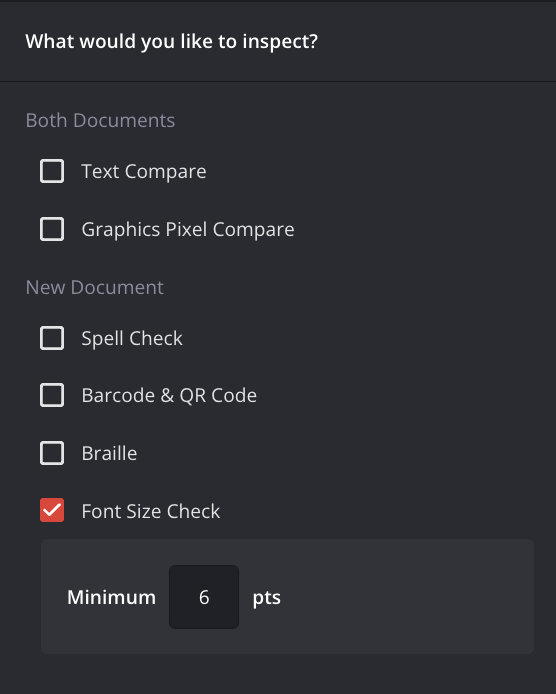
If your font size is all within the minimum point size inspected, you will get this a pass. If your font is not within the mimimum point size, you will get a fail.
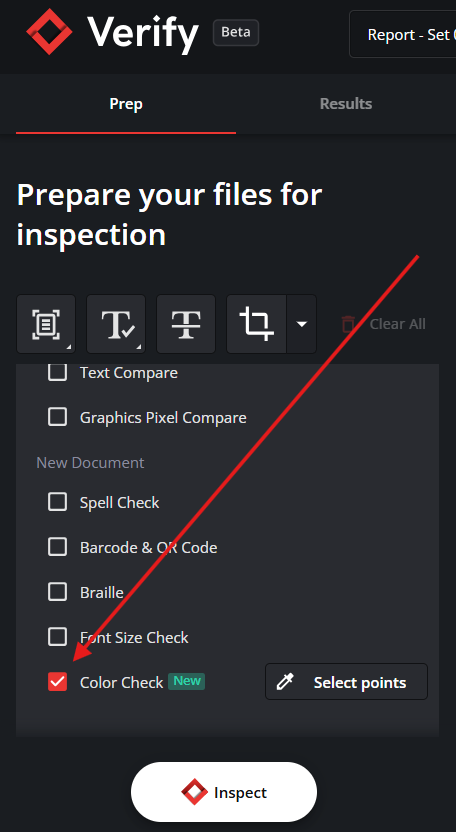
Color Check
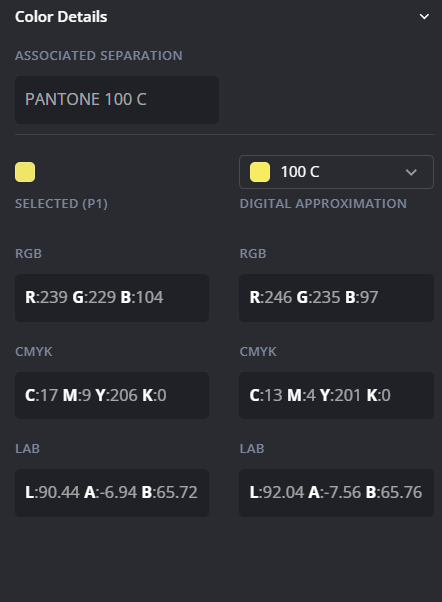
With a color check inspection, you can select points on your file and see the corresponding Pantone® color values.
Select Color Check on you inspection list. (Note that color check applies to the new, right hand file only)
Select the color picker to choose points on your file
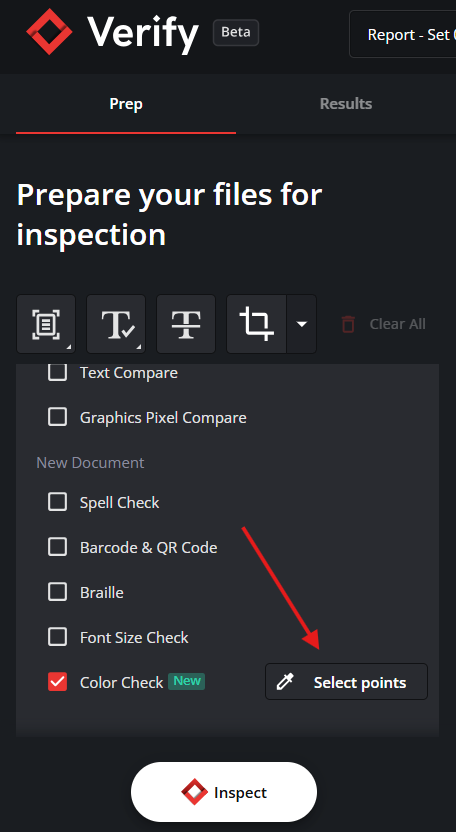
On your new file, select the points that you would like to check for color consistency
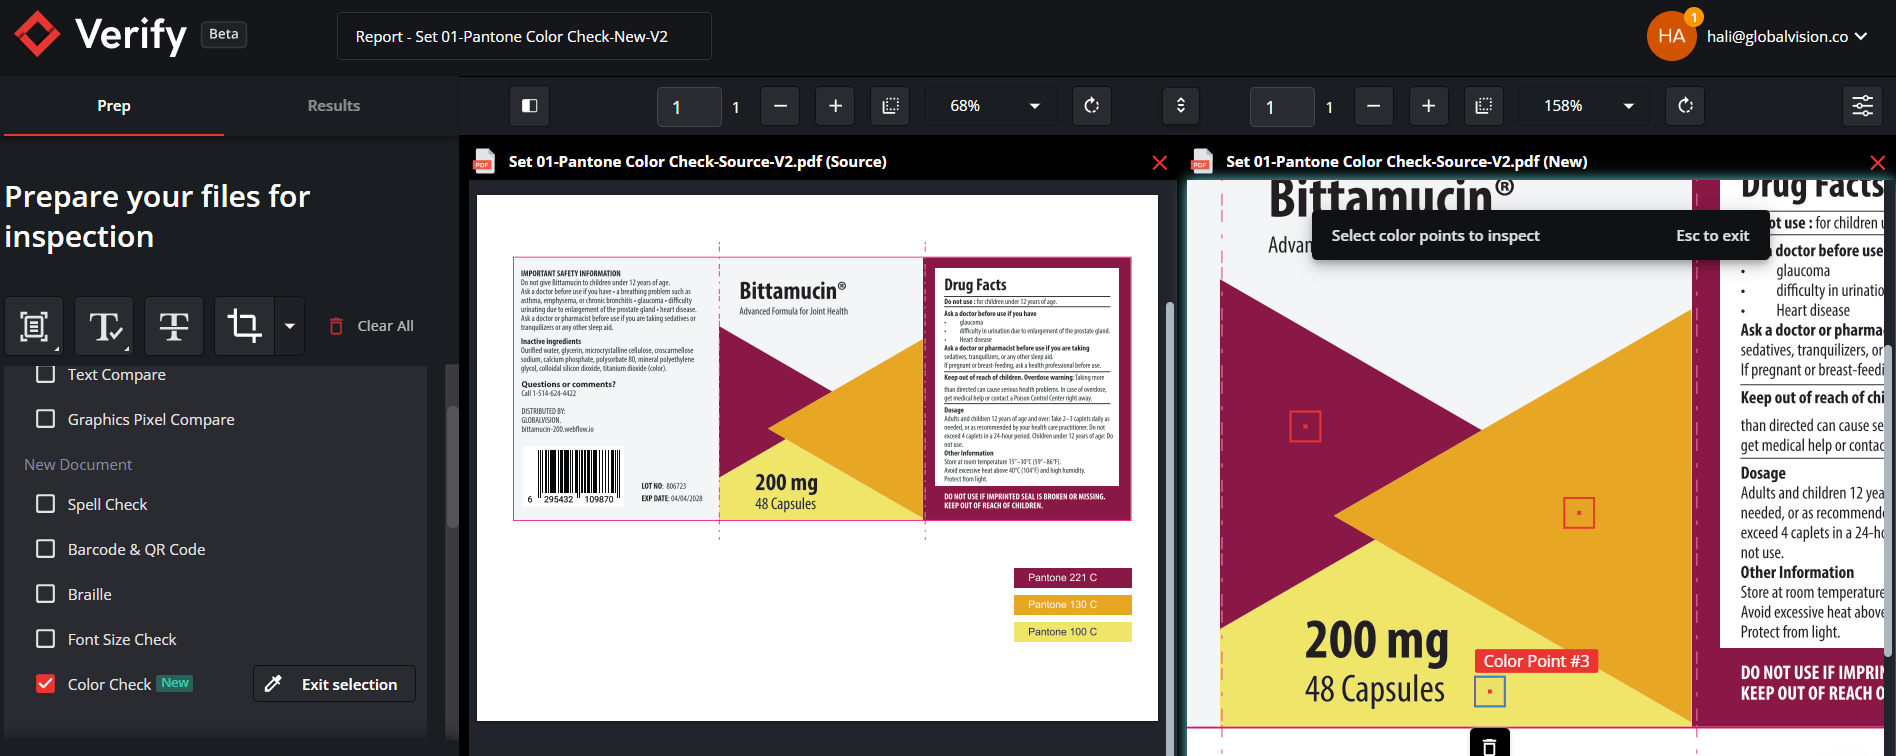
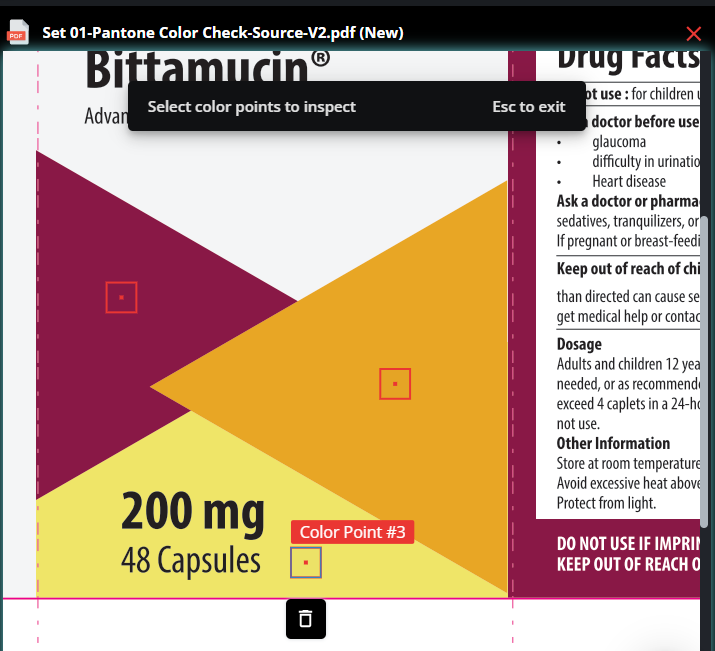
Run your inspection
Your color check results will show up in their own results card. Each point you selected will have it’s own color result card.
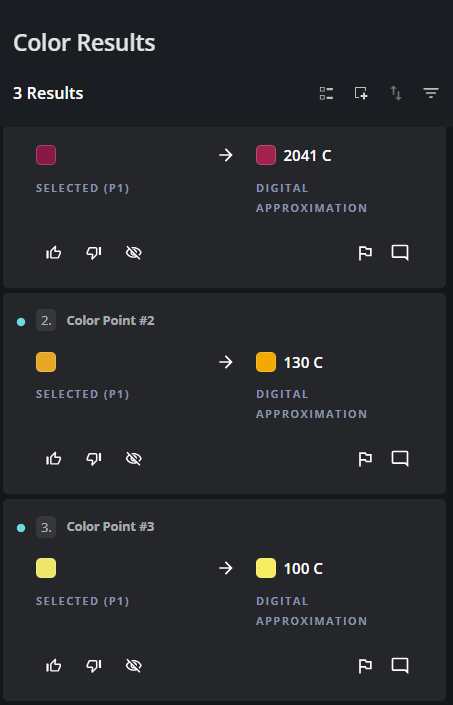
Review results by clicking a card to show color details. If a separation with a specific Pantone appears in your file’s separations, Verify lists that separation’s color values in the first column. The second column shows your selected point's color values and the closest Pantone value as a digital approximation.
Layers & Separation Controls
14. Layers & Spot Color Controls allows the breakdown of all layers and colors identified in your uploaded files. It is possible to select or hide any combination of relevant layers and colors to be considered during your inspection.
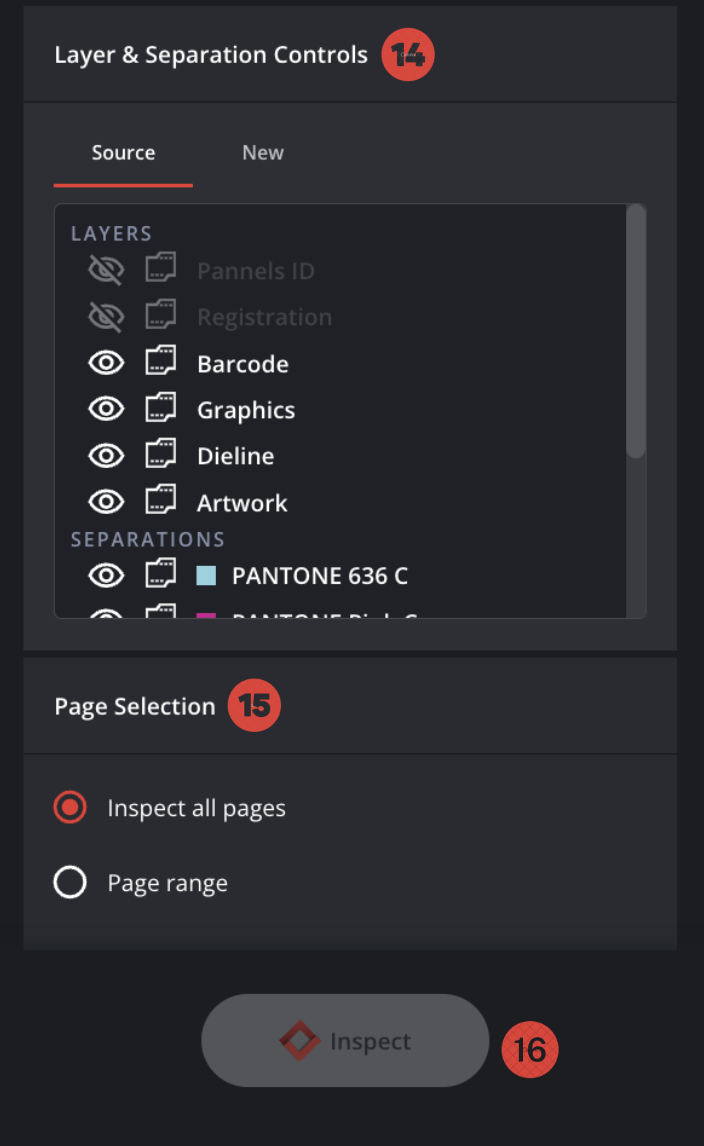
This functionality will show the layers and colors identified in your files.
Note: You can now show/hide Layers and Spot Colors in the Prep Tab. Graphics Inspection will be affected by visibility of the Spot Colors (meaning only visible Spot Colors are inspected).
When both files have Layer & Spot Color enabled, both should have the same applied layers for an optimal inspection.
Overprint Toggle
If your separations have settings that are tied to overprint, you can toggle those ‘on or off’ for both the source and new document in preparation for inspection.
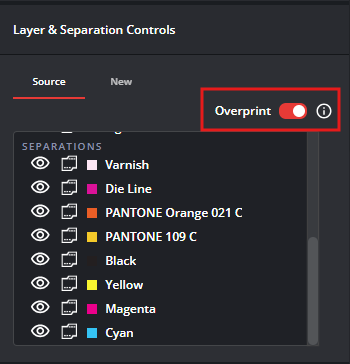
The Overprint status affects inspection results:
When On, layers and separations tied to overprint are reflected in the inspection.
When Off, these overprint effects are not included.
With Overprint Off, you cannot toggle separation visibility. To adjust or view separations, make sure Overprint is turned On.
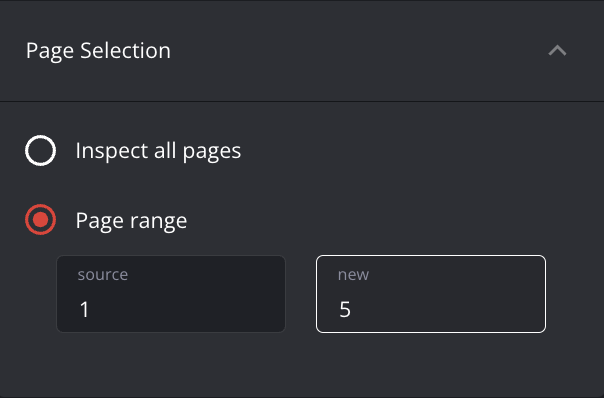
Page Selection
15. Page Selection allows you to include or exclude pages from a multi-page document when running an inspection. The options are Inspect All Pages and Page Range.
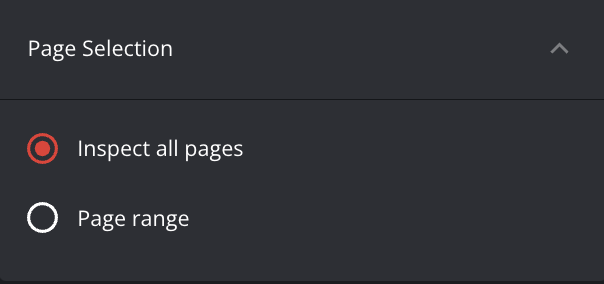
Inspect All Pages: Every page in the document gets inspected.
Page Range: Allows you to limit the inspection to the indicated pages of the Source and New files by entering the range of pages desired.
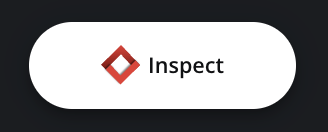
Inspect
While in the Prep tab, click 16. Inspect to run an inspection. Once completed, the inspection results will be displayed in the Results tab.
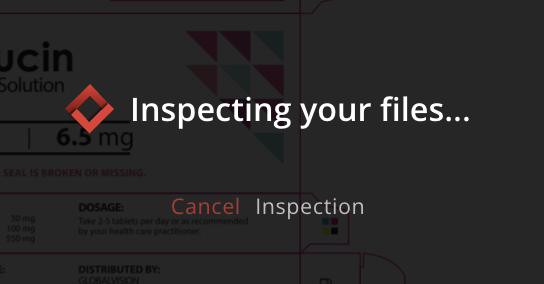
Canceling an Inspection
To cancel an Inspection:
Click on the Cancel button while an inspection is running. Your inspection will be cancelled and you will be brought back to the Prep stage.