Getting Started
Account Creation
There are two options to create a User in Verify:
Single Sign-On (SSO)
Create a User with Password login
Details on how to create users or enable SSO on existing users are described in the Administration Guide.
Single Sign-On (SSO)
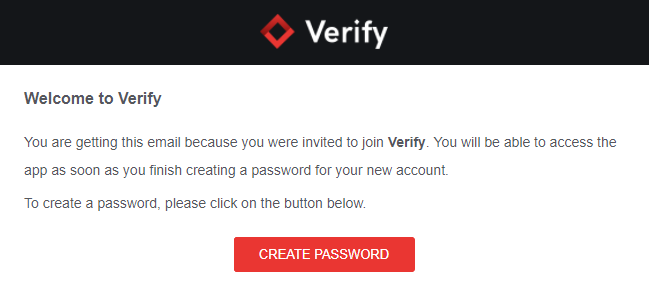
When a user is created with SSO enabled, an email will be sent to the given email address.
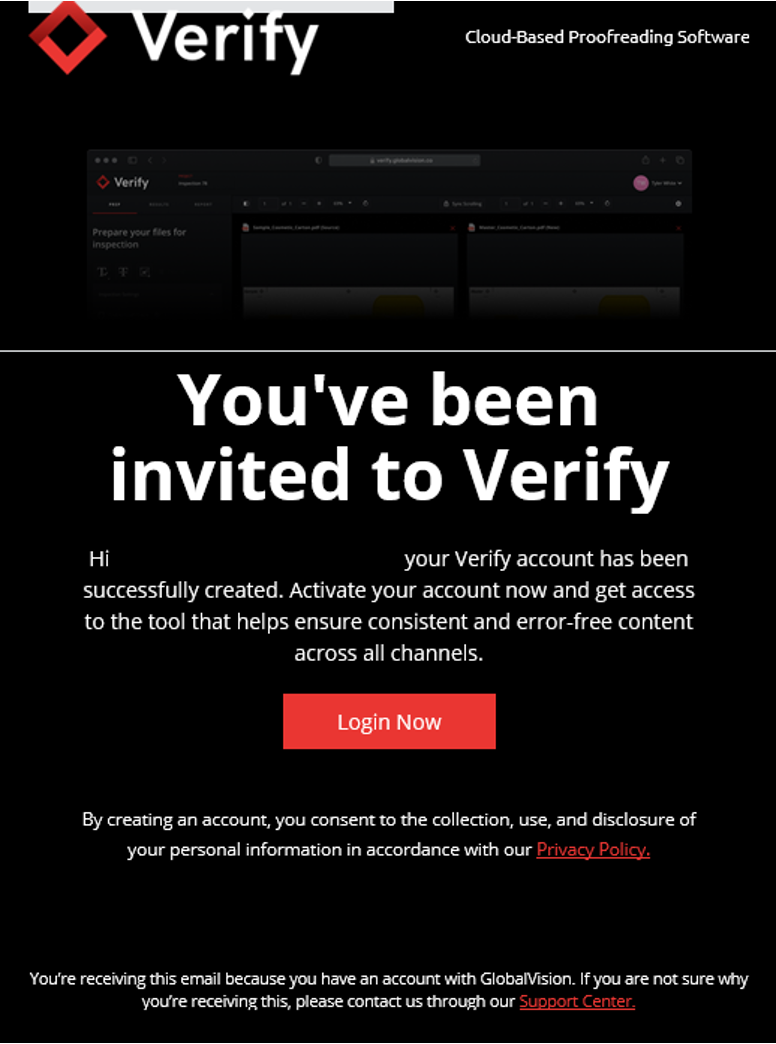
By clicking on Login Now, you will be taken to the Verify Login page where you will have to enter your email.
You will then be prompted to login via your SSO provider.
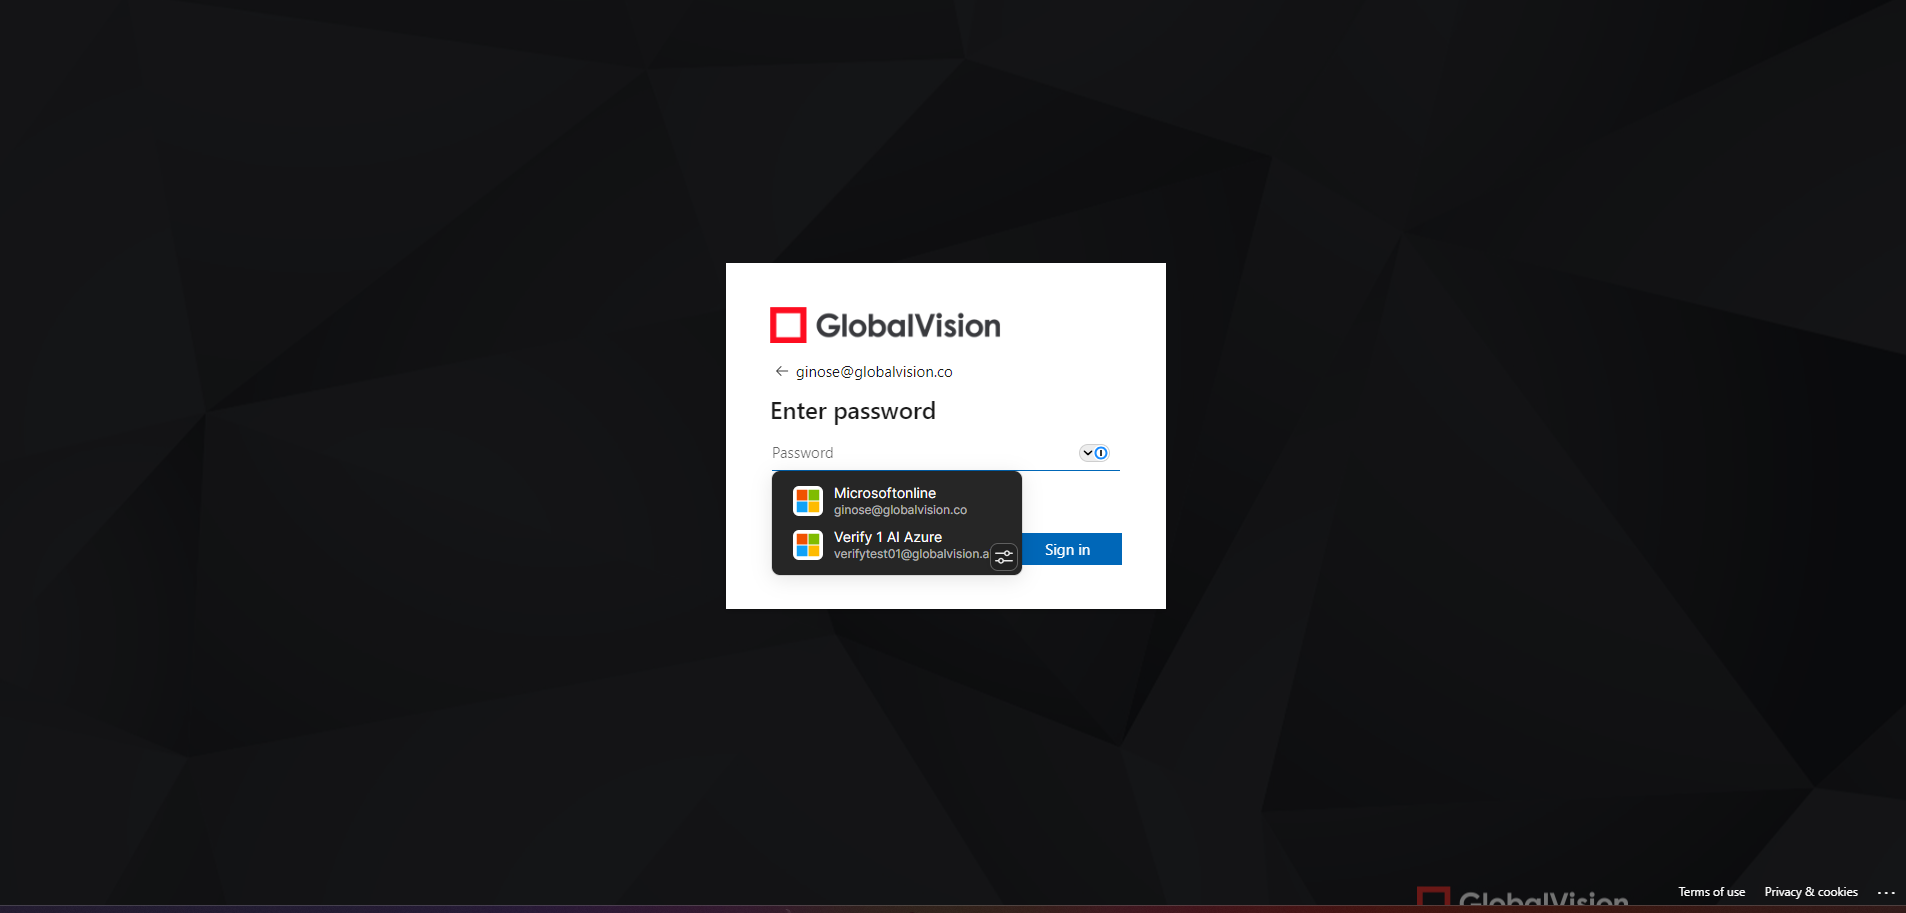
Once successfully logged in, you will be taken directly to the Verify main page.
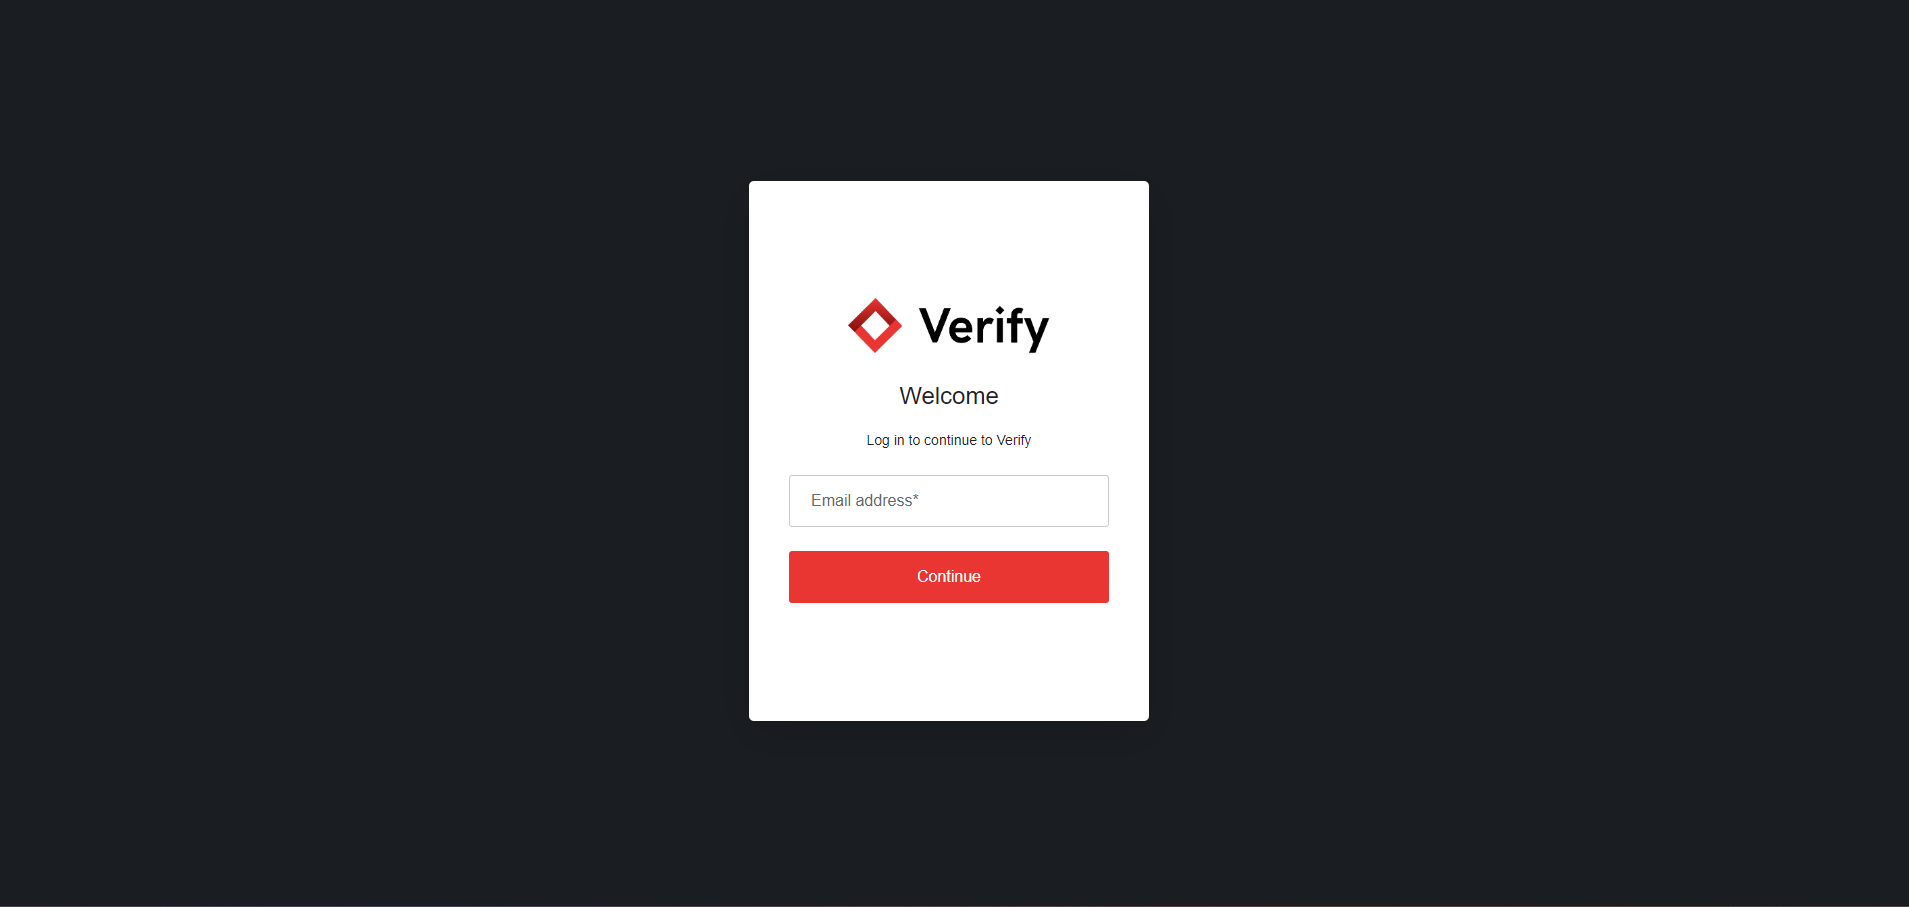
Logging In
Enter your Email Address
Login via your SSO provider
Click Continue
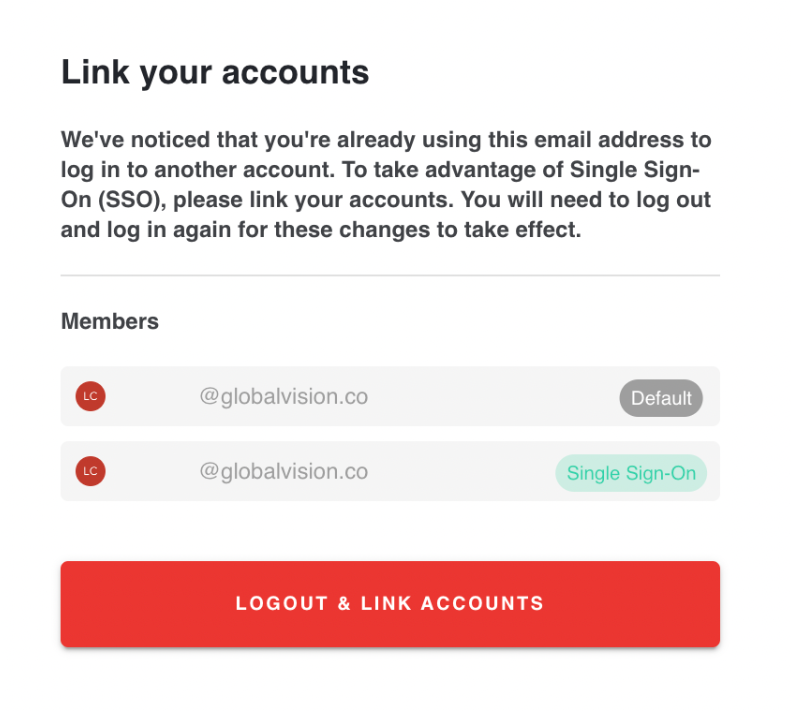
Linking default and SSO accounts
It is possible to link an existing default, user-password-based account to a Single Sign-On account when the latter is enabled on that specific account. The user needs to click on the Logout & Link Accounts button to link the accounts.
User-Password Login
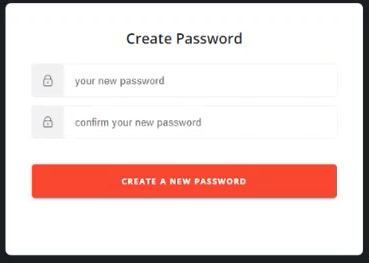
Once the Administrator creates your account, an email will be sent allowing you to create a password to finalize the account details.
Click Create Password
the Verify password creation window will launch
Enter your new password
Confirmation your new password
Click Create a New Password
Password Criteria
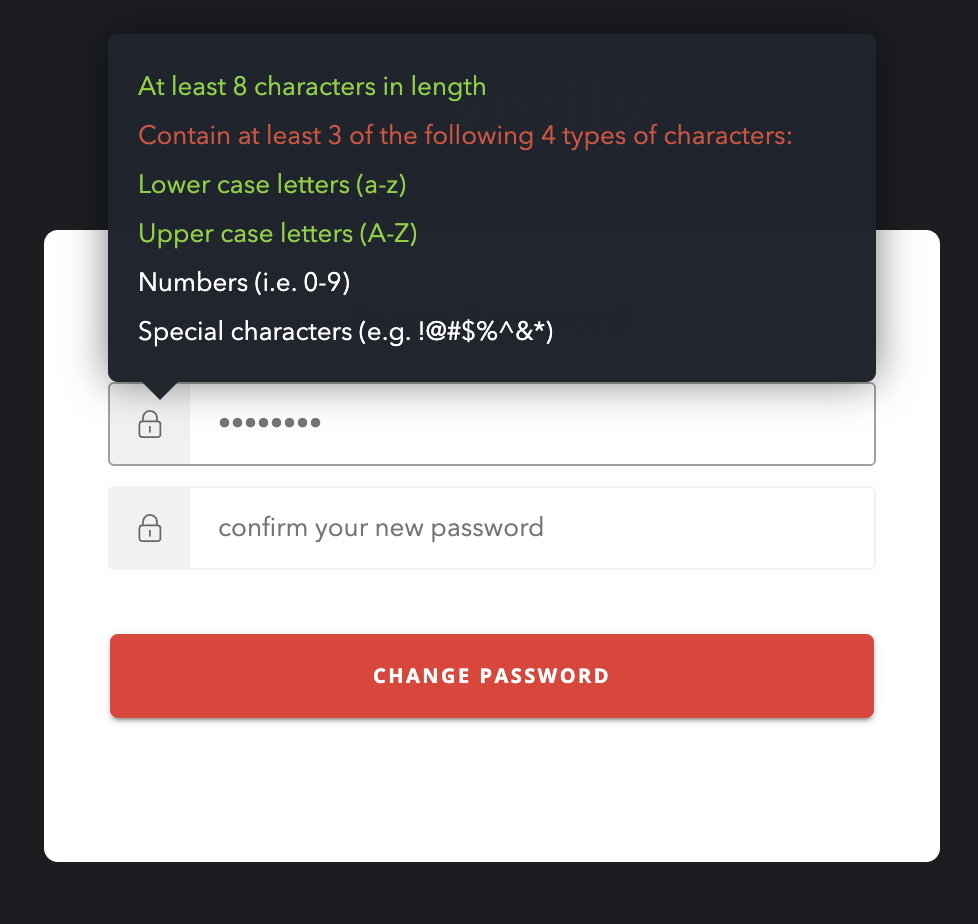
Passwords need to meet the following criteria:
Be at least 8 characters in length
Contain at least 3 of the following 4 types of characters
Lower case letters (a-z)
Upper case letters (A-Z)
Numbers (i.e. 0-9)
Special characters (e.g. !@#$%^&*)
If the password meets the above criteria, the following message will display indicating that your password has been successfully created:
‘Your password has been created successfully'.
You will then be prompted to log in.
Logging in
Enter your Email Address
Click Continue
Fill in the Password field as requested on the page
Verify supports Google Chrome browsers for all versions of the application, as well as Microsoft Edge.
Logging out
Click the name displayed at the top right corner
Click Logout from the dropdown
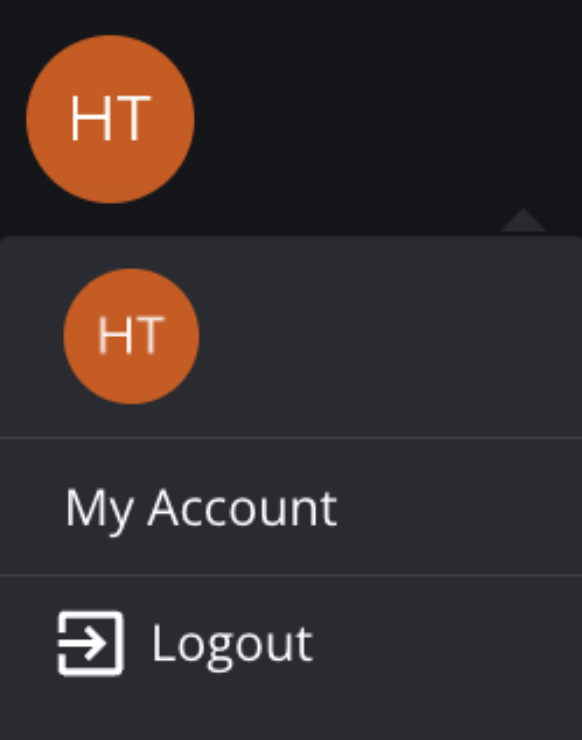
You will then be prompted back to the login screen.
Forgot password without SSO
In case you forget your password,
Click Forgot Password from the login page
The email address will be pre-filled, but it is possible to change it, if so required.
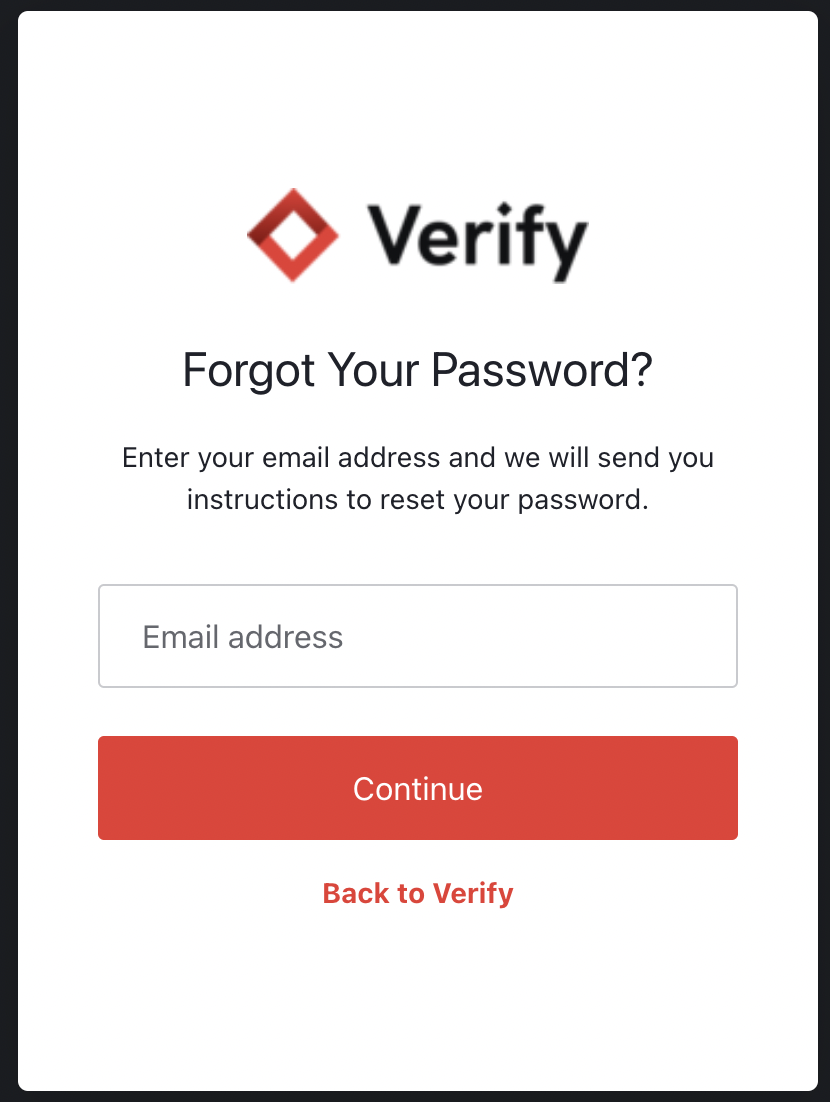
Click Send Email
You will then get a message informing you that an email has been sent to reset your password
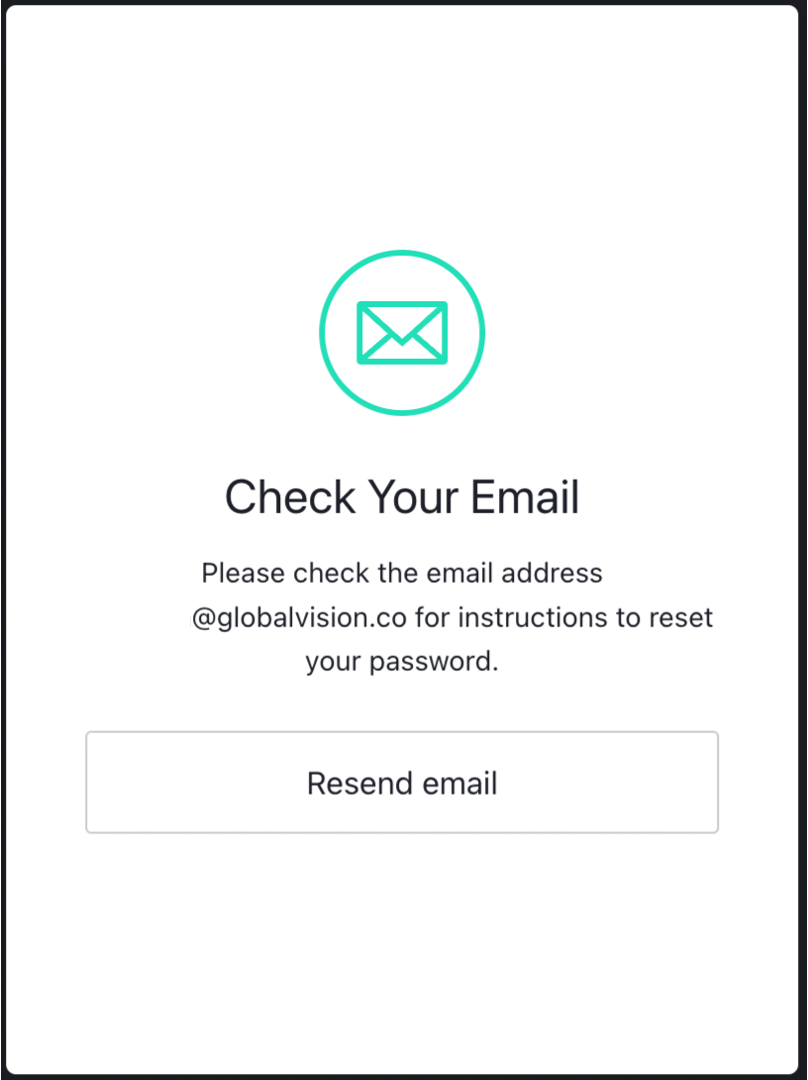
Check your email and follow the instructions to enter a new password
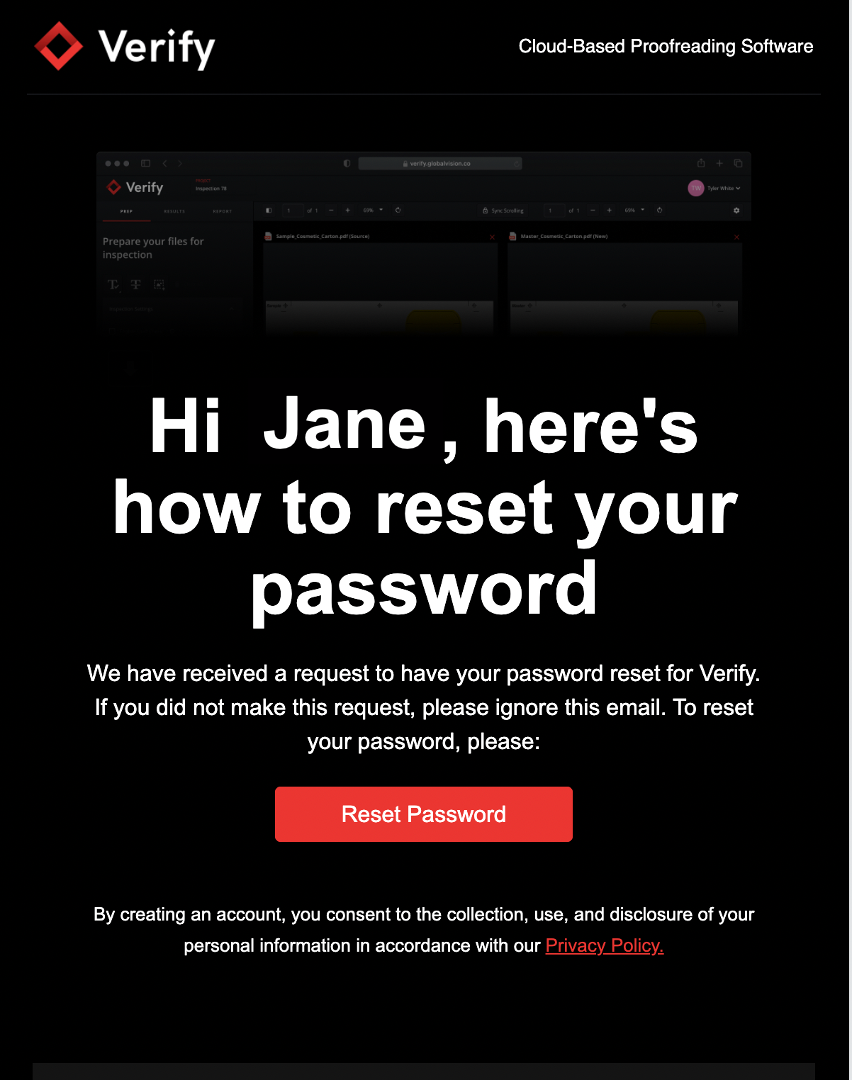
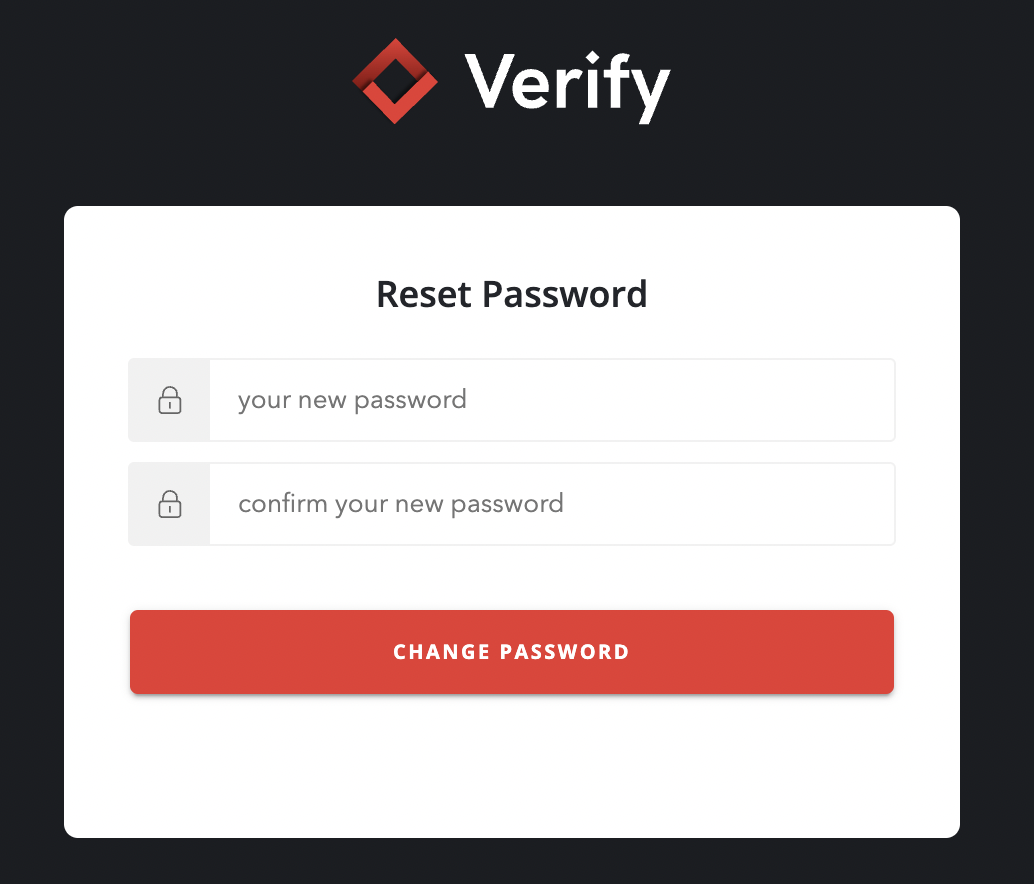
Click Reset Password
The Verify password reset window will launch
Enter your new password as requested
Click Change Password
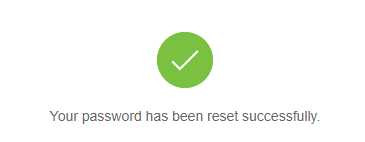
If the password meets the criteria, a message will display indicating that your password has been successfully reset:
‘Your password has been reset successfully'.
You will then be prompted to log in.
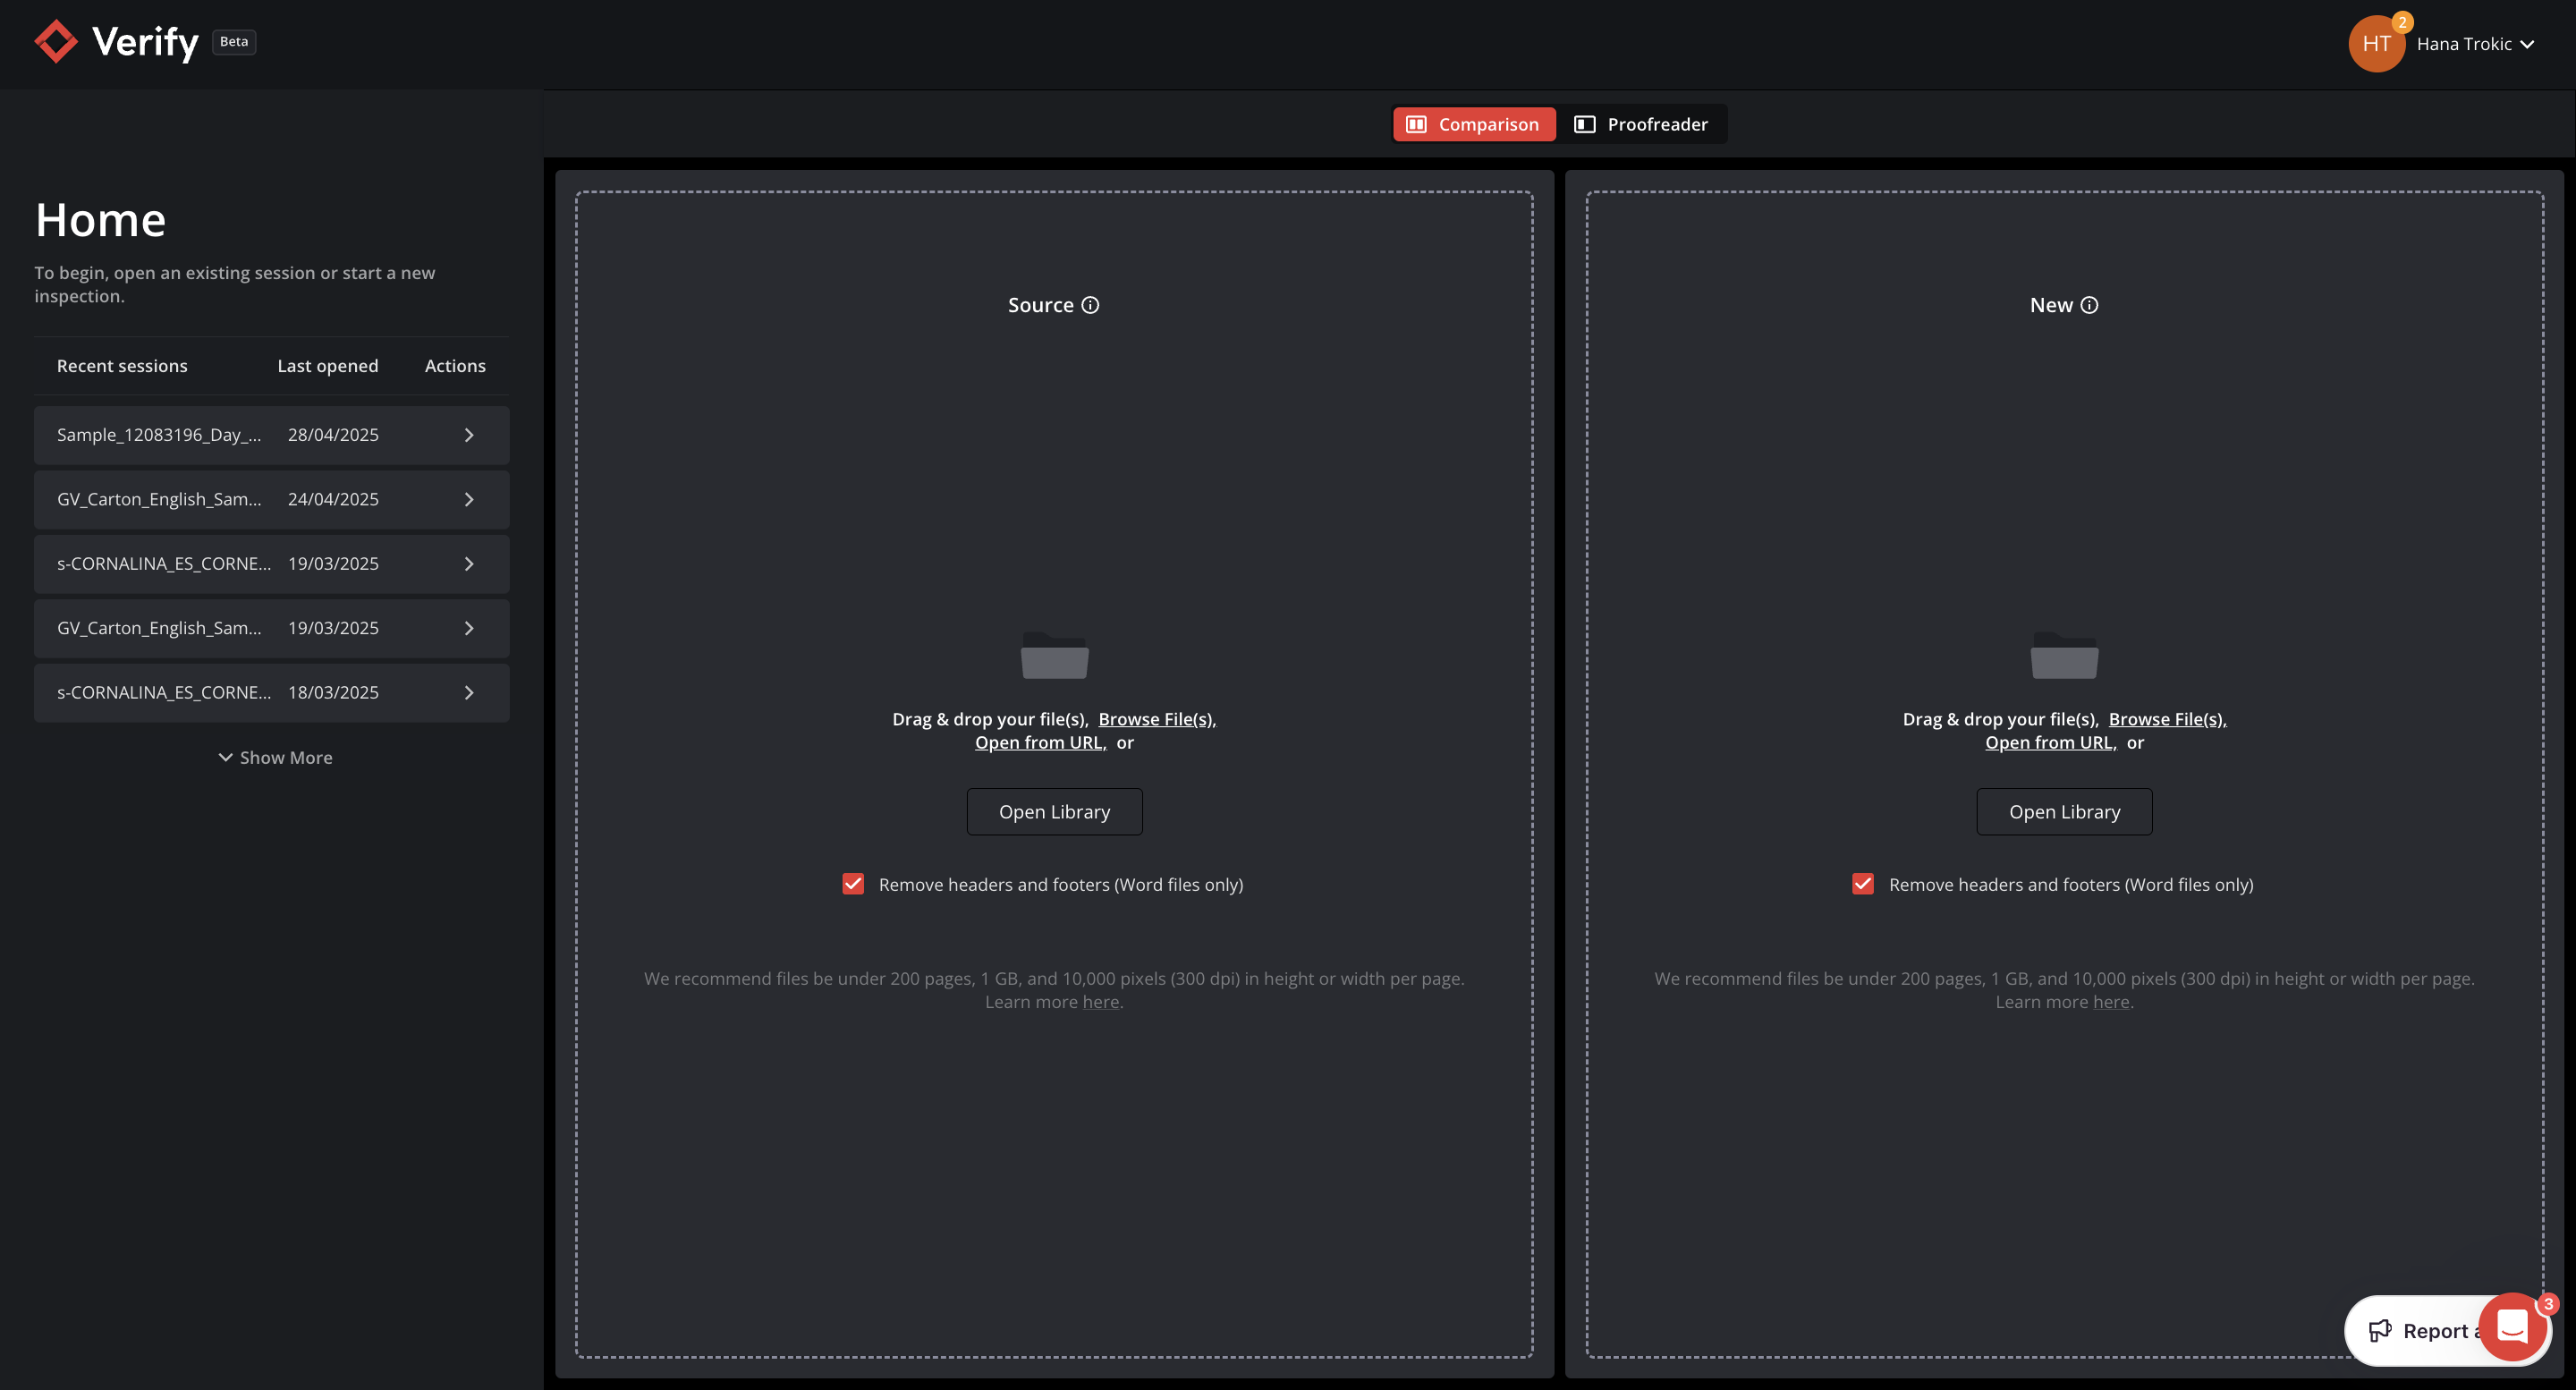
Once logged in, the Verify home page will display.
The password criteria check will pop up while inputting a new password. This is to help users set an approved new password.
Password history is not enabled in Verify. You can re-use passwords you have used in the past.
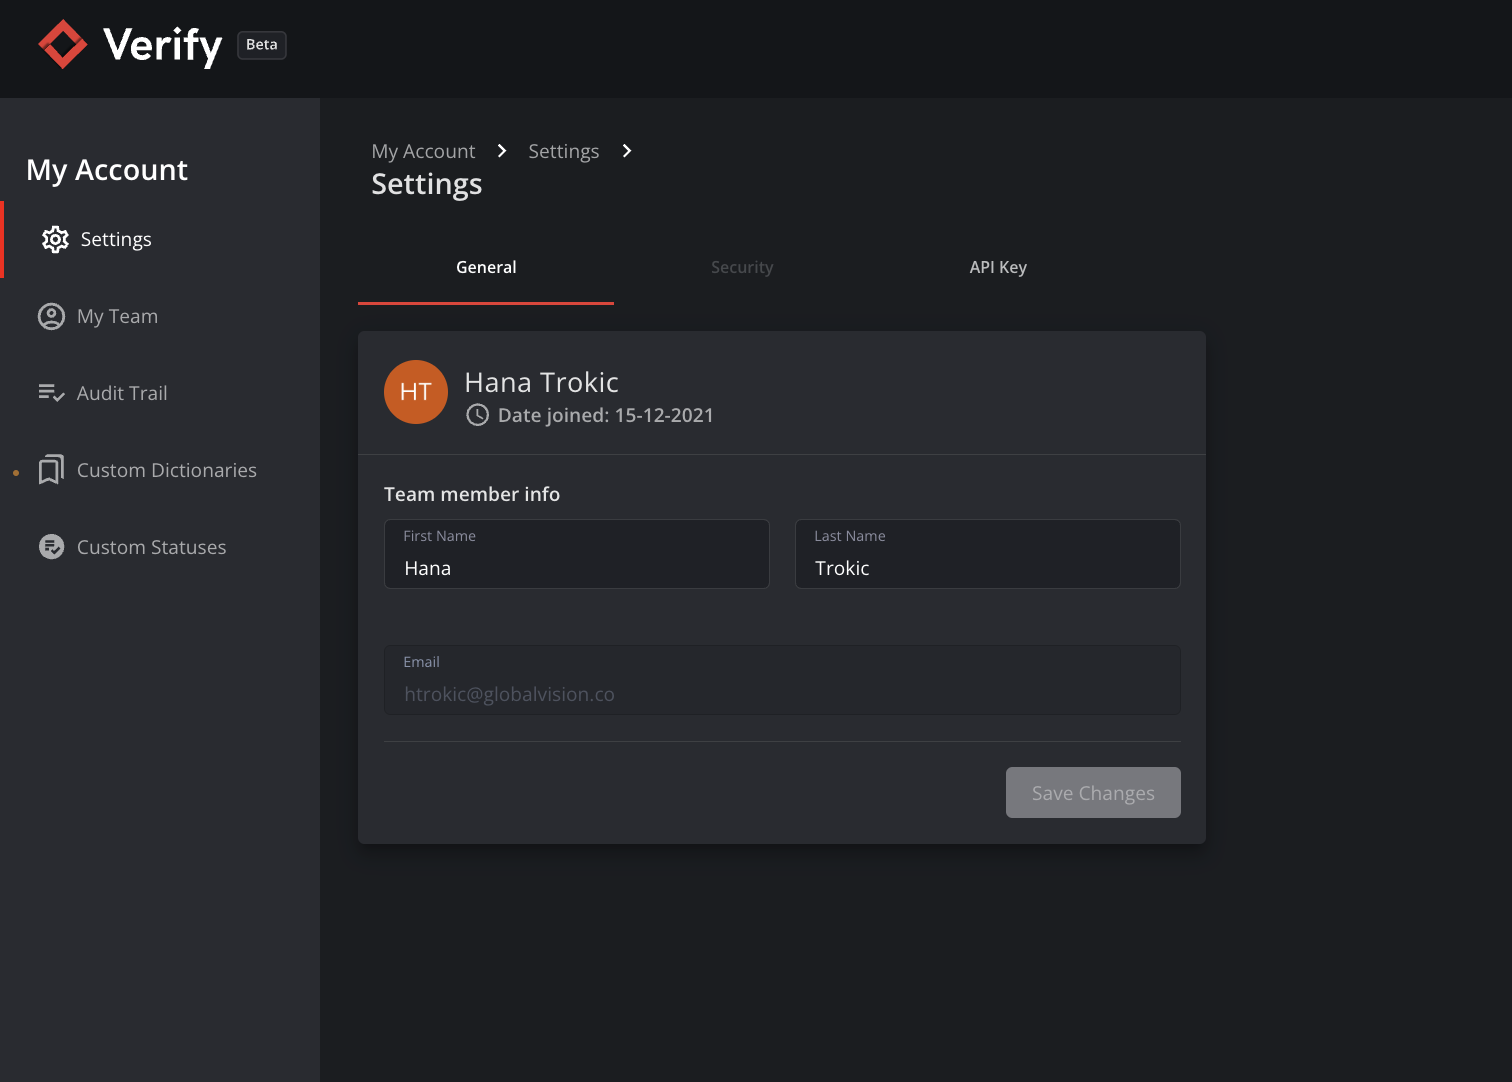
My Account
Click on the name displayed at the top right corner to access your account information.
Click My Account
Note: For the User access group, the only available rights will be the ones under the Settings tab.
General Tab
The General tab provides information on the 'team member’ (user) such as their name and email address. Only the first name and last name can be edited by the user.
Security Tab
In the Security tab, you can change your password.
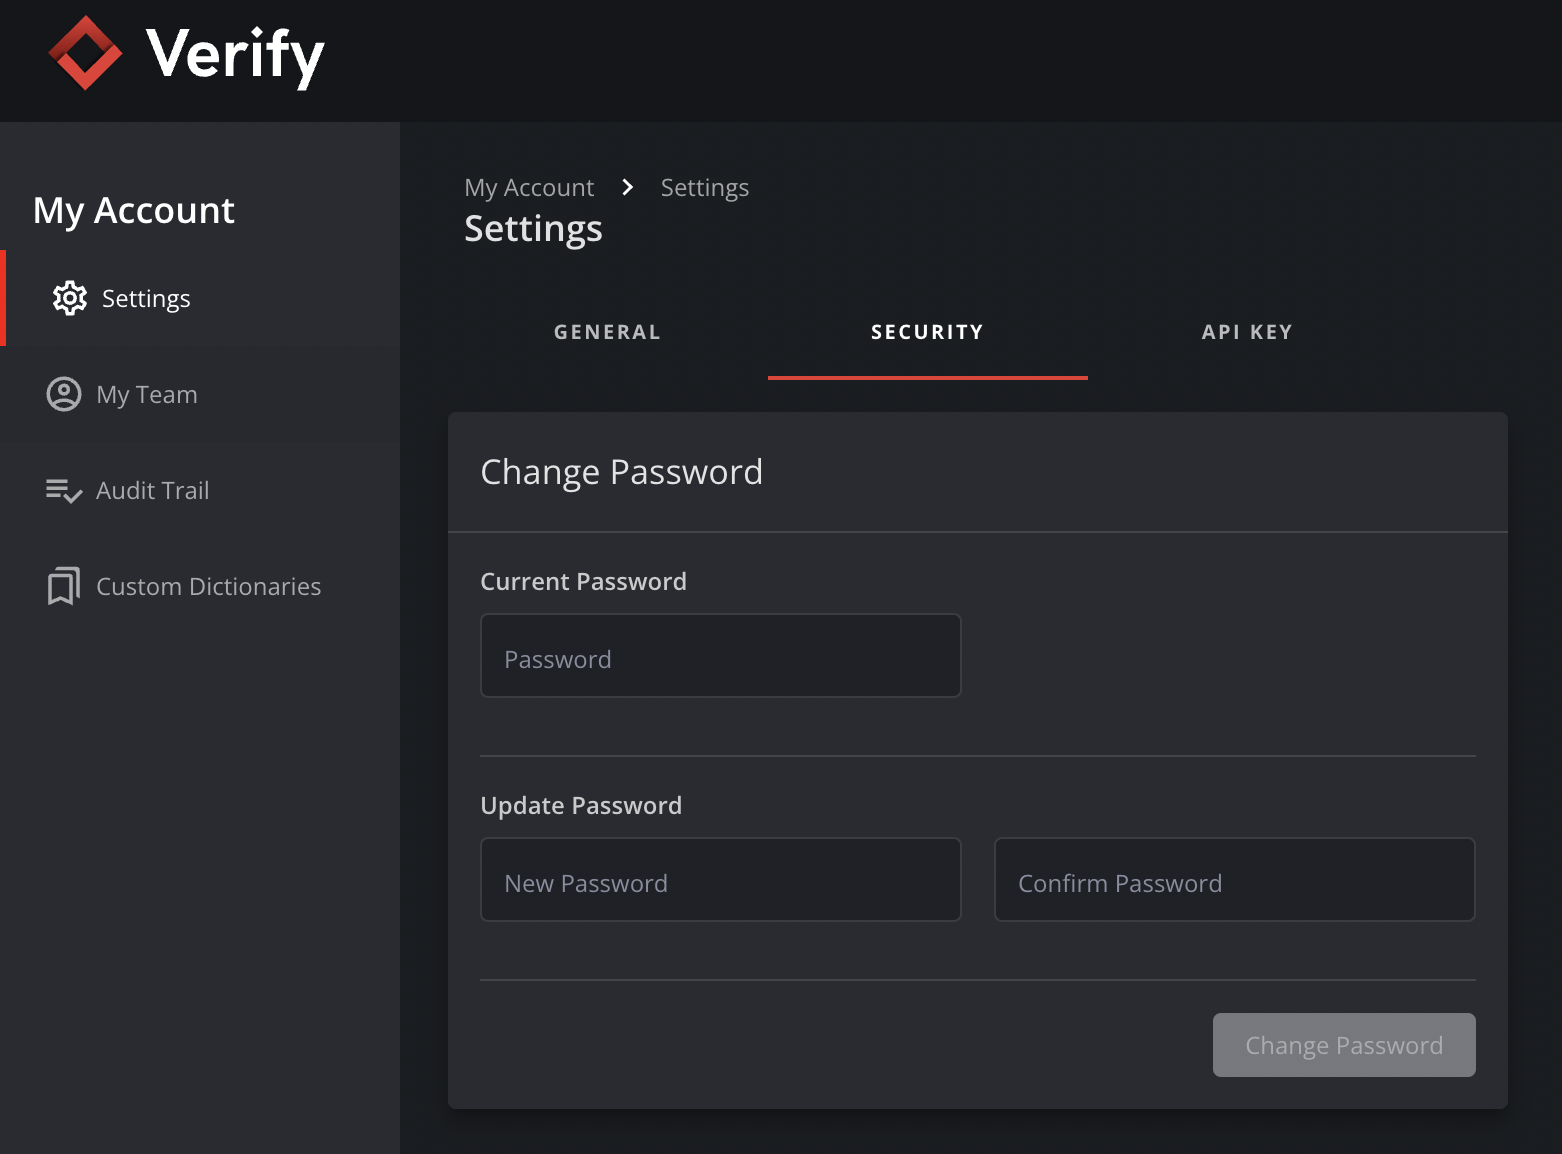
Note: The Security tab is disabled when SSO (Single Sign-On) is enabled on the user.
Generate your API Key
Programmatically upload files and download reports with Verify APIs.
Once the API key is generated, it can be pasted into the third party application.
Here’s how you can generate one for yourself:
Log in to Verify
Navigate to the user section and click My account > Settings > API Key
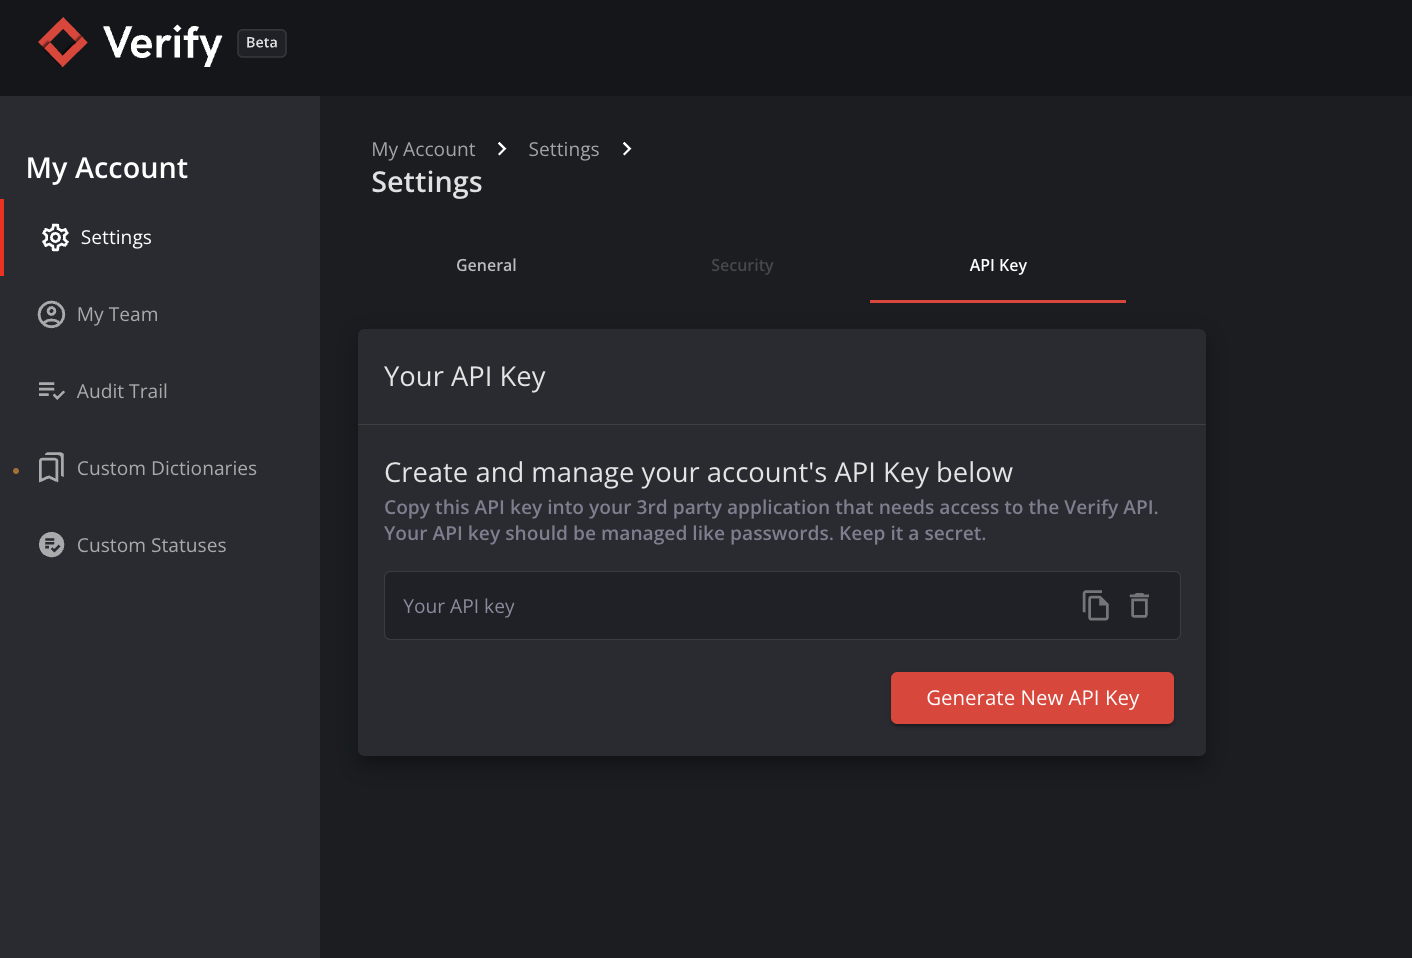
Click Generate New API Key
Copy your New API Key
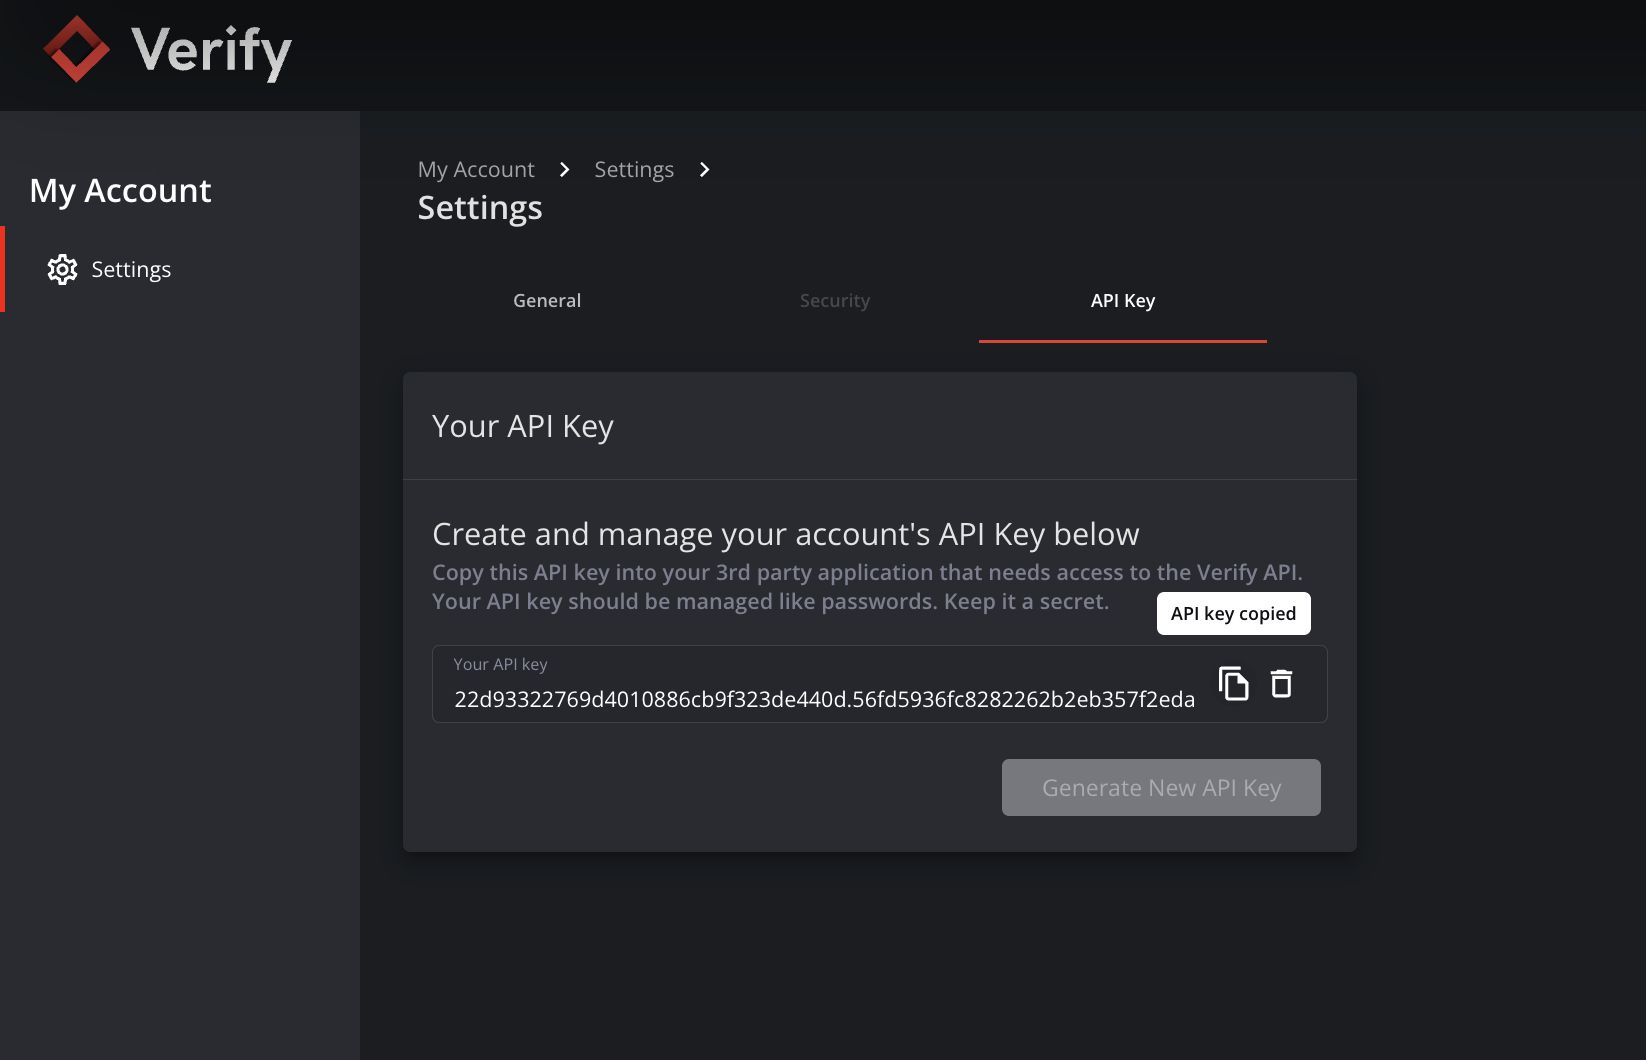
Your API Key should be managed like a password. Do not paste or share it anywhere. Treat it as a secret.
For further information on setting up an API connection, please contact our Support Team.