Step 5: Troubleshoot any Errors or Issues
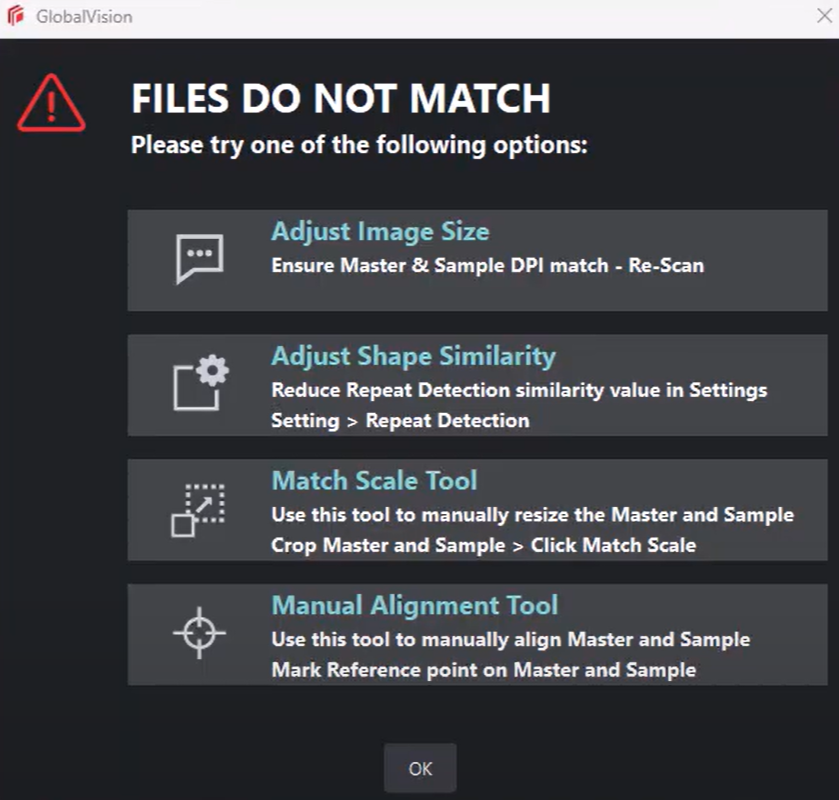
Error message: Files Do Not Match
Error Message: Files Do Not Match
When conducting a Graphics Inspection, the following error may occur.

To match the Master and Sample files, try one of the below presented options.
Adjust Image Size
Change the resolution to match the Master to the Sample by going to: Menu > Resolution > Custom, or re-scan your sample.
Match Scale Tool
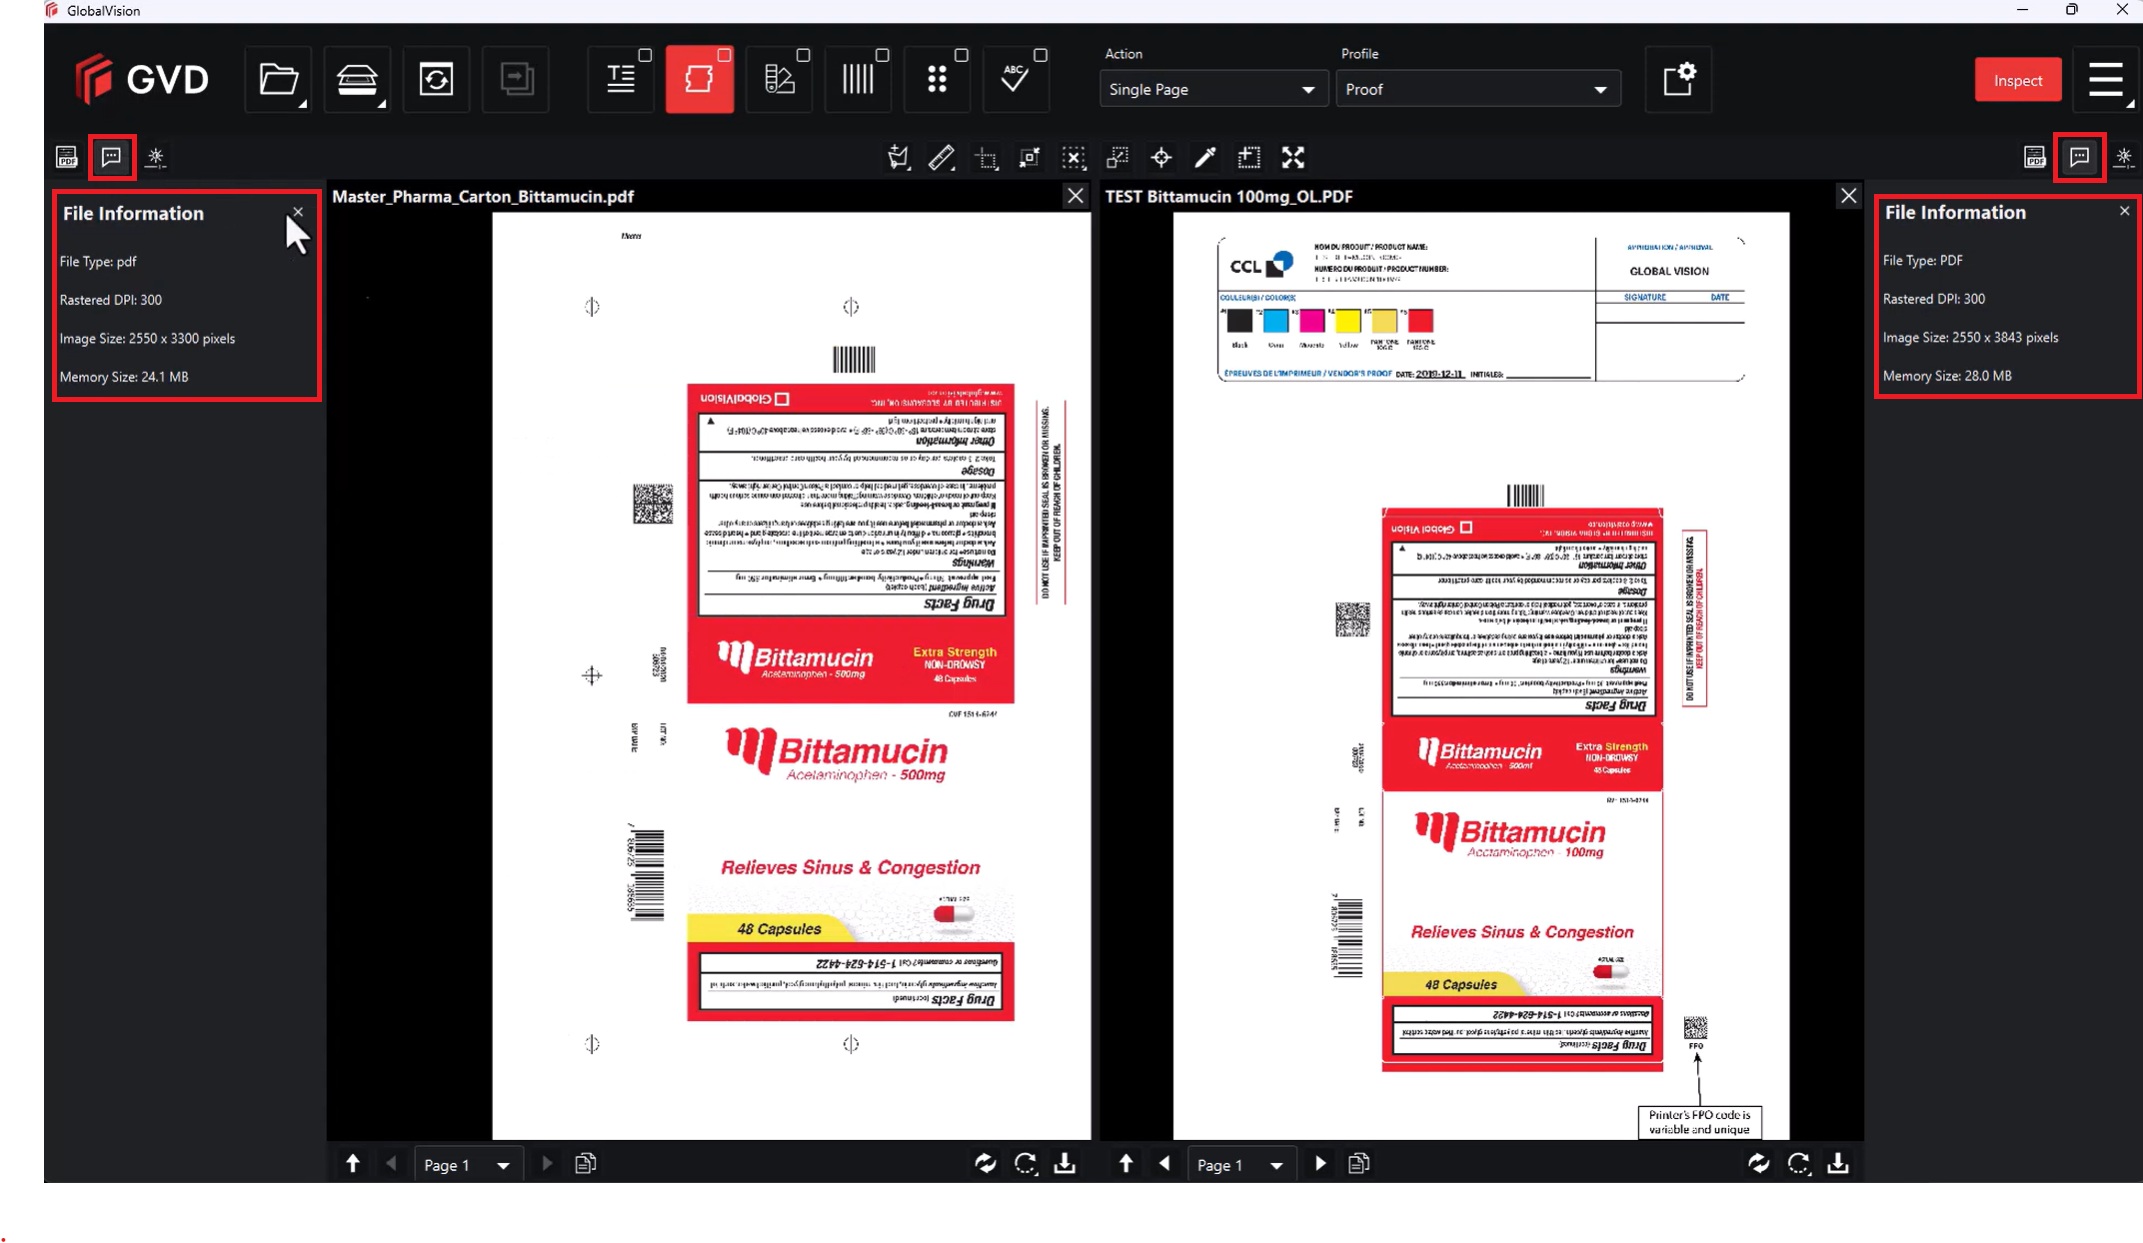
Normally, GVD will perform the inspection when the image sizes are double or half of each other. Click the ‘File Information’ button top left from the Master file and top right from the Sample file to check the image sizes.

The Match Scale Tool allows you to manually resize the Master and Sample files by going to: Crop Master and Sample > Click on Match Scale.
Scale & Shift
Select an area using the Crop feature. The Scale & Shift option will appear at the bottom of the selection box. An anchor point is required, in order to find the same area in the Sample file. Select (pinpoint) an anchor point on the Master file and the Sample file both. When both anchor points are set and the selection was performed, the inspection may be started.
Adjust Shape Similarity
Reduce the Repeat detection similarity value in Settings by going to: Profile Setting > Repeat Detection.
Manual Alignment Tool
Use this Tool to manually align the Master and Sample files or to mark Reference points on Master and Sample files.
Support Rotated Repeats
If you’re running the inspection with a Sample image that contains rotated repeats of the Master, make sure to keep the option Support rotated repeats ON in Preferences (it is ON by default).

With this option ON, GVD supports arbitrary rotated repeats detecting for Graphics inspections. During the inspection, the images are compared without considering rotation.
Note: Having this option enabled increases inspection time.
See it in Action
For additional information, visit:
Error: The Entire Sample is Flagged as a Difference
This happens on rare occasions when the quality of the scan is poor. To fix this:
Re-scan the sample and ensure you use the correct Nextimage pre-set.
For samples with foil and metallic finish, make sure to use the sleeve's mylar side to reduce the sample's reflection.
Use the Manual Alignment tool in NextImage to ensure the sample is square and not skewed, especially with inserts and leaflets with fine print.
Verify that the profile for the GlobalVision inspection is correct. Verify that you are using the correct inspection profile (e.g. Digital to Scan, or any custom inspection profile set up for your inspections.
Try using GlobalVision’s cropping tool to manually isolate the artwork for the inspection. This will help eliminate the entire sample being highlighted as a difference.
For additional information, please visit: Best Practices when using Scanned Samples in GVD
