5.9.0 - Text Inspection - Step-By-Step
Summary
This section describes the steps to follow while running a text inspection.
Steps
Step 1. Load Files for Text Inspection
To inspect Text:
Click on the File Menu icon on the top panel→ then Load Master or click on the Master panel to select the file to load. The Master image loads in the Master panel.
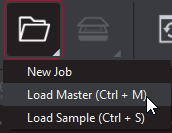
Click again on the File Menu icon on the top panel→ then Load Sample or click on the Sample panel to start repeating the process to load sample files.
Step 2: Select Profile
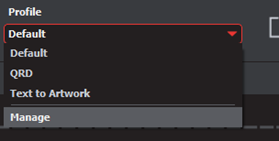
Click the Profile drop-down menu to access the Application's library of available text inspection profiles.
The following default profiles are installed with the system:
Step 3: Ensure proper Inspection Area is selected using the Pre-Inspection Tools
Step 4: Run the Inspection
Click Inspect
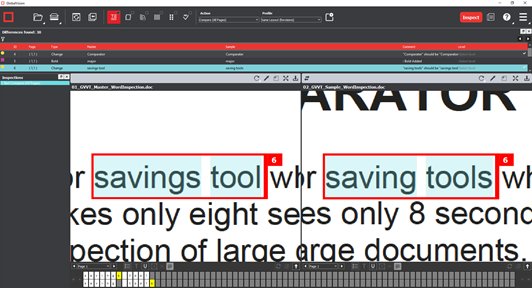
The files are inspected and the differences display in the Inspection View.
Step 5: View the Results
To view the inspected file:
To review the difference list navigate through them using either keyboard arrows or by clicking on each difference.
Use the trackwheel to zoom in or out.
Hold the left mouse button and move it around to pan the image.
Step 6: Go through differences to assign levels or comments
Step 7: Modifying/Resetting Inspection Results
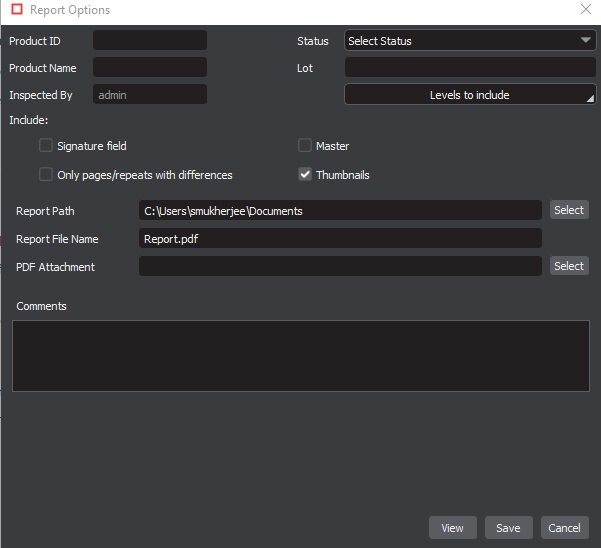
Step 8: Generate the Report
Click the Report icon.

See the Generating Reports section for step-by-step instructions.