Setting Graphics Inspection Options
Click the Start button at tat the top-left of the Master panel to expand the Graphics Inspection panel.

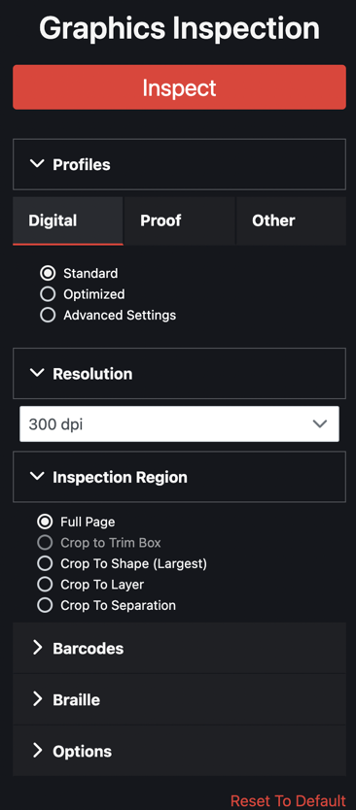
1. Selecting the setup
The system uses different inspection algorithms based on different setups, which are determined by the type of files being inspected.
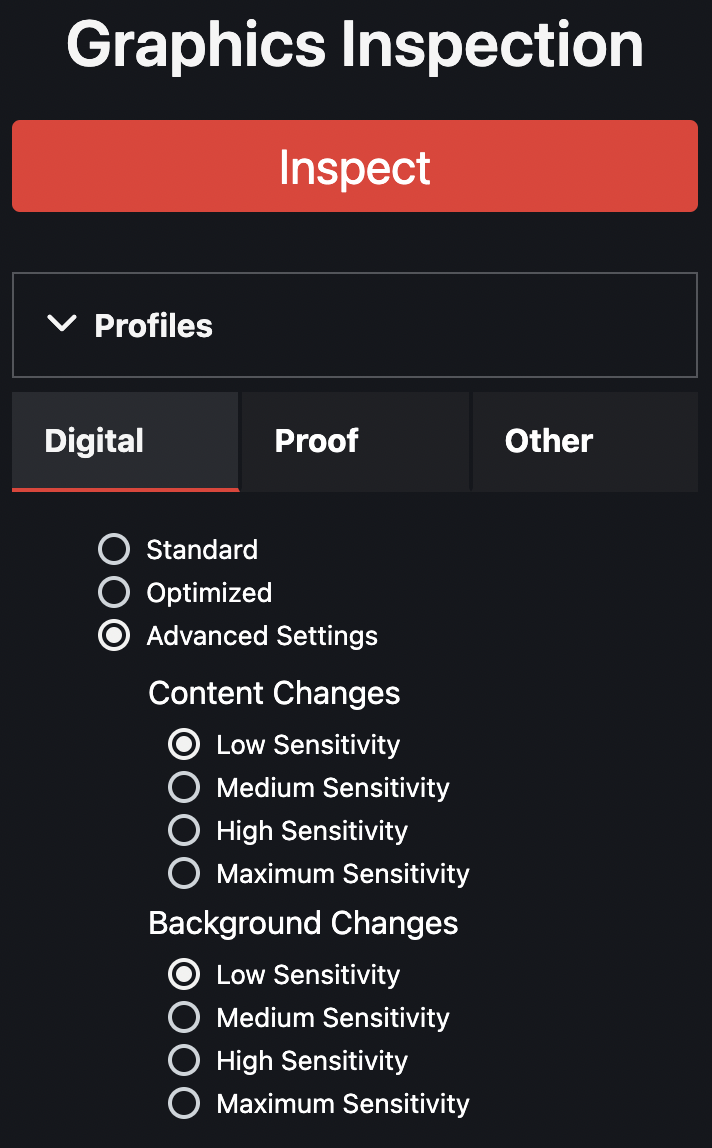
For example, the Digital setup is used to inspect original artwork created by the graphics department against revised editions. It does not use Refine, Auto Distort, or Smoothing (image correction tools).
The Digital setup can be applied for Content and Background changes. Sensitivity levels can be set for both separately, as such applying different settings for the given difference type.
Proof is used to inspect original artwork created by a graphics department against a printer's proof. Proof setups use Refine, Auto Distort, and Smoothing to compensate for changes in the image.
The same parameters can be applied for Proof as well - similarly to Digital, Content and Background-level sensitivity levels can be applied individually.
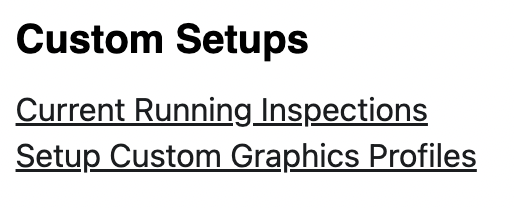
Users can create and use custom Graphics Inspection setups (an example appears as "USPA Label" in the image above), with their own desired parameters.
In order to do so, first, select the Profile icon at the top of the screen. Click Setup Custom Graphics Profiles and the GlobalVision Custom Graphics Setups screen appears.
Click Choose File to browse for an externally created .ini file. Then click Upload File. The uploaded file appears on your profile under the Custom Graphics Profiles Loaded portion (named Custom.ini for this example).
Note: This is only available if the admin enables Allow user specific custom graphics profiles.
2. Resolution
It is possible to choose the resolution of the inspection before executing it. The resolution can be 200, 300, 400, or 600 dpi. The maximum, 600 dpi, is suggested for particularly small details, and labels.
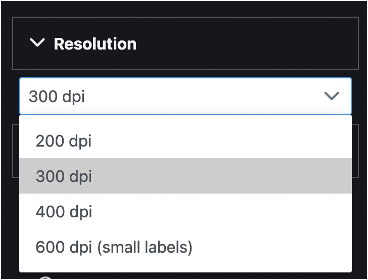
Warning: Using 600 dpi will affect the performance of the tool, as such it is better to use this feature with the maximum setting only when required, in order to optimize resource consumption.
3. Selecting the inspection region
Inspection Region allows you to select the Master region to inspect against the Sample. The options are:
Crop to Trim Box, Full Page, Crop to Shape (Largest)
Crop to Trim Box automatically detects the Trim Box and uses it as the shape. The inspection only applies to the content inside the shape selected.
Full Page detects the entire page of the Master.
Crop to shape automatically detects the largest shape on the document. The inspection only applies to the content inside the shape selected.
Crop to Layer/Crop to Separation allows the user to select the appropriate layer/separation that they wish to use as the border of the shape of the uploaded artwork. The inspection only applies to the content inside the shape selected.
4. Enabling barcode detection
Click Barcodes in the Options panel and click Enable to detect and grade barcodes in the loaded files.
The inspection may take noticeably longer with this option enabled.
Barcode settings allow choosing the right profile for running the inspection. This allows a more precise barcode inspection performed within a text inspection.
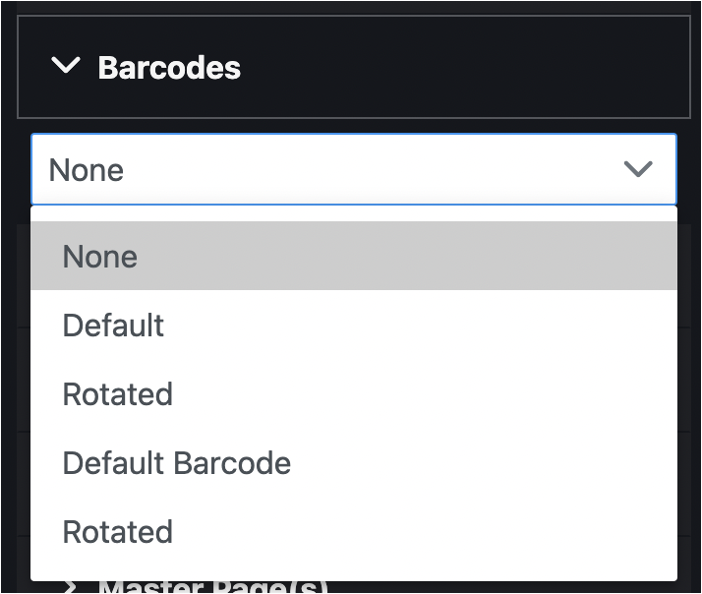
For information on navigating through detected and graded barcodes, consult the corresponding articles in the Barcode Inspection section.
5. Enabling Braille detection
Click Braille in the Options panel and click the applicable language to detect and translate Braille regions in the loaded files.
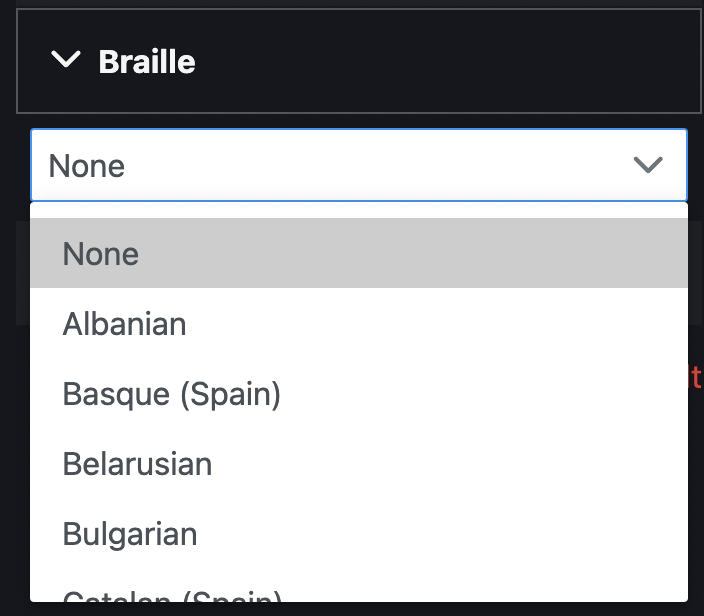
The inspection may take noticeably longer with this option enabled.
For information on navigating through detected and translated Braille, consult the corresponding articles in the Braille Inspection section.
6. Enabling Overprint and Support Rotation
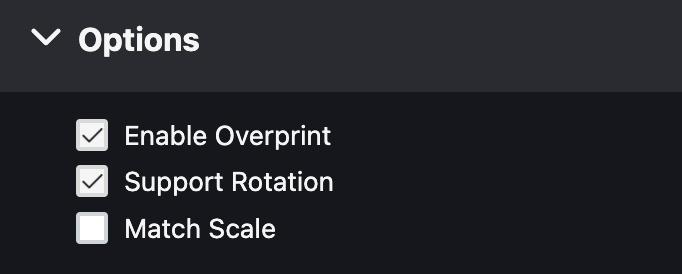
Enable Overprint, Support Rotation, and Match Scale can be found under the Options panel.
Enable Overprint approximates how blending and overprinting appear in color-separated output. Enable Overprint is enabled by default and is applied to the inspection. This contrasts with how the separate Overprint options do not get applied to the inspection.
Support Rotation enables comparing image files with different orientations and detecting rotated/nested samples. Support rotation is enabled by default.
Match Scale lets you compare images with different sizes by scaling the dimensions of the Sample’s cropped area to match the dimensions of the Master’s cropped area.
To use the Match Scale:
In the Master panel, click Crop and select the crop area
In the Sample panel, click Crop and select the other crop area.
Click Match Scale. When the inspection is run, the Sample cropped area is inspected as if it were the same size as the Master cropped area.
Note: Both the Master and Sample images must be cropped before Match Scale is used.
7. Inspecting multi-page documents
If multi-page files are loaded, Master Page(s) and Sample Page(s) fields appear. Click the applicable field and select the desired page(s) to inspect.
There is no limit to the number of pages that can be inspected, but larger amounts of pages take longer to inspect.
8. Inspection may start!
Click Inspect once all options are set.
