Proofing Barcode Inspection Results
After a barcode inspection is run, the Inspection panel appears. Color-coded barcodes and accompanying measurements of each can be reviewed.
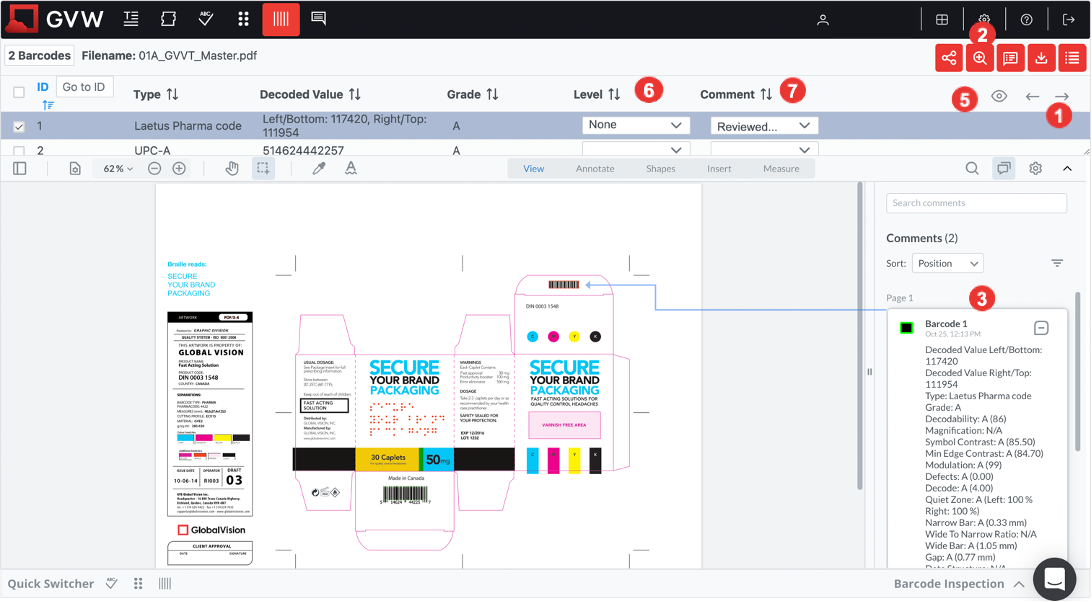
1. Navigating differences
Click the Previous or Next arrow to navigate between inspected barcodes, each of which will be highlighted in the Inspection panel once selected.
Barcodes are color-coded and graded as follows:
A (Green): Overall grade of 3.5 or better. The barcode should scan easily the first time with most barcode scanning equipment.
B (Blue): Overall grade of 2.5 - 3.5. The barcode may scan easily the first time. If a second scan is required, there is a high probability of success.
C (Yellow): Overall grade of 1.5 - 2.5. The minimum grade that most barcodes should achieve.
D (Orange): Acceptable only if the barcode is printed on fiberboard.
F (Red): Failing grade.
N/A (Grey): Verification grading of this barcode symbol is not supported.
2. Zoom levels
For maximizing user experience during navigating through the differences, zoom levels were introduced. These zoom levels will determine how the tool is zooming in when reviewing the differences one-by-one.
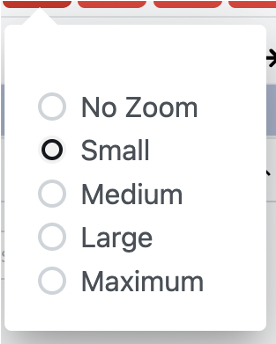
No Zoom
The items are not zoomed in at all, the whole page is visible with the difference flashing, as such providing an overview of the entire inspected page. This zoom level is optimal for reviewing in an overall encompassing manner.
Small
Items are zoomed in slightly, allowing a good overview of the relative position and the surroundings within the inspected page/area.
Medium
Items are zoomed in moderately, still allowing an overview of the relative position and the surroundings within the inspected page/area.
Large
Items are zoomed in almost entirely, but allowing some overview of the surrounding area to a smaller extent, compared to Medium zoom level. The relative position is not clearly visible, only immediate surrounding area.
Maximum
The difference is zoomed in completely, fitting the screen, without showing the surrounding area. This zoom level is optimal for reviewing small differences, without regard to the position of the difference compared to the inspected area.
Note: Medium/Large are the recommended zoom levels for optimizing user experience - having an overview of the difference, as well as the relative position within the inspected page/area.
3. Seeing your barcode inspection results
Navigating to a barcode automatically toggles on the Notes panel, where measurements for each are found.
Reason why the barcode inspection failed will be marked in red to illustrate the parameter where the inspection was unsuccessful. Example:
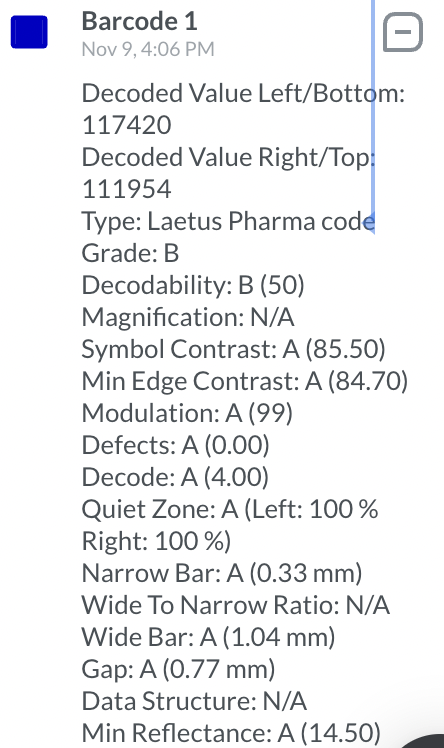
A small sampling of the measurements of the selected barcode is highlighted, while a longer list can be accessed by clicking the Show more option at the bottom.
The list of measurements/characteristics for 1D (one-dimensional) is made up of the following:
Decoded value
Type
Grade
Decodability
Magnification (if applicable)
Symbol Contrast
Min Edge Contrast
Modulation
Defects
Decode
Quiet Zone
Narrow Bar
Wide-To-Narrow Ratio
Wide Bar
Data Structure
Min Reflectance
Max Reflectance
Bar Width Reduction (BWR)
The list of measurements/characteristics for 2D (two-dimensional) is made up of the following:
Decoded value
Type
Grade
Symbol Contrast
Modulation
Decode
Axial Non-Uniformity
Grid Non-Uniformity
Fixed Pattern Damage
Unused Error Correction
Data Structure
Bar Width Reduction (BWR)
Cell Size
Quiet Zone
4. Accessing the Difference List
Click on the Difference List icon to maximize and see the measurements/characteristics of all the detected barcodes at once. The navigation functionalities at the top of the Inspection panel will automatically carry over to the Inspection panel once closed.

The individual barcodes measurements appear under the Master heading, click the Previous or Next arrow to navigate between barcodes, each of which will also be highlighted in the Inspection panel.
5. Show/Hide differences
Clicking Show differences displays thin, faint red boxes around all the differences found while keeping the selected difference in bold. To disable this view, click on the Hide differences button.
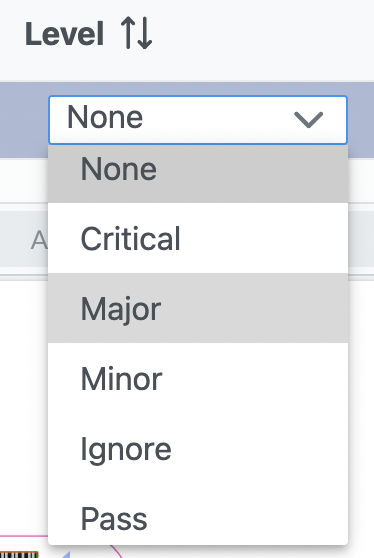
6. Levels
Criticality levels may be assigned to each identified barcode difference. Preset levels are available for setting each item as required, ranging from Critical to Ignore or Pass.
Note: Both criticality and comments may be assigned in a bulk manner by using multi-selection. Please refer to the Navigating pages & Setting Preferences and Reset to Default page for further details.
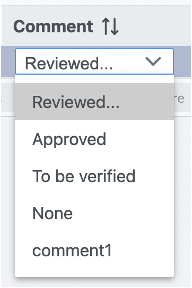
7. Comments
Comments may be assigned to each identified barcode difference. Some preset comments are there to help make the process more efficient, but custom comments may be made as well.
Note: Both criticality and comments may be assigned in a bulk manner by using multi-selection. Please refer to the Navigating pages & Setting Preferences and Reset to Default page for further details.
When using two monitors, you can pop out the tab as such maximizing user experience using a secondary screen.