Viewing and Annotating Files in Notes
Overprint and different layers can be toggled on and off in Notes via icons on the top toolbar.

1. Annotate
Annotate allows multiple text and graphics based changes to the document.

Text Highlight: Click and drag the cursor to highlight the next on the page.
Text Underline, Strikeout, and Squiggly Underline: Click and drag to underline or strikeout text.
Comment Note: Click to add the note, enter text in the Comments panel, and click Save.
Free Text: Click and drag the cursor to draw the text box and start typing.
Rectangle: Click and drag to draw a rectangle. Double-click to release the cursor once finished.
Free Hand: Click and drag the cursor to draw the annotation.
2. Shapes
Shapes
Once a shape is selected, move the cursor and click on the file.

Free Hand: Click and drag the cursor to draw the annotation.
Various shapes
Click and drag to draw a rectangle or ellipse.
For the polygon, polyline, and cloud, click, drag, and click again to draw one segment.
Double-click to release the cursor once finished.
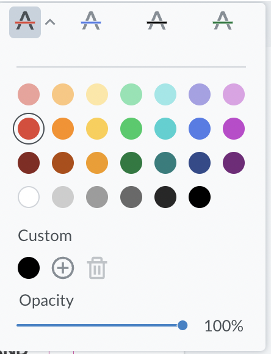
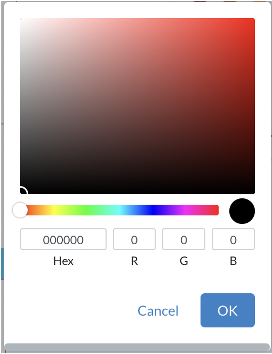
Colors and annotation settings can be set with the available color panel, with the possibility to choose from multiple colors, setting custom colors and opacity.
Undo and Redo buttons support easy annotations process, along with Erase for removing unnecessary annotations.

HINT: All annotations are listed in the Notes panel on the right.
Edit, comment or delete it. Click Save to save any edits. To delete the annotation itself first, click on the Inspection panel and then select Delete from the menu.
3. Share document
Click Share document on the top-right corner of the Report panel.
Enter the email address(es) of the recipients in the field that appears and click Share.
To share the report with multiple recipients, separate the addresses with a semi-colon. Example: emailaddress1@globalvision.co; emailaddress2@globalvision.co.
4. Zoom
For maximizing user experience during navigating through the differences, zoom levels are available introduced. These zoom levels will determine how the tool is zooming in when reviewing the differences one-by-one.
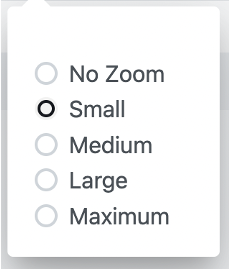
No Zoom
The items are not zoomed in at all, the whole page is visible with the difference flashing, as such providing an overview of the entire inspected page. This zoom level is optimal for reviewing in an overall encompassing manner.
Small
Items are zoomed in slightly, allowing a good overview of the relative position and the surroundings within the inspected page/area.
Medium
Items are zoomed-in moderately, still allowing an overview of the relative position and the surroundings within the inspected page/area.
Large
Items are zoomed-in almost entirely, but allowing some overview of the surrounding area to a smaller extent, compared to Medium zoom level. The relative position is not clearly visible, only immediate surrounding area.
Maximum
The item is zoomed in completely, fitting the screen, without showing the surrounding area. This zoom level is optimal for reviewing small differences, without regard to the position of the difference compared to the inspected area.
Note: Medium/Large are the recommended zoom levels for optimizing user experience - having an overview, as well as the relative position within the inspected page/area.
5. Annotations List
It is possible to see a list of all the annotations in the document, as such the page would contain all the added comments/illustrations.

If another user is working on the document at the same time, their annotations can be seen after reloading the document. Click Reload on the top right to view updates on the document.
6. Download the annotated document
Click Download the annotated document to download an annotated PDF document to your computer.