Proofing Text Inspection Results
After a text inspection is run, the Inspection Panel appears. Differences between the Master and Sample files can be viewed and reviewed with the ability to assign levels and comments to each difference.

1. Navigating differences
Click the Previous or Next arrows to navigate between differences, each of which will be highlighted in both panels once selected.
2. Zoom levels
For maximizing user experience during navigating through the differences, zoom levels were introduced. These zoom levels will determine how the tool is zooming in when reviewing the differences one-by-one.
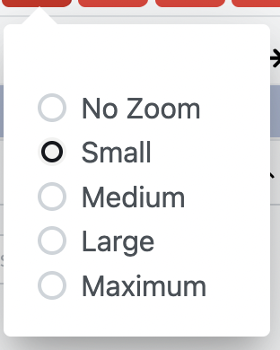
No Zoom
The items are not zoomed in at all, the whole page is visible with the difference flashing, as such providing an overview of the entire inspected page. This zoom level is optimal for reviewing in an overall encompassing manner.
Small
Items are zoomed in slightly, allowing a good overview of the relative position and the surroundings within the inspected page/area.
Medium
Items are zoomed-in moderately, still allowing an overview of the relative position and the surroundings within the inspected page/area.
Large
Items are zoomed-in almost entirely, but allowing some overview of the surrounding area to a smaller extent, compared to Medium zoom level. The relative position is not clearly visible, only immediate surrounding area.
Maximum
The difference is zoomed in completely, fitting the screen, without showing the surrounding area. This zoom level is optimal for reviewing small differences, without regard to the position of the difference compared to the inspected area.
Note: Medium/Large are the recommended zoom levels for optimizing user experience - having an overview of the difference, as well as the relative position within the inspected page/area.
Flashing differences are available directly on the inspected document, without having to go into a separate window.
3. Assigning levels
Once a difference is picked, click on the Level drop-down list to access and select from the pre-defined levels.
4. Assigning comments
Once a difference is picked, click on the Comment drop-down list to access and select from the pre-defined comments. To create a custom comment, simply type it in the text box.
5. Navigating between pages
Click the Previous Page or Next Page arrow when applicable to navigate between pages in the Master or Report panels.
The arrows appear when hovering in the middle of the inspected documents.
6. Ignoring/skipping differences
If you want to skip multiple occurrences of the same difference, navigate to the first occurrence of the difference, and click Ignore/Skip All.
Text Inspection automatically sets the level to "Ignore" and comment to "Reviewed" for all occurrences. As you navigate through the differences, Text Inspection skips over these duplicates.
7. Accessing the Difference List
Click on the Difference List icon to maximize and view all differences at once.
The navigation functionalities are ported over to the Difference List. Any changes made in the Difference List will automatically carry over to the Inspection panel once closed.
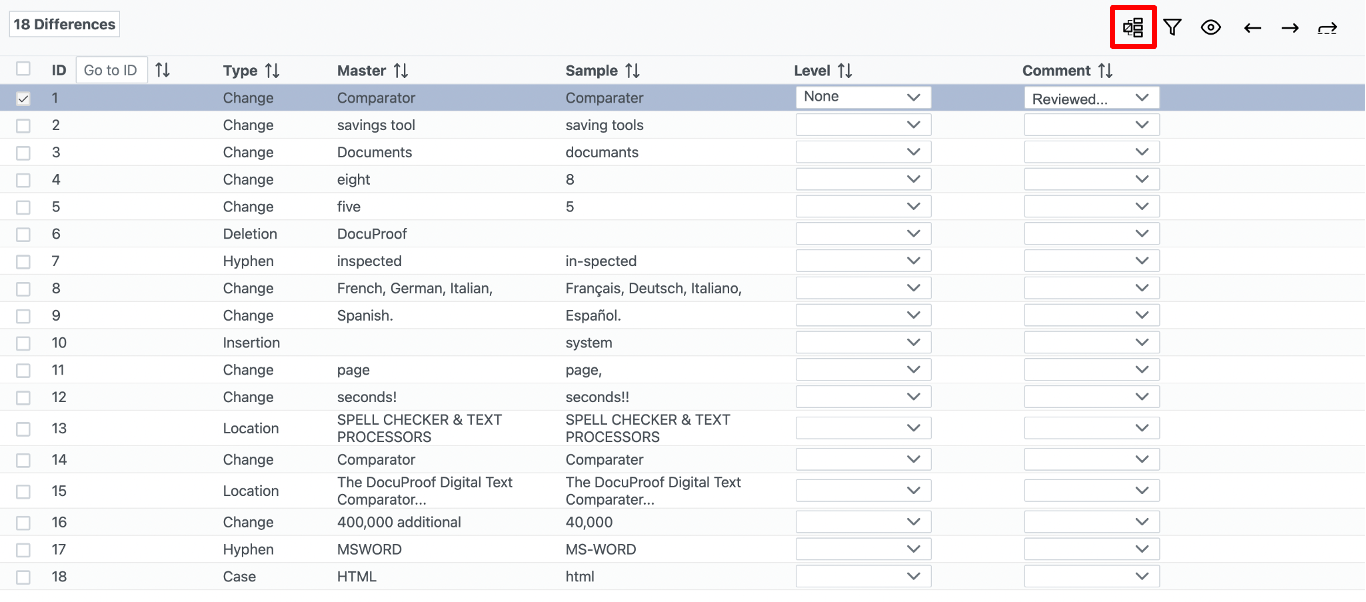
Difference types are displayed to the left of the differences, as they appear in the Master and Sample panels.
Grouping differences is available as well, which allows users to set up groups based on difference type, as such maximizing efficiency in reviewing changes that are similar to each other. These items can be then grouped by the user and as such can be treated in the same way.
Levels and Comments can be assigned by clicking on the applicable drop-down list. Click the Previous or Next arrows to navigate between differences, each of which will display in the Inspection Panel. In order to navigate more easily amongst the items in the list, it is also possible to use the scroll, or the keyboard arrows. The Inspection Panel will provide an overview of the difference in both the Master and the Sample files.
Use Resync if any undesired difference is selected in the List. It will either be removed in case it's identical in both panels or reclassified as a Change-type difference if not.
Note: Hold Ctrl and/or Shift key to select multiple differences at once and assign the same level/comment.
8. Change Grid
The Change Grid appears below the Report panel and it displays character changes (highlighted in yellow) for the difference that is currently selected.
Hover over a specific character to see its Unicode value. Navigating through the inspection results will automatically refresh the Change Grid with new differences.
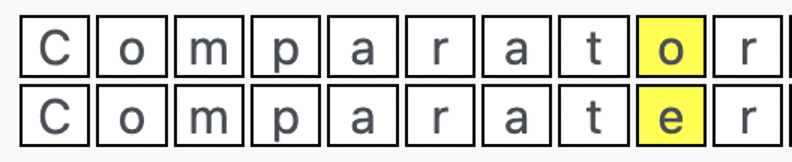
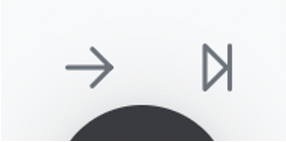
Navigation is rendered easier with arrows for switching between differences. It is handy to use these arrows when checking one difference at a time, or it is possible to jump ahead to the first and last difference at the click of the button.

9. Grouping
Grouping provides a possibility to group all similar differences, as such making proofing more efficient for the user. This functionality aims at increasing user experience with faster inspection analysis. Clicking this icon will remove identical differences from the list, as such, they do not need to be analyzed individually.
10. Filtering
Filtering was introduced on the primary screen for viewing differences in an overall way as well - as such not overwhelming the user, but rather letting them focus on a specific type of difference if so required.
All differences are shown until they are specifically filtered. Clicking the Filtering icon will provide the list of possible items, the different types of filters that can be implemented are visible below:
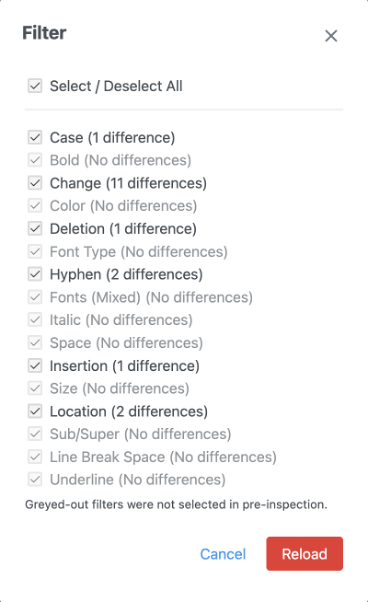
Note: Irrelevant items are greyed out in the selection, to make the filtering easier for the user.
11. Show/Hide differences
Clicking Show differences displays thin, faint red boxes around all the differences found while keeping the selected difference in bold. To disable this view, click on the Hide differences button.
12. Hide/Show Master panel
Click Hide Master to provide the entire Inspection panel for the Sample and Flash panels. Once it is hidden, click Show Master to restore the original view.
13. Hide/Show Sample panel
Click Hide Sample to provide the entire Inspection panel for the Master and Flash panels. Once it is hidden, click Show Sample to restore the original view.
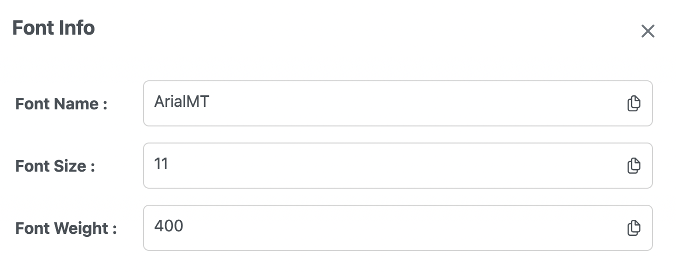
Font Information
Whenever a text is selected, Font Information is available, whereas the Font Name, Font Size and Font Weight are displayed for the user.

When using two monitors, you can pop out the tab as such maximizing user experience using a secondary screen.