C8 Scanning
Summary: Configuring and scanning with your GlobalVision cylinder scanner
All scanning is done in the GlobalVision C8 scanner interface.
To launch the scanner interface and start scanning a master:
Click Scanner Scan Master.
To launch the scanner interface and start scanning a sample:
Click Scanner Scan Sample.
The image loads in the corresponding (Master or Sample) panel.
How to Scan
Measure the diameter of the cylindrical object in millimeters (mm) and enter the value in the Diameter field.
Place the cylindrical object on the rollers- top facing left, centered over the sensor, starting point on the silver roller.
Select SCAN (Wait for the image to load)
Use the BRIGHTNESS, CONTRAST & GAMMA values to adjust the image to match the Master image or the loaded PDF file.
When satisfied, select ACCEPT. The image will load in GVD.

Figure 7: C8 Scanner Interface
Image Options
Adjustments to these options appear in real-time in the GlobalVision C8 scanner interface.
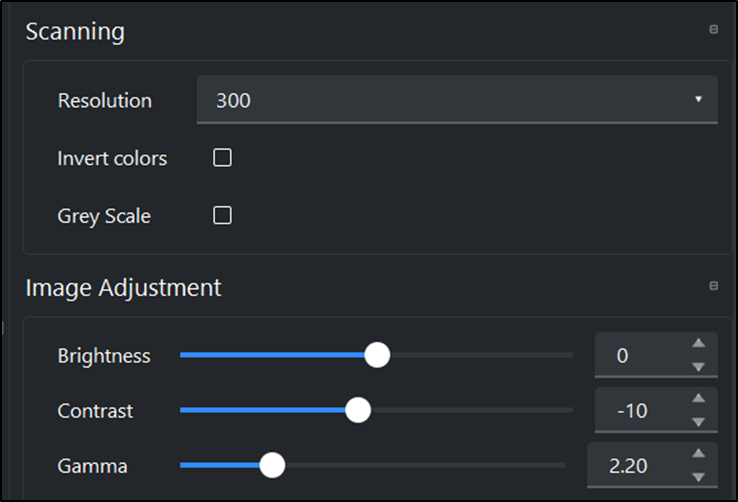
Figure 8: Image Adjustments
Brightness: The lightness of the color in the scan; Adjust by clicking the slider and moving it to the right or left or by using the UP and DOWN arrows on your keyboard.
Contrast: The separation between the darkest and brightest areas of the image; Adjust by clicking the slider and moving it to the right or left or by using the UP and DOWN arrows on your keyboard.
Gamma: The luminance; Higher values cause darker shadows while lower values make darker regions lighter. Adjust by clicking the slider and moving it to the right or left or by using the UP and DOWN arrows on your keyboard.
Invert Colors: Toggle it on to display a negative image.
Greyscale: Toggle it on to display the scanned image in a series of neutral colors, ranging from black to white.
Advanced Options
Adjustments to advanced options only appear once a subsequent preview/ scan has been made.

Figure 9: Advanced Options Tab
The advanced options are as follows:
Overlap
Scans additional diameter area (greater than 360 degrees). Adjust by clicking the slider and moving it to the right or left or by using the UP and DOWN arrows on your keyboard. Measured in percentage.
Crop Top
Adjust the horizontal crop line to exclude the TOP of the image.
Crop Bottom
Adjust the horizontal crop line to exclude the BOTTOM of the image.
Scan Profile
The Scan Profile tab lets standard users load pre-set configurations of settings tailored to scan in individual samples. Administrators or managers can access profiles, add new ones, and update or delete profiles that have previously been created. The tab can be accessed by simply clicking on its title bar.
To load a GlobalVision C8 profile:
Select the desired profile from the Scan Profile drop-down list. The settings will re-adjust in real-time, based on the profile selected.
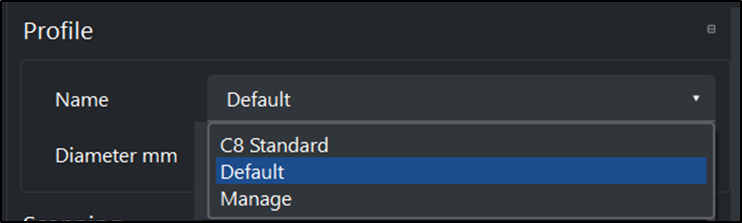
Figure 10: Scan Profile Tab
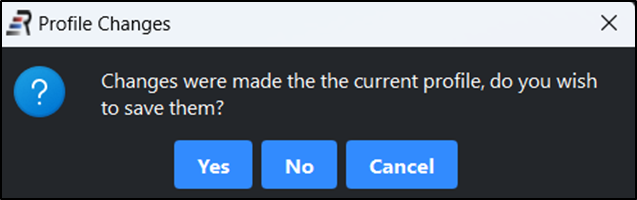
To update a profile:
Scan your cylindrical object, then make the necessary changes, when satisfied with the changes, select ACCEPT. If you wish to save the changes to the current profile, selct YES.
To add a profile:
Select MANAGE
Click Add.
Enter the desired name for the profile in the prompt that pops up and click OK.
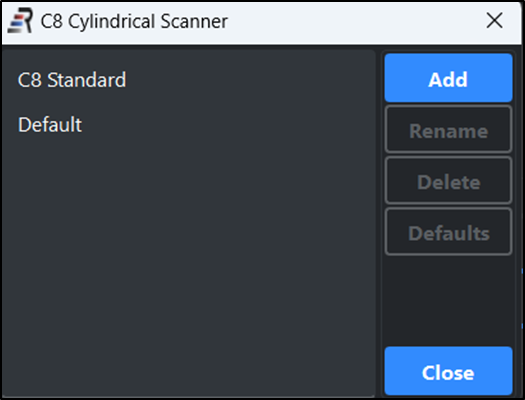
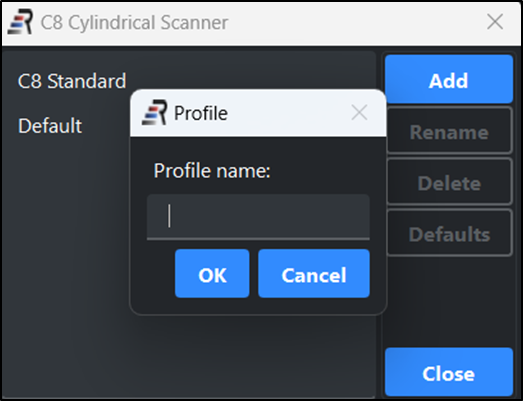
Figure 11
The new profile will be added to the drop-down list.
To delete a profile:
Select the profile to be deleted from the Scan Profile drop-down list.
Click Delete.
Click Yes when asked, “Are you sure you wish to delete the profile [profile name]?”
The profile will no longer appear in the drop-down list.

Figure 12
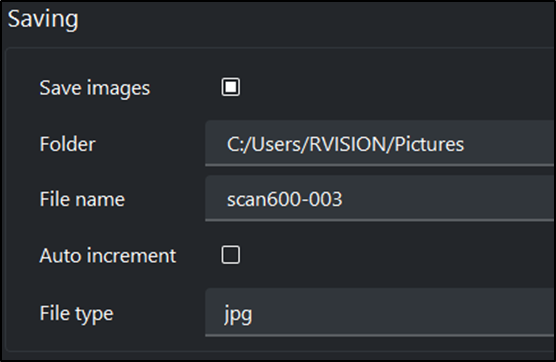
Saving Images
In order to save your scans, check the box for Save images. Then select the Folder where you want to save them.
Auto increment selection is useful if you want to save all your scans. However, if you want to only save the last image and save disk space, this option will be preferred.
Setup this option if you are using the Stand-alone version where image comparison is not required.
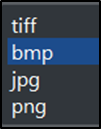
File Types:
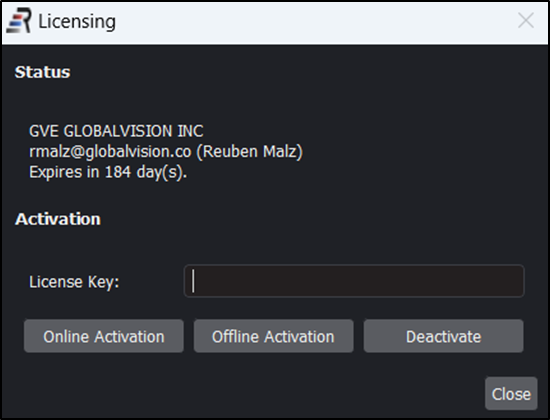
Licensing
After installing the C8 software, you will need to activate your product by entering an authorized License key.
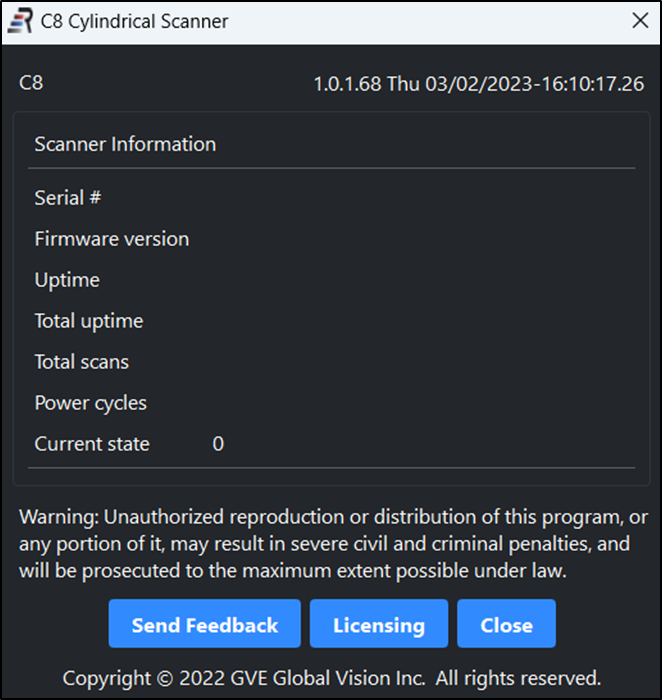
About
Here information about your C8 software, firmware, and operational statistics is available.
Send Feedback is a new process at Global Vision where we want to hear from you. Your experience when using our products helps us to improve our products for yourself and other users like you.