Roll Scanner Stand Assembly Guide
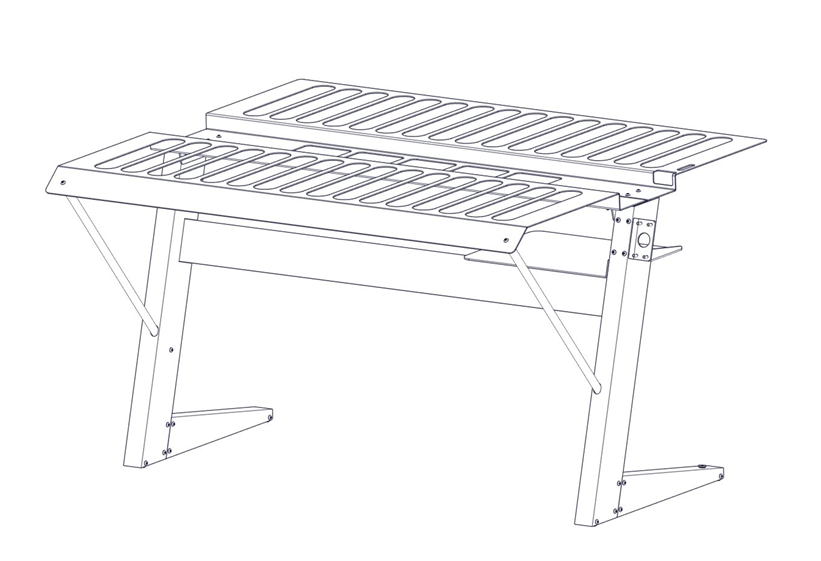
GlobalVision Roll Scanner Desktop Inspection System
Instructions
The following instructions are to assemble the Roll scanner Stand:
Note: Do not fully tighten any bolts until all parts are assembled.
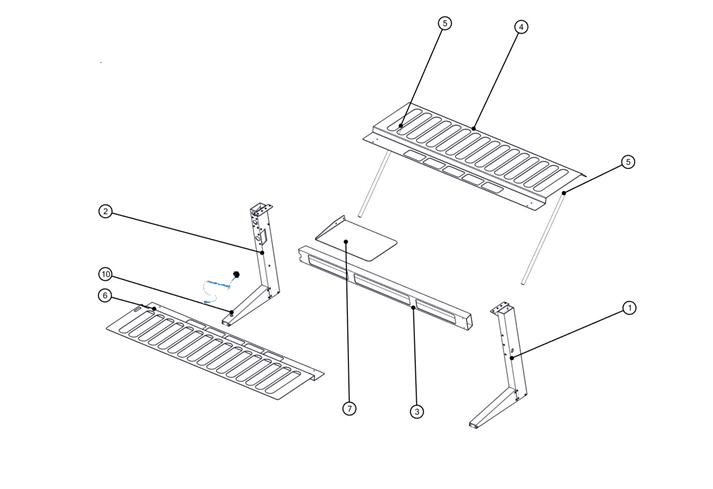
GlobalVision Roll Scanner Assembly Parts
Parts List | ||
# | Part Name | Quantity |
1 | Left Leg | 1 |
2 | Right Leg | 1 |
3 | Horizontal Support Bar | 1 |
4 | Front Tray | 1 |
5 | Front Diagonal Support Bar | 2 |
6 | Rear Tray | 1 |
7 | Computer Tray | 1 |
8 | Bolts | 16 |
9 | Allen key 3/16" | 1 |
10 | Electro-Static Ground plug | 1 |
GlobalVision Roll Scanner Parts List
Step 1
Connect left leg assembly (Ref Table 1: Part #1) to horizontal support bar (Ref Table 1: Part #3) and attach with 2 bolts.
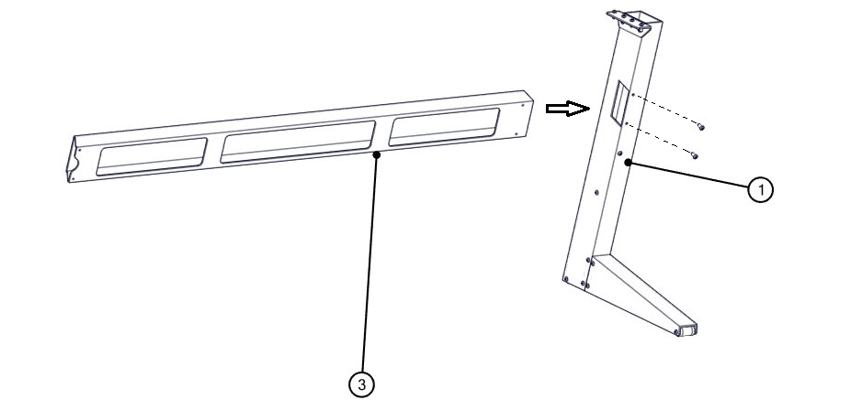
Attaching left leg to horizontal support bar
Step 2
Connect right leg assembly (Part #2) to horizontal support bar (Part #3) and attach with 2 bolts.
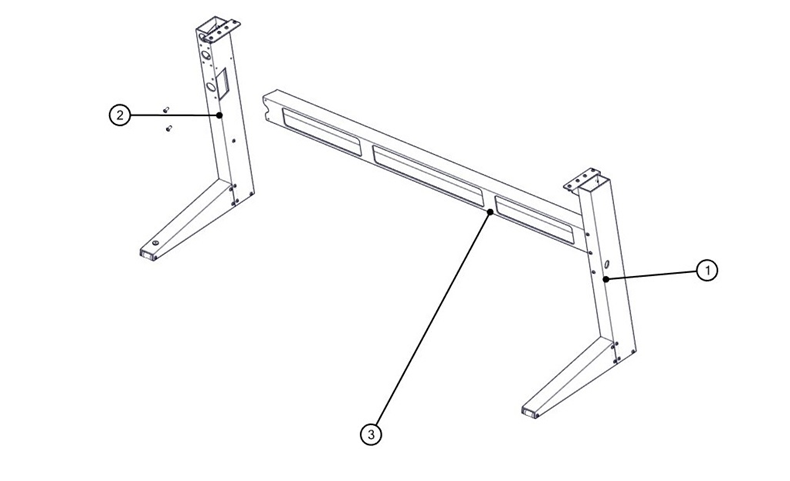
Attaching right leg to horizontal support bar
Step 3
Connect the front tray (Part #4) on top of the two legs (Parts #1 and 2) and attach with 2 bolts on each side.
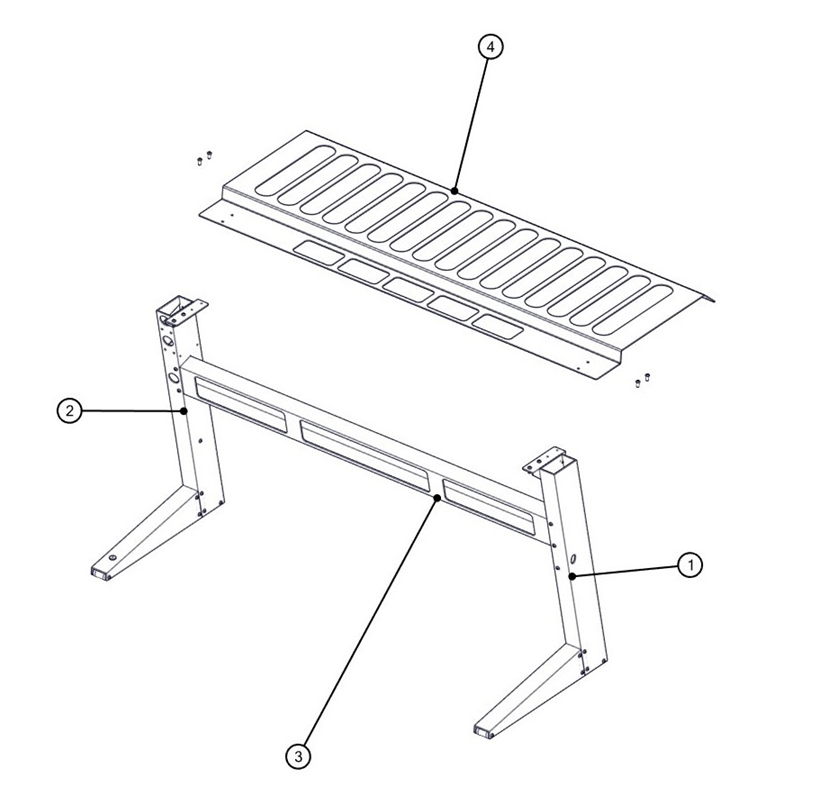
Connecting front tray with the two legs
Step 4
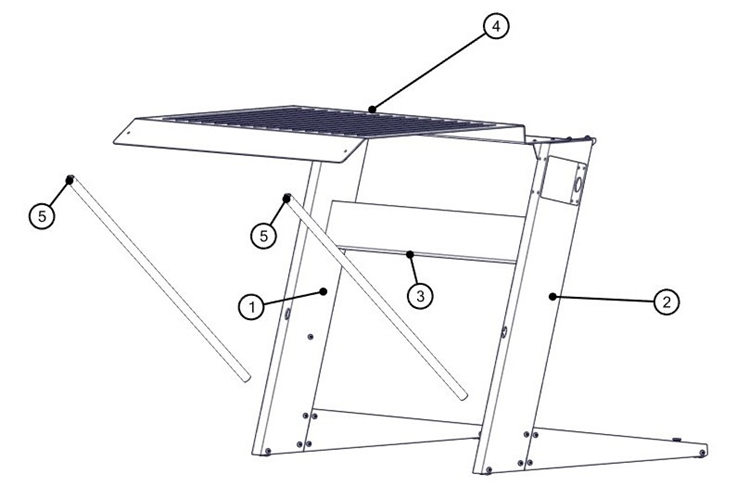
Connect the two left/right diagonal support bars (Part #5) for the front support tray (Part #4) by placing the support bar bottom end in the front leg socket and the top end under the front tray.
Attached is the bolt from the top of the front tray. Repeat for the second support bar.
Connecting two support bars with a front support tray
Step 5
Connect the rear tray (Part #6) on top of the two legs (Parts #1 and 2) and attach with 2 bolts on each side.
Attaching rear tray with the two legs
Step 6
Connect the computer tray (Part #7) to the left side of the right leg under the scanner trays (Parts #4 and 6) by aligning the computer tray to the 2 bolt entry points. Attach the 2 bolts.
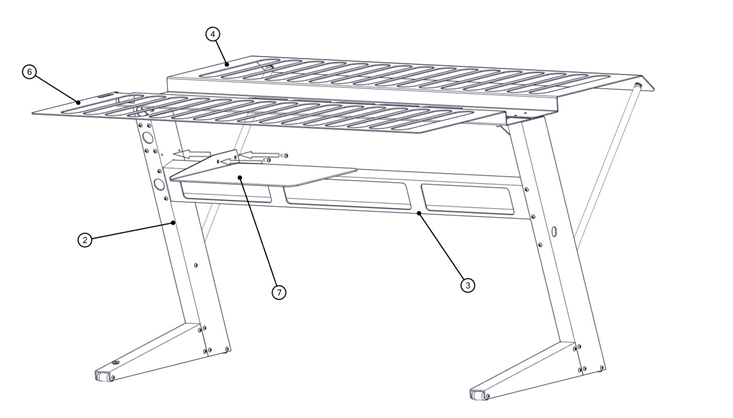
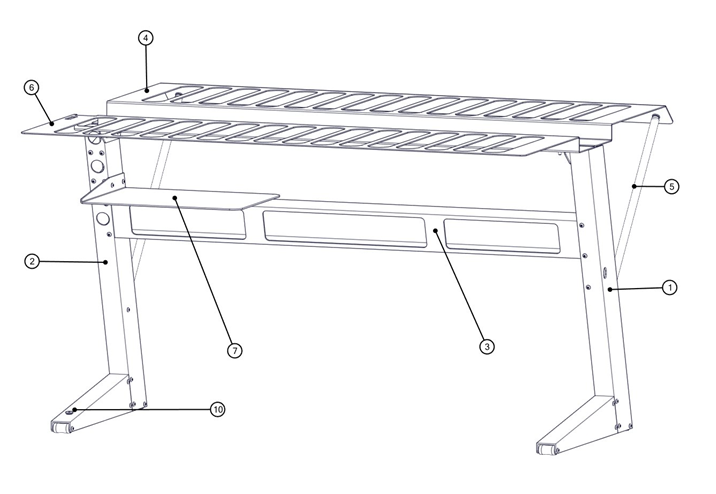
Attaching computer tray with right leg
Step 7
Connect the Monitor Arm to the right side of the right leg (Part #2).
Step 8
Ground the scanner stand by connecting the anti-static ground plug(Part #10) provided. The button, on the anti-static cable, will snap into the right scanner stand leg. Then, from the anti-static cable, plug the ground socket into a grounded power bar or wall socket.
Note: Follow instructions with the Monitor Arm assembly guide.
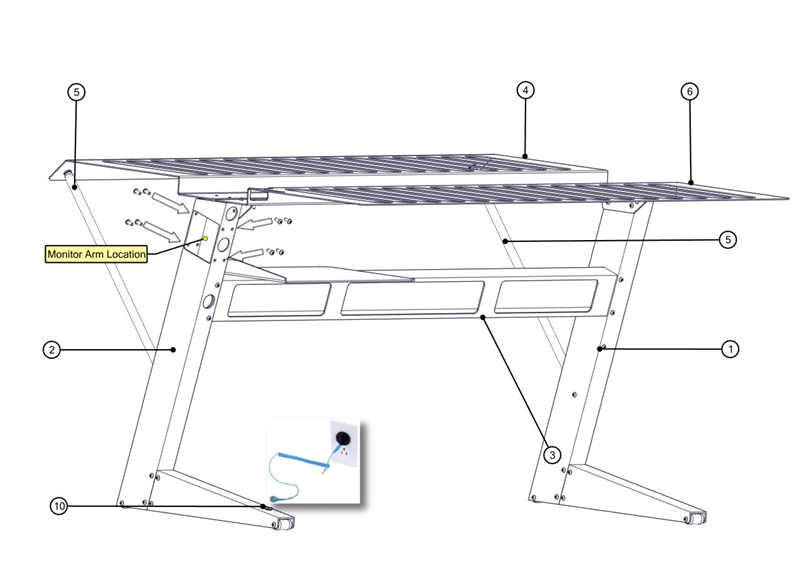
Connecting the anti-static ground plug
Step 9
Tighten all the bolts to ensure that the stand is safe and ready to use.
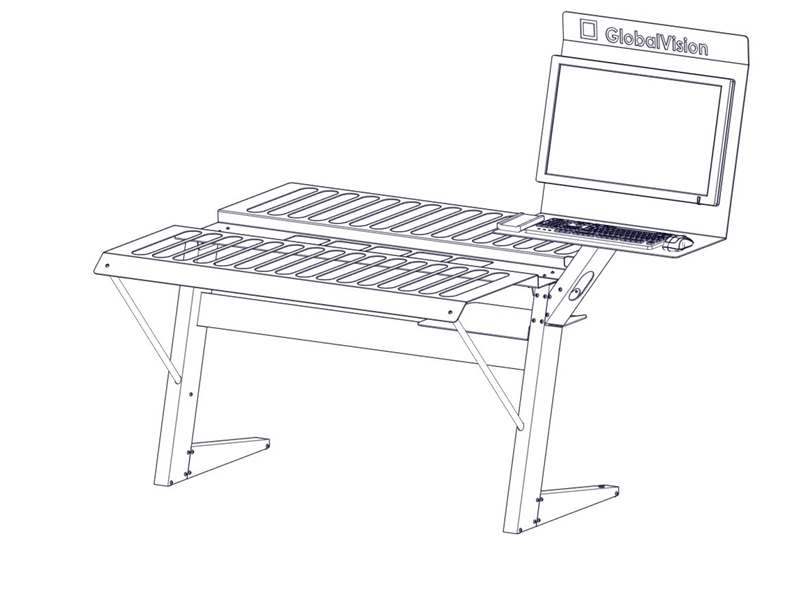
Finishing setup
Assembly Guide PDF:
GlobalVision Roll Scanner Table With Electro static Plug Assembly Guide (WIP) (2).pdf
