RCount User Guide
1.0 Overview
The RCOUNT™ system is designed specifically for non-contact counting of folded stacked products such as inserts, outserts, and cartons. Tray contents are counted and validated in milliseconds resulting in reduced labour costs and improved product dependability.
The RCOUNT™ requires minimal setup. Folded stacked products are counted by placing the tray under the camera, and the total count is displayed at the push of a single button. The system displays the row counts and the accumulated total. The RCOUNT™ is capable of counting single or multiple-row insert trays. It can also count folded cartons, folded leaflets, Vials, and many other stacked parts.
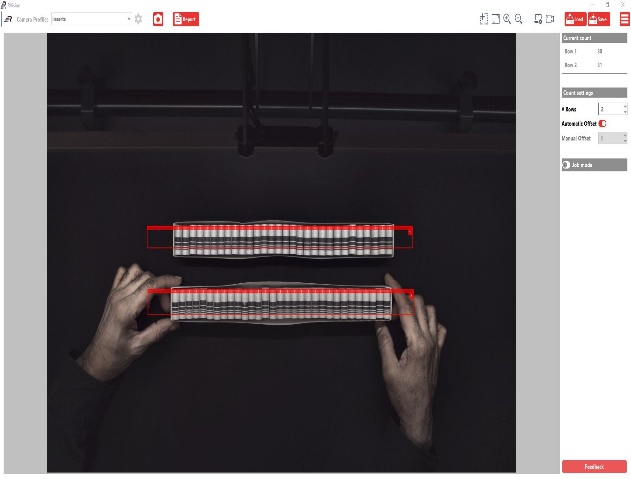
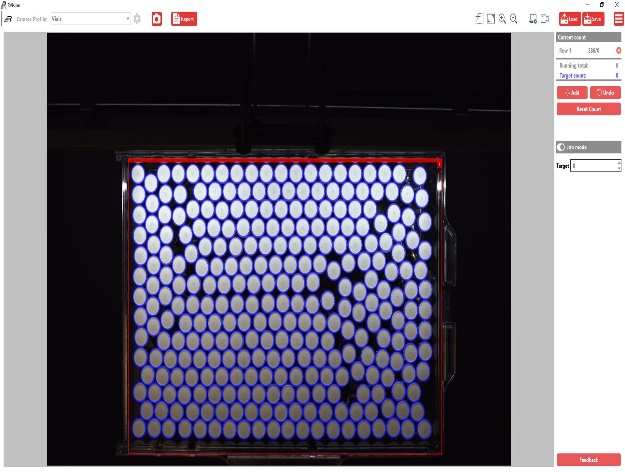
Fig. 1 RCount can count Folded Carton, Inserts & Vials.
1.1 Software
The RCOUNT™ software operates on an Intel processor using Microsoft Windows operating system and is compiled using a high-level programming language.
The counting software is intuitive and easy to use in part to the latest technology in both hardware and software. Counting is in real-time, so the RCount is always armed and ready to count.
For additional support in using the RCount system, please visit the Global Vision website Help Center → RVision Training Videos.
1.1.1 Software Installation
The software installation is typically performed at the factory and sold as a turnkey system. If you are using your own PC, simply run the installer and follow the steps.
Now you are ready to calibrate your RCOUNT. Go to this section at the end of this guide.
1.2 Hardware
The RCOUNT™ is a computer vision product. Image input is through an industrial high-resolution camera, minimum 10 megapixels, with output to a hi-resolution computer monitor.
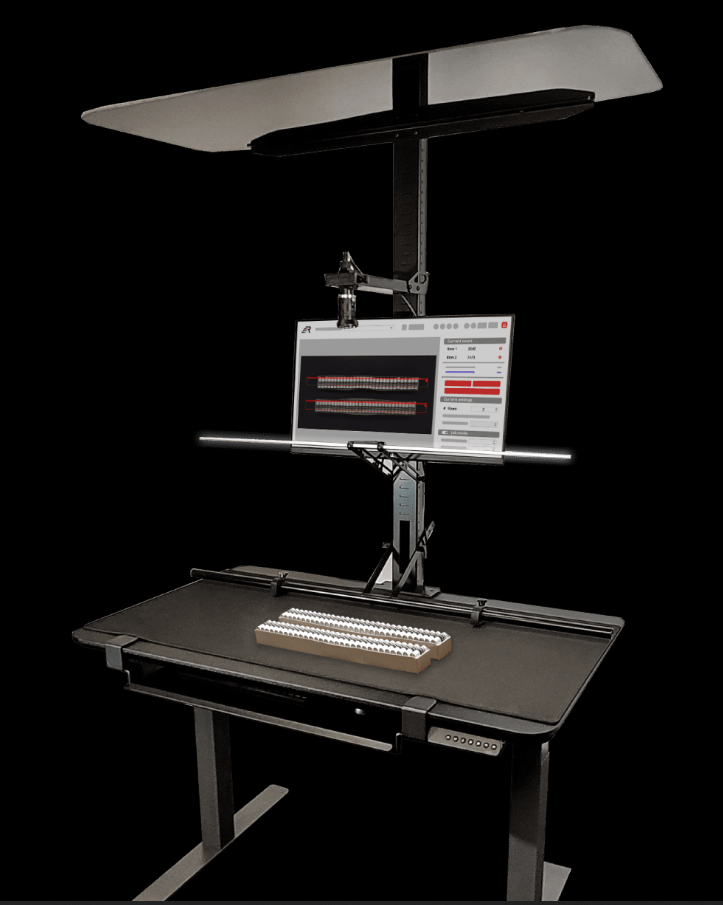
The hardware is easy to set up. It comes 80% preassembled. The assembly instructions can be accessed by scanning the QR code located in the box. All the hardware components are attached to a single column. Including the Digital camera, Monitor, lighting, tray guide (rip-fence) and canopy.
It is recommended to purchase the electric table option. Alternatively, the column can be attached to your own desk with either the clamp or bolts that are supplied.
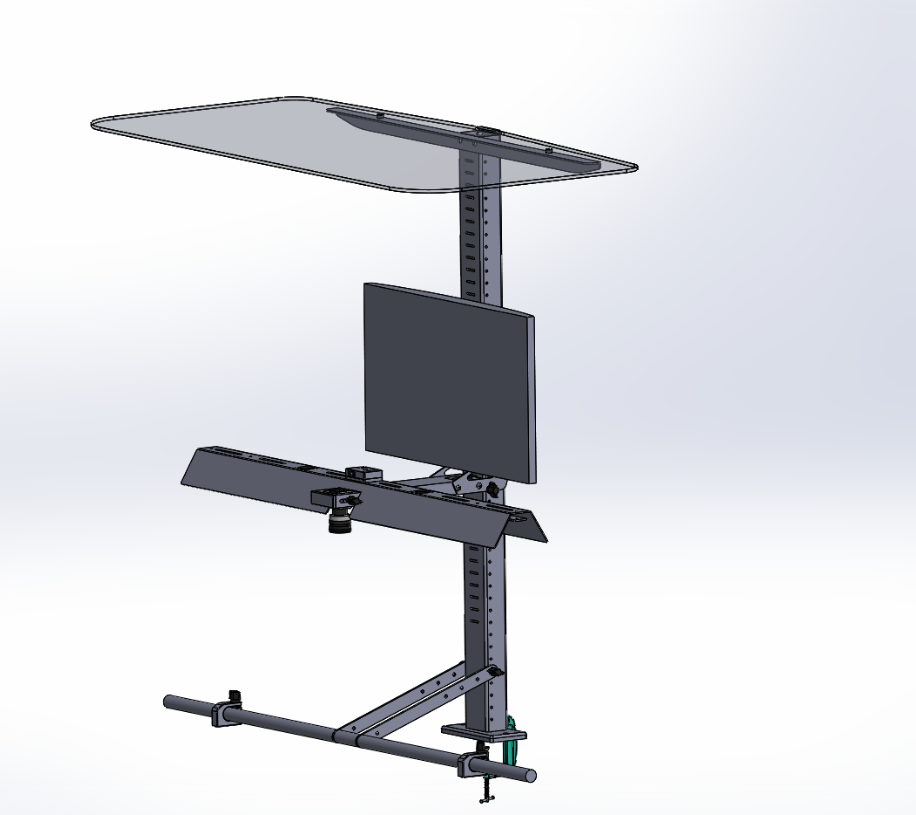
Fig 2a. RCount system (Column Configuration) showing Canopy, Monitor, Camera, Lighting, Guide mounted to a column.
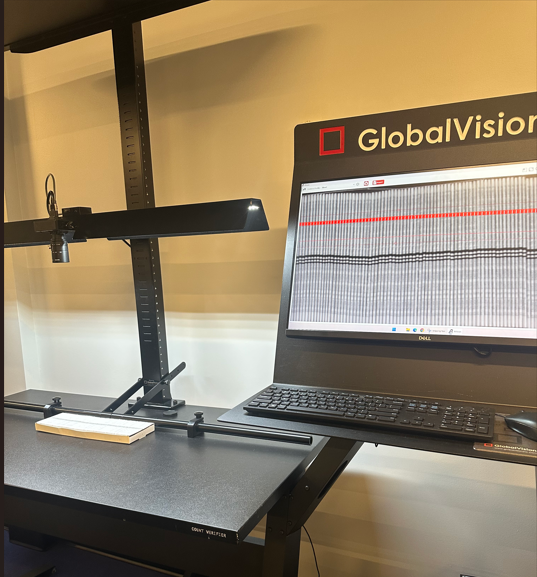
Fig 2b. RCount system (Table configuration) for easy height adjustment
1.2.1 Specifications
The following table describes the system specifications:
DESCRIPTION | SPECIFICATIONS |
Sample Type | Folded Inserts, Cartons, Vials |
Sample Size | Max 40” (1000mm) |
Input Voltage | 110-220 V; 50-60 Hz |
Office Environment | Vibration-free table |
DPI | 300 |
Light Source | LED Strip |
Maximum Count | 600 parts/row |
Camera | MindVision 10 MegaPixel |
Software | RVision |
No. of Rows | 10 |
Table 1
2.0 Getting Started
This section provides the information and procedures required to use the RCount™ software.
2.1 Logging into the System
Select RCOUNT™ software.
The RCOUNT™ Log In Screen appears.
Enter User Name and corresponding Password.
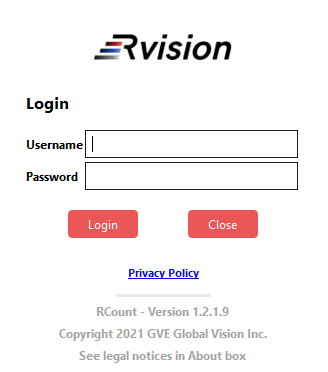
Fig. 3 RCOUNT™ LOG IN SCREEN
3.0 Setup
The RCOUNT™ main system window will load after logging in and it will be in Live counting mode as shown in Fig 4.
Place the item to be counted on the table, under the camera.
Open the aperture and focus the lens.
The next step is to calibrate the system. See Section 4.0.

Fig. 4 RCount Main User Interface
4.0 Calibration
An initial calibration is necessary prior to counting. The digital camera requires a white balance in order to function at its peak performance.
The calibration tool comprises of a solid white, opaque sheet of photographic paper. If this is not available, use a pack of 5 sheets of regular white paper.
Click the
Cameraicon in the main tool bar.

Place the calibration sheet under the camera and fill the red rectangle with the white target.
Click
Calibrate.You may notice the image quality and/or brightness quickly change.
Remove the Calibration tool and set aside for future calibrations.
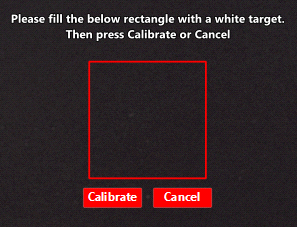
Fig. 5 RCount Calibration
From the main toolbar go to Camera Profile to select the item to be counted
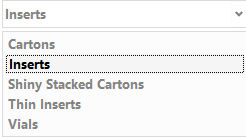
Fig. 6 Camera Profile Selection
5.0 Camera Setup
Select the
Setupicon.

Select
Default.The main camera parameters will automatically adjust.
If you wish to manually adjust the Camera Brightness, Contrast, Gamma and Exposure, use the sliders or spin boxes.
After setting these parameters, select
Save Profile. ThenClose.

Fig.7 Camera Setup
6.0 Start Counting
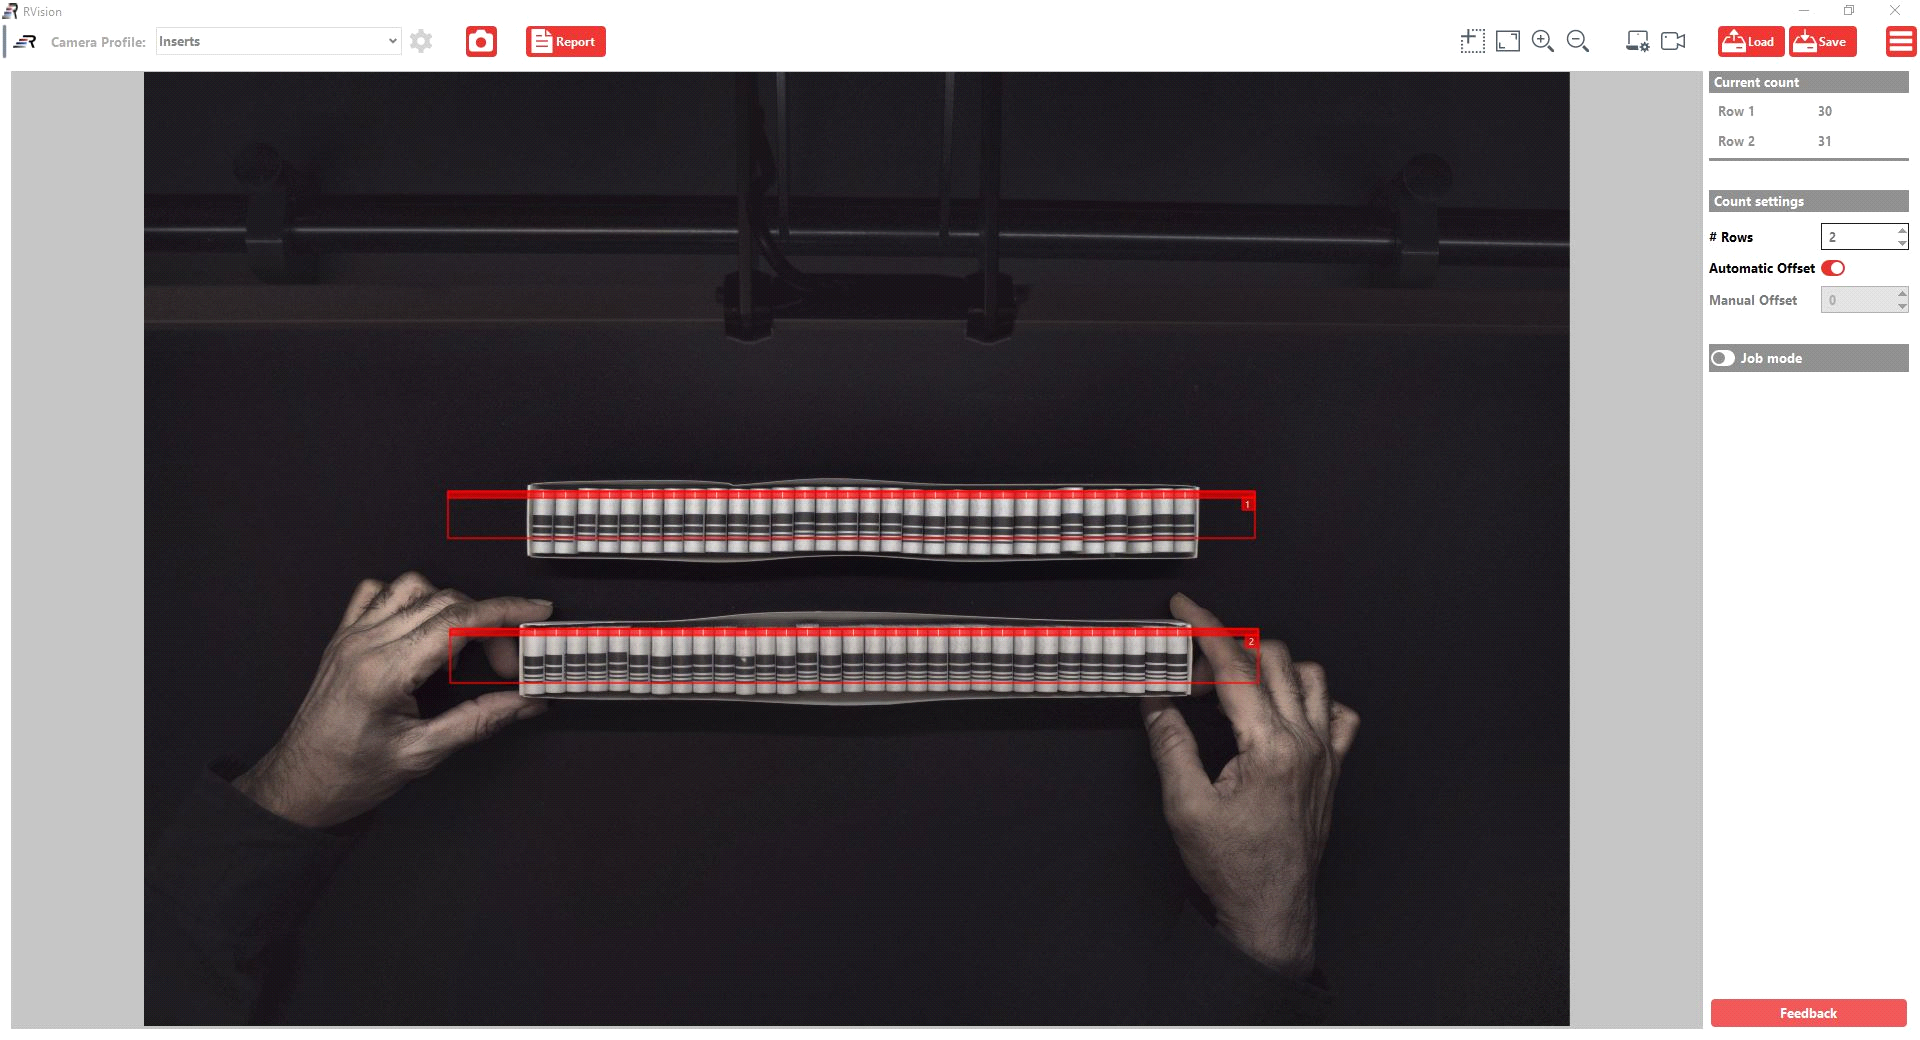
Fig. 8 RCOUNT™ Insert Counting – Multi-Row
Enter the #Rows in the Count Settings
Enter the Count/Row in the Job Mode
Enter the Target amount for the current job.
If a Target amount is not required, turn off Job mode.
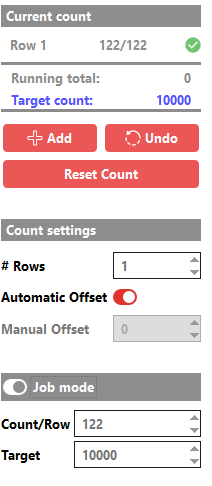
Fig. 9 Counting Dialog Box
A red rectangular counting box will appear at the top left of the image for each Row. They can be lengthened and widened by dragging the box edges.
Now drag each Red rectangle (Counting Box) over the parts to be counted.
A white tick will appear over each part and the total quantity will be displayed in the Current Count.
Check the accuracy of the count and adjust the camera setting as necessary.
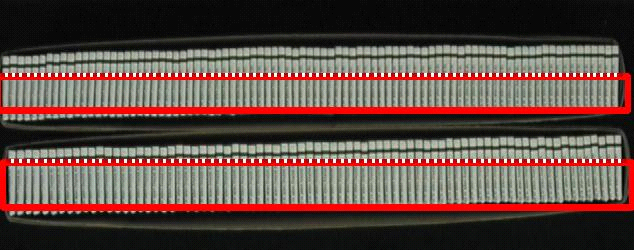
Fig 10. Red Counting Regions showing white tick marks for each part found
6.1 How to Remove the Tray from your Count
RCOUNT will recognize the tray and not include it in the count only if it is a different color and/or thickness from the other parts being counted. There should not be a white tick on the tray itself on each end.
Select Automatic Offset in order to automatically subtract the tray or container from the count.
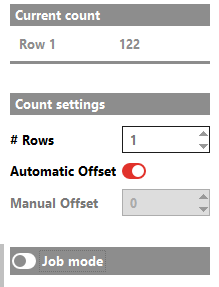
Fig. 11 Count Settings window
If the tray is too similar, a white tick will appear on the tray. Simply deselect Automatic Offset. Now enter a quantity to subtract from the count in the Manual Offset field. (Typically 2)
The part count should be accurate now.
7.0 Reports
In order to generate a Counting report, select the Report icon from the main toolbar. Select the report template and complete the form. It is recommended to select “Save & View” to see the final report. It is also recommended to add your company logo to the report using this dialog box.
Go to the Main Menu.

Select General settings.

Fig 12. Report Logo setup
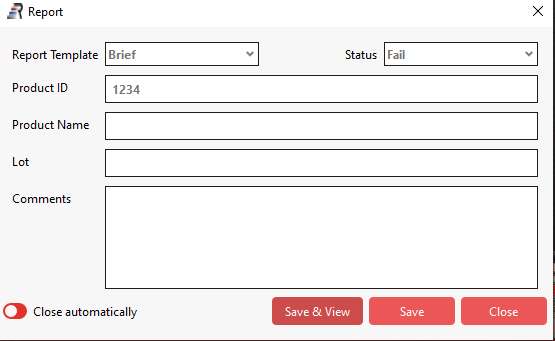
Fig 13. RCount Report Template
Here is an example of an RCount report.
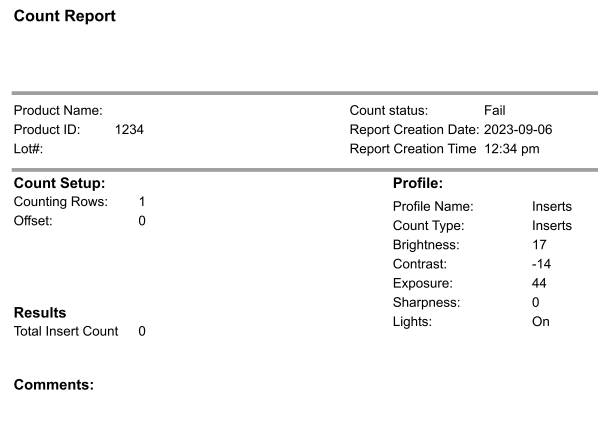
Fig 14. Example of an RCount Report
8.0 General, Administration & Compliance Settings
All the Administrative and Compliance controls are located here and outlined in this section.
Click
Main menuto access the main menu shown below.
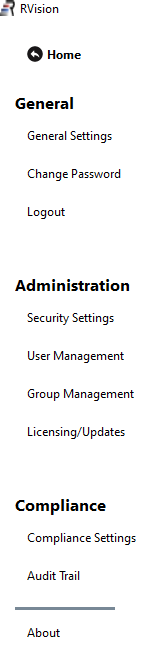
Fig 15. RCount Administration Main Menu
8.1 General
General Settings - This function allows you to add your company logo to the Reports
Change Password - This function allows you to change your password
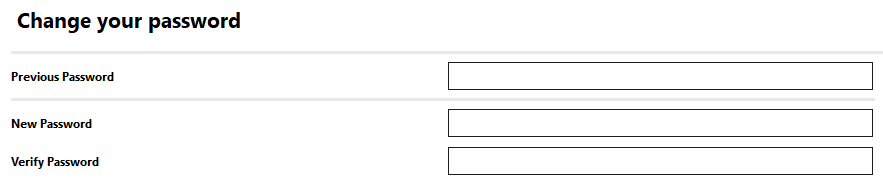
Fig. 16 Change Password Window
8.2 Administration
Security Settings - This function allows you to manage passwords and system security including system time out, log out, password security, and more.
User Management - This function allows you to manage user access. Select
User Managementfrom the Main Menu and you will see this dialog box appear.

Fig. 17 User management window
To add a new user, click on the ADD icon and enter all the User information including the email address.
Group Management - This function allows you to arrange all active users into groups and manage them as a group.
Licensing/Updates - This function allows you to manage licensing and software updates. When a new software version from GlobalVision is available, this function will automate the upgrade process.
8.3 Compliance
Compliance Settings - This function allows you to enable electronic signatures. From the
Main menu, select Compliance Settings. You will now be able to toggle this feature ON.
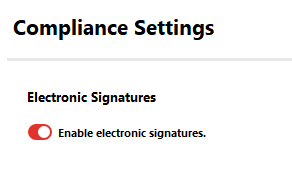
Fig. 18 Electronic Signatures
Audit Trail – This function allows you to view the audit trail. Simply select this feature from the
Main Menu.
Exiting the Main Menu
To Exit from the Main Menu in the RCOUNT™, click on the Home button.
Logging out of the RCOUNT Software
Click on the Main Menu button and select Logout.

Fig. 19 Logging out of RCount
9.0 Camera Lens Adjustment
The adjustments on the camera lens are as follows:
Lens | Description |
Aperture (top ring) | Controls the light intensity to the camera. |
Focus (bottom ring) | Adjusts the focus for clarity. |
Table 2. Camera Lens Adjustments
9.1 Camera Image Setup
Camera Setup adjusts the image settings from the camera. To open Camera Setup, click Camera Setup from the Setup menu. The Camera Setup Information window appears.
Feature | Description |
Brightness | Adjusts the image brightness. |
Contrast | Adjusts the image contrast. |
Exposure | Adjusts amount of lighting entering camera. |
Gamma | Adjusts image luminance |
Table 3. Camera Image Setup
10.0 Troubleshooting
Table 3. Basic problems that may occur are:
Problem | Solution |
Image is not clear | Firmly connect cables. Adjust lens aperture and focus. Verify monitor brightness and contrast. Check lighting source. |
Row count is not accurate |
3. Adjust camera setup.
|
Spots on image | Clean lens. |
No image from the camera | Verify that the camera power and cables are connected properly. Verify that the camera power indication light is illuminated. Check that the camera aperture is set open. Check that the lens cover has been removed. |
System does not boot up | Check the power of the system and monitors. Make sure power bars are on. Check power cables to computer and monitors. Check mouse and keyboard connections. |
11.0 Counting Analyzer
If the count is not accurate, the RCount has a built-in tool to visualize how the camera is seeing the individual parts.
On the main toolbar, click the analyzer tool.

At the bottom of the image, you will see a graph appear. Use the slider at the bottom to scroll the parts from Left to Right.
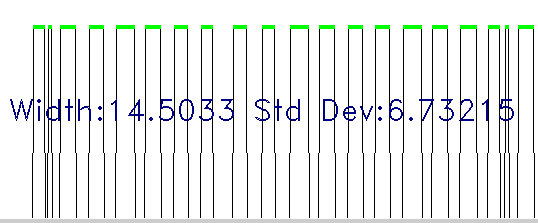
Fig. 20 Part Analyzer showing average part width & standard deviation between parts
12.0 Importing & Exporting Images
The RCount allows the saving of camera images for the purpose of Importing or Exporting images. This can be useful for supporting your system with Global Vision technical teams and troubleshooting.