C8 Setup
Summary: Hardware set-up of your GV cylinder scanner.
The following sections describe the pre-scanning process when using your GlobalVision C8 cylinder scanner.
Hardware Set-Up
The following steps outline the hardware set-up procedure:
Ensure the GlobalVision C8 scanner is on a secure, level platform with minimal vibration.
Connect the power cord to a power supply that complies with and then to the Power Adapter port on the back of the scanner.
Connect the USB cable to the back of the USB Adapter port and then to the computer USB input.
Placing the Sample
To place your sample (cylindrical object) prior to the scanning process:
Ensure all software is installed
Ensure the scanner is set up
Ensure the scanner is powered on
Once the scanner has initialized, lift the scanner lid and place a cylindrical object on the rollers over the sensor.
The Scan starting point is just above the silver roller.
If necessary, place a custom insert in the cylindrical object to ensure it maintains its shape. For clear cylindrical objects, place a colored paper stock inside to match the PDF file or actual product packaging.
Orientation: The top of the cylinder is on the left side.
Setting the Resolution
The resolution defaults to 300 DPI.
Available Scanning resolutions are 150, 300, and 600 DPI.
Selecting the Scanner Source
To select your source (scanner) and start scanning:
On the Main toolbar, click Scanner Select Source.
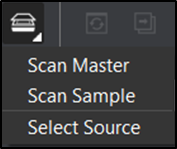
Figure 5
Select GlobalVision C8 from the Scanner Selection window and click Select.
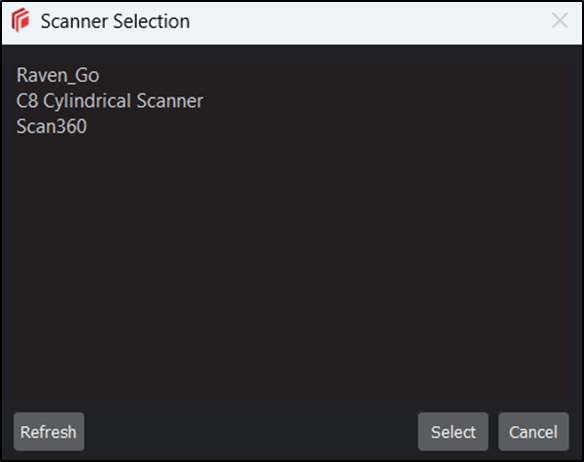
Figure 6: Scanner Selection Window
Calibration
In order to achieve the best image quality, it is recommended to perform a White Balance on the C8 Scanner.
Please note that C8 Calibration is performed on each unit at GlobalVision Production prior to shipping.
A White Balance Calibration tool will be required as shown below.
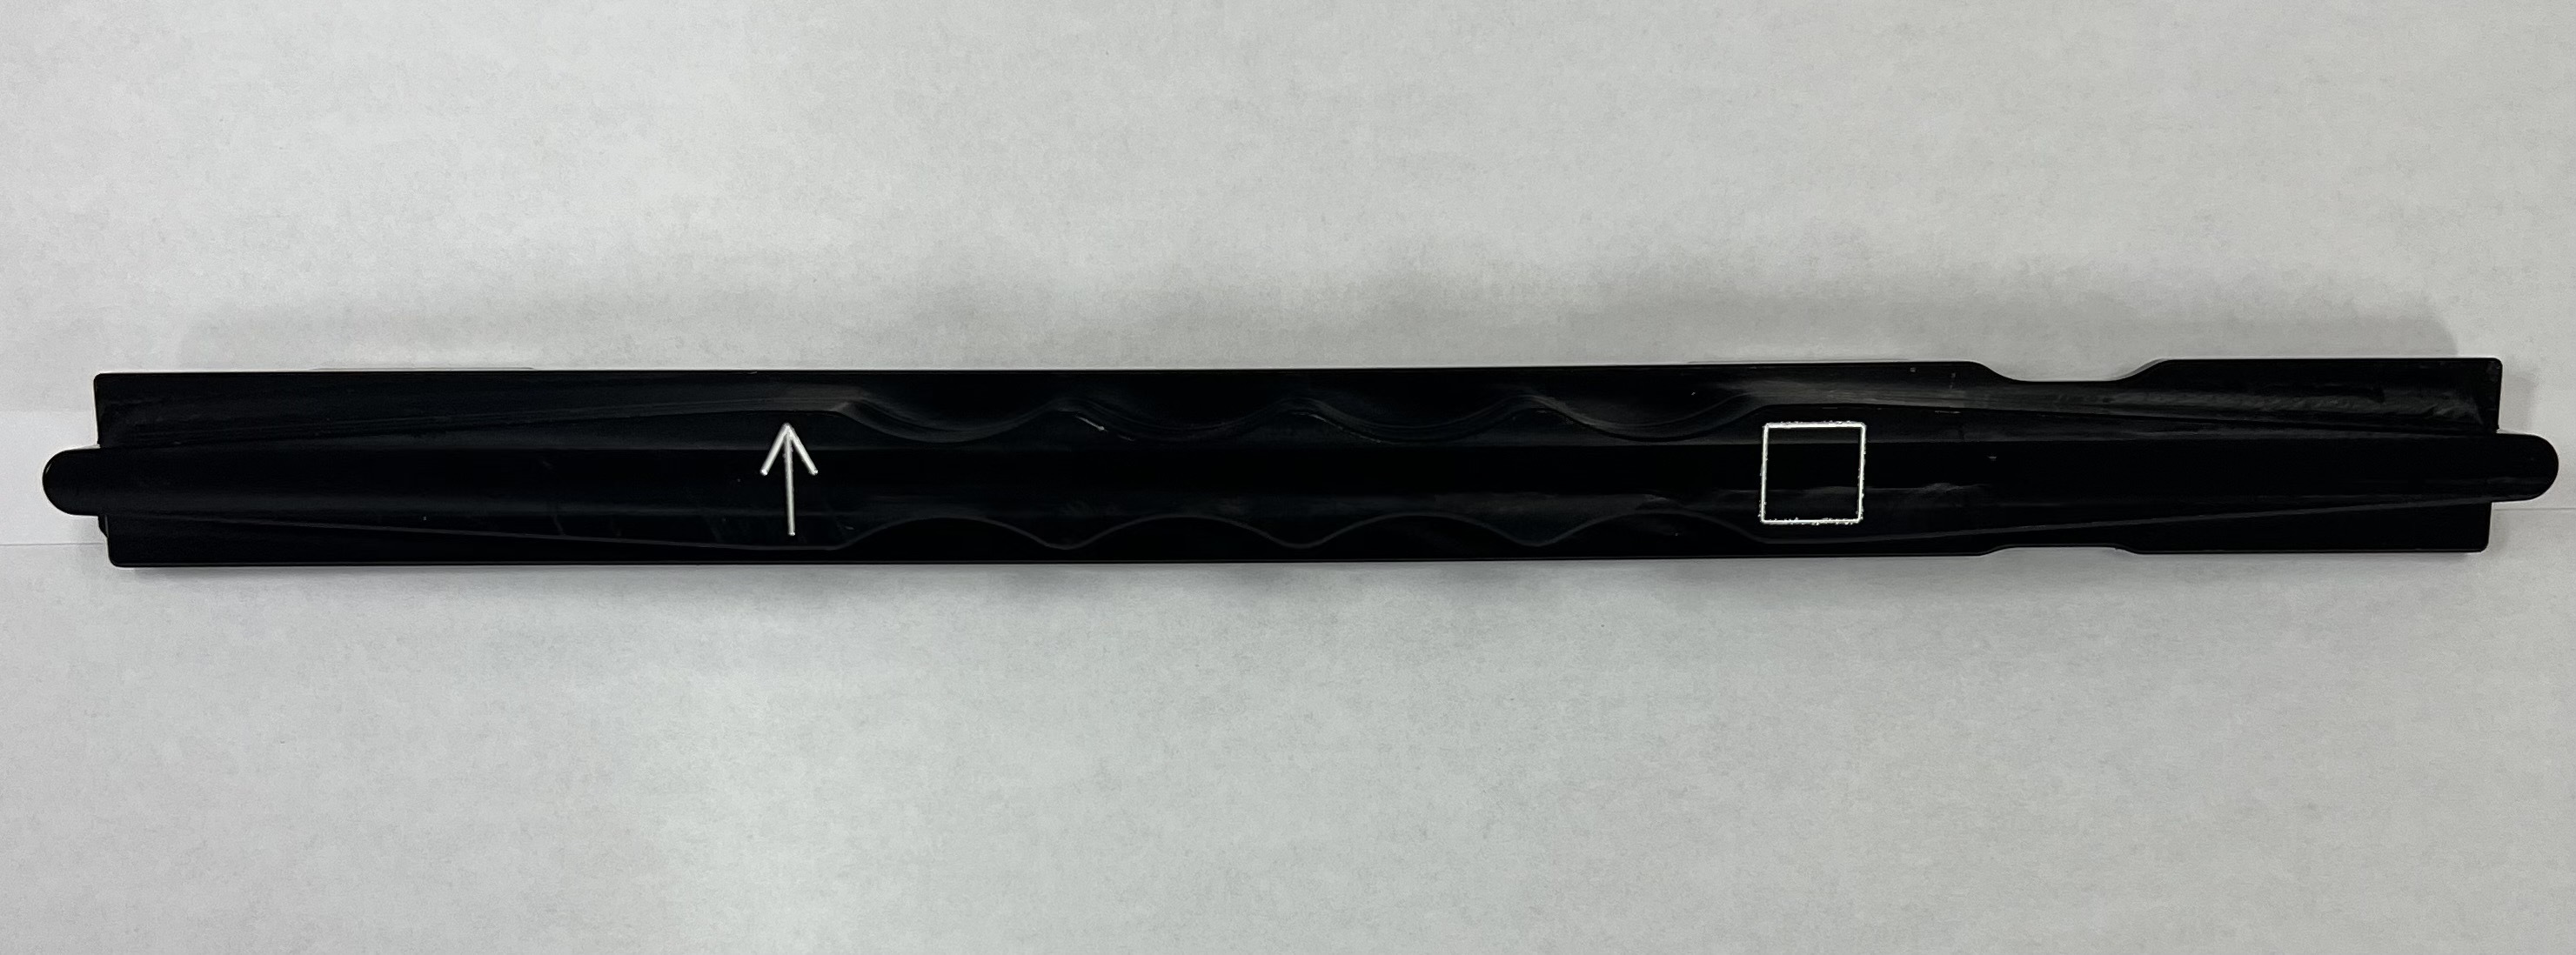
Place the Calibration tool on the C8 Scanner as shown below.
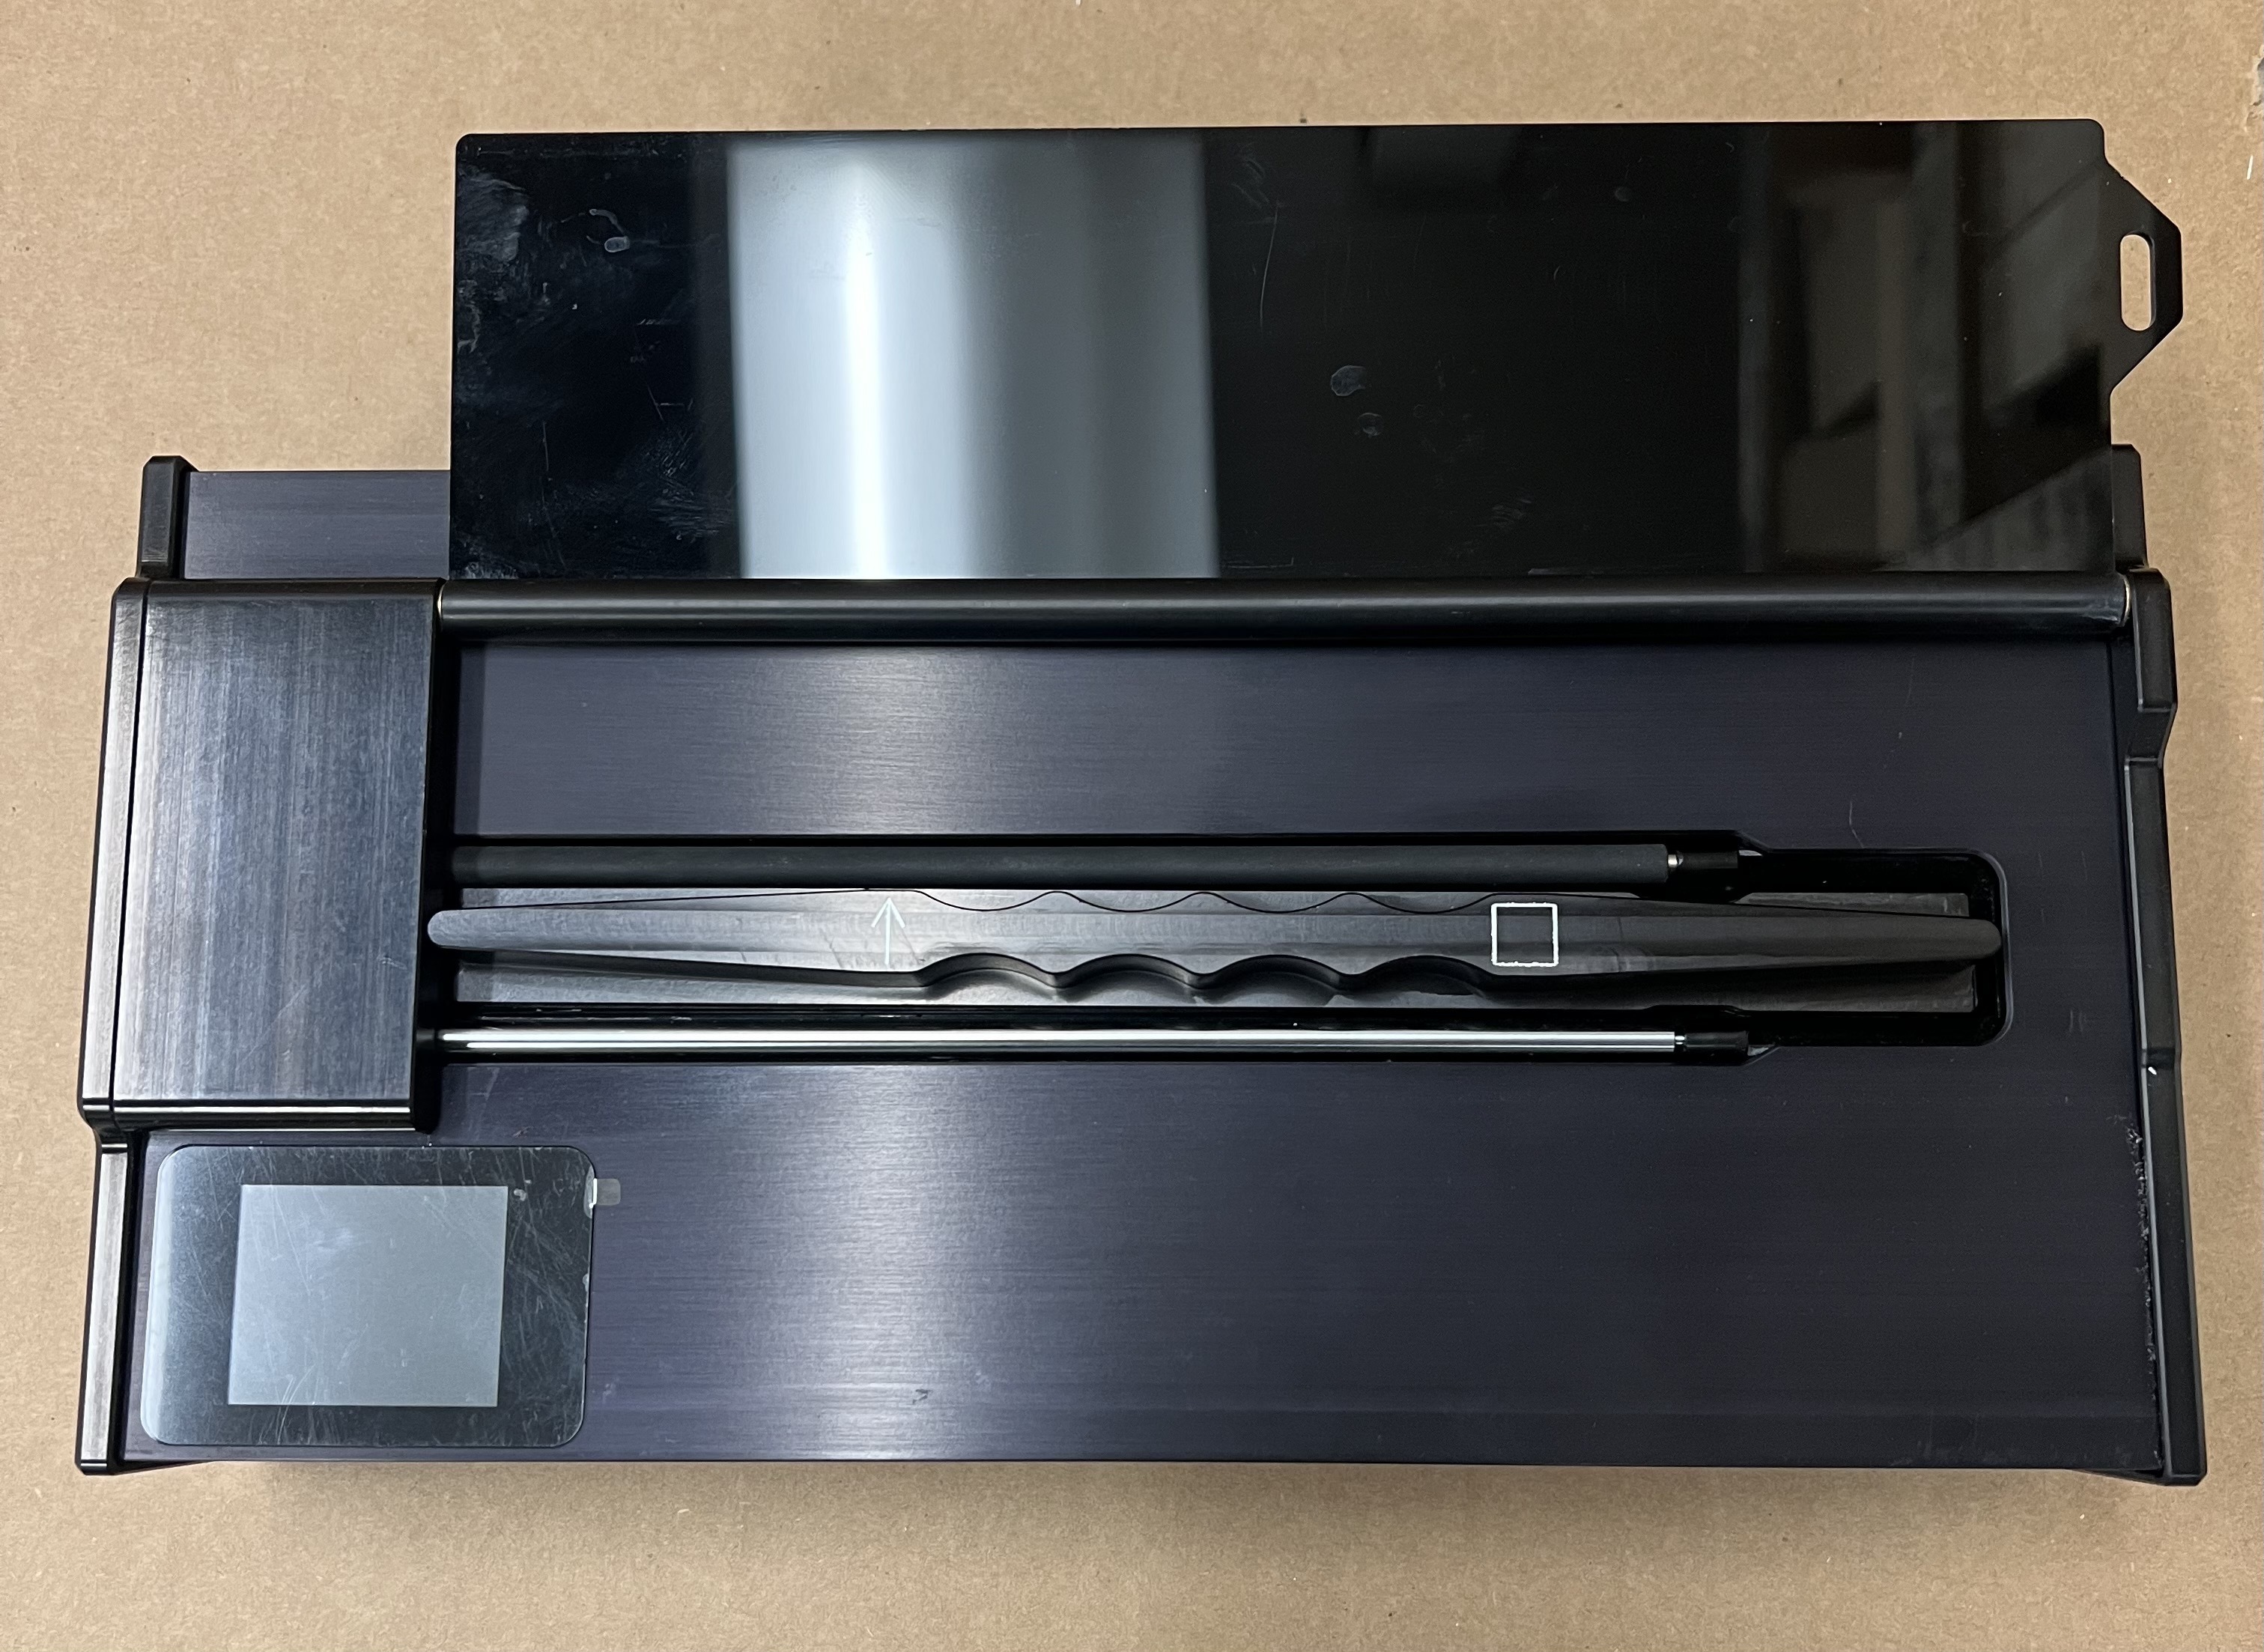
The C8 is now ready to be calibrated. Follow these steps:
Open the GVD application
Click the Scanner icon
Click on the Down Arrow
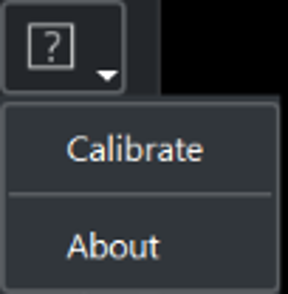
The Calibrate function will appear.
Click on the Calibrate icon, the option to Calibrate will appear as shown below:
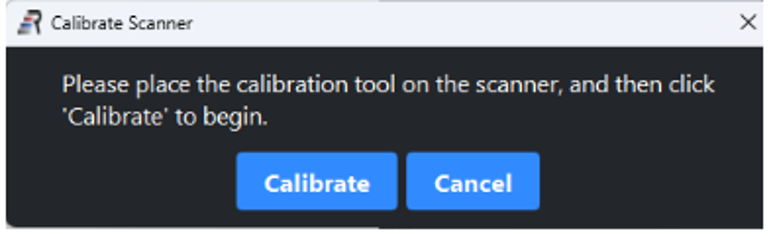
Click on Calibrate.
“Performing scanner calibration” message will appear and calibration started.
Wait for Calibration to finish, then remove the Calibration Tool and store in a safe place from any light.
It is recommended to perform Calibration Monthly.