5.9.0 - Tools (Master & Sample)
Summary
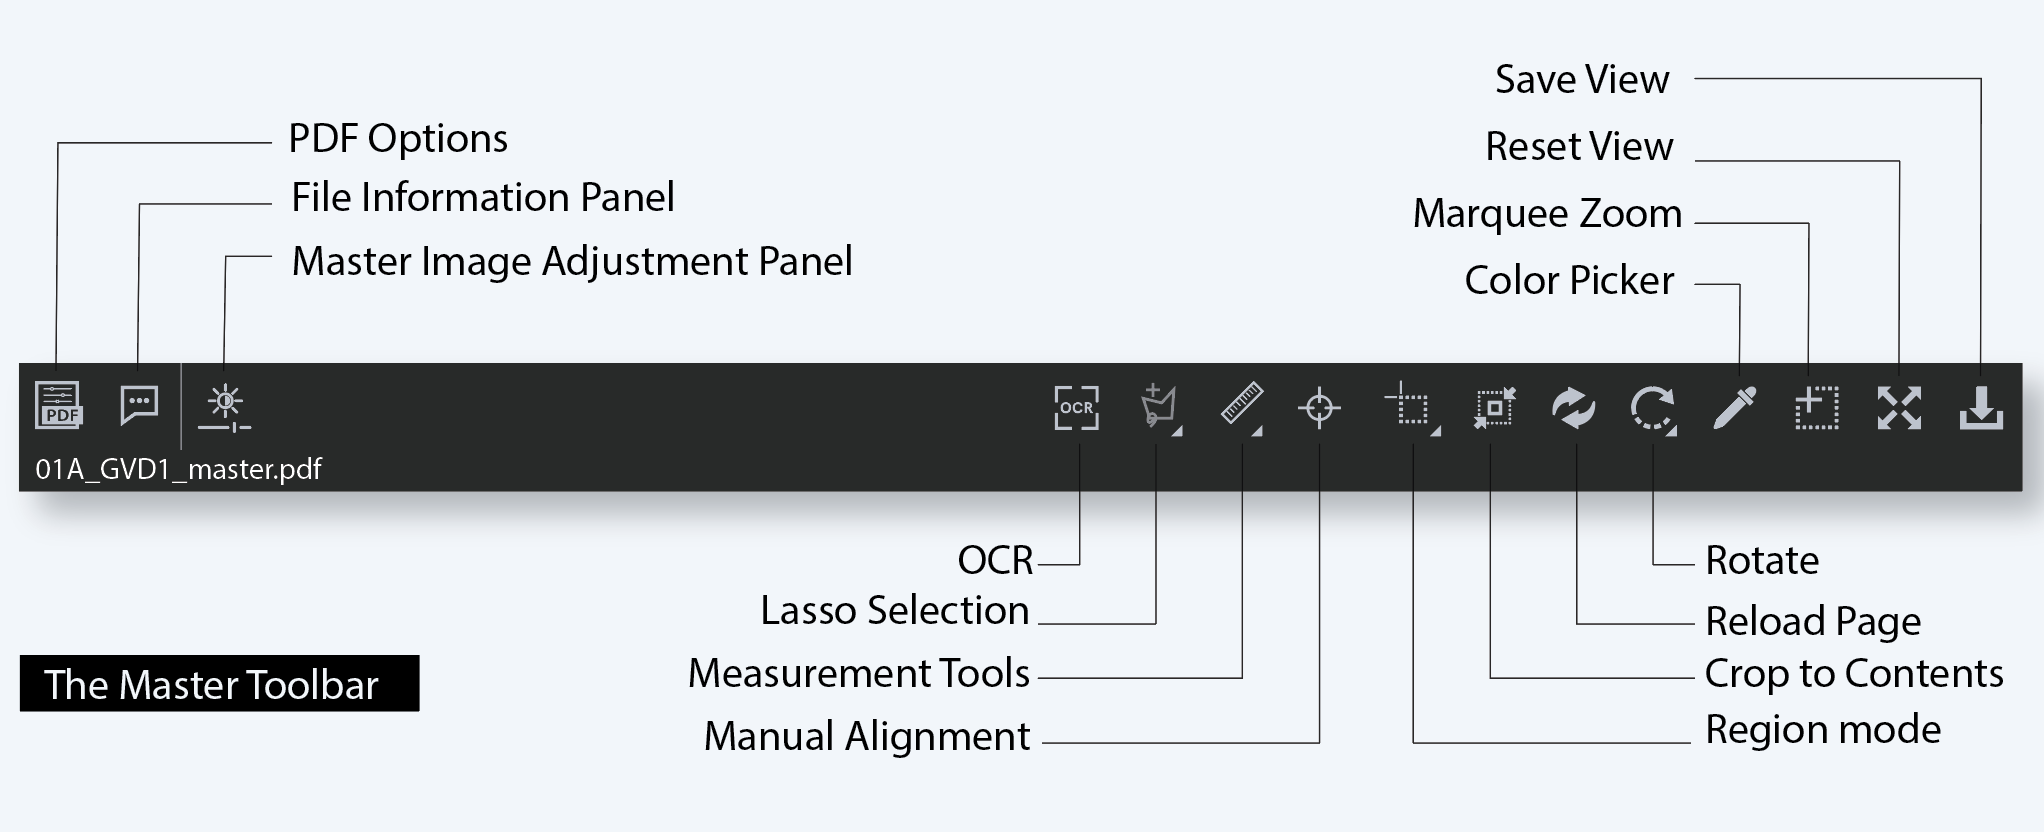
The toolbar at the top of the Master panel or Sample Panel is known as the Master/Sample Toolbar. It contains several tools needed for a successful Inspection. Each of them is covered in detail below.
Toolbar

1. PDF Options
If a PDF or AI file is loaded in the Master panel, the PDF Options icon can be checked, or unchecked to set it on or off.
2. File Information Panel
To display information about the Master file:
Click File Information.
The following information becomes available:
File Type: The originating file format.
Rastered DPI: The DPI at which the file was rasterized.
Image Size: The size of the image (in pixels).
Memory Size: The amount of physical memory the rasterized image uses (in MB).
3. Image Adjustment Panel
To adjust the Master image's brightness, contrast, or gamma value:
Click Image Adjustments. Click the button in the center of the bar and slide to right or left.
Alternatively,
Click on the arrows on either end of the fields or manually type-in values for each of them.
Click Apply to make the changes or click Cancel to close the panel.

4. Reload Page
To reload the Master:
Click Reload Page. The image reloads in the Master panel.

5. Crop to Contents
To tighten the crop selection so that it includes only the object:
Click Crop Sample. Left-click and select an area with the crosshairs that appear. A red dotted line surrounds it.
Click Crop to Contents. The crop selection adjusts to contain only the revised selection.
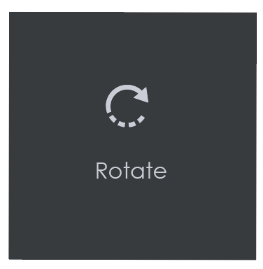
6. Rotate Page
To rotate the Master 90º clockwise: Click on Rotate → then select Rotate 90 CW.
To rotate the Master 90º counter-clockwise: Click on Rotate → then select Rotate 90 CCW.
To rotate the Master 180º clockwise: Click on Rotate → then select Rotate 180.
To specify the angle to rotate the Master: Click on Rotate → then select Arbitrary rotate.
Insert the desired angle by typing in the prompt or clicking the arrows on either side and click OK.
Note: Not recommended for Text and Spelling Inspection modes.
5. To mirror-rotate the Master horizontally: Click on Rotate → then select Mirror Horizontally.
Note: Not recommended for Text and Spelling Inspection modes.
6. To mirror-rotate the Master vertically: Click on Rotate → then select Mirror Vertically.
Note: Not recommended for Text and Spelling Inspection modes.

7. Marquee Zoom
To magnify the image:
Place the cursor in the Master panel. Scroll upward with the trackwheel.
Note: On a Mac operating system, scroll downward with the trackwheel if the Scroll Direction: Natural setting is ON.
To select an area in the image to magnify:
Click Marquee Zoom. Select the area using the left button of your mouse.
Or,
Scroll upward with the trackwheel.
Note: On a Mac operating system, scroll downward with the trackwheel if the Scroll Direction: Natural setting is ON.
To reduce the magnification:
Place the cursor in the Master panel. Scroll downward with the trackwheel.
Note: On a Mac operating system, scroll upward with the trackwheel if the Scroll Direction: Natural setting is ON.
To pan:
Left-click in the Master panel. Hold and move the mouse around the panel.

8. Reset View
To restore the image to its original size:
Click Reset View

9. Save View
To save the Master image view:
Click Save View
The Save As window displays. Type in the file name and click Save.