5.9.0 - Graphics Inspection - Post-Inspection Results Viewing
Summary
This section describes the post-inspection results viewing process and steps, needed after running a Graphics inspection.
Post Inspection Result Viewing
Difference List
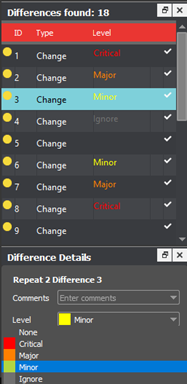
The Difference List displays the differences between the Master and Sample files for easy reviewing and proofing. The column headings include the ID, Type, and Level.
To select a difference:
Click on the difference in the Difference List. It gets highlighted in the Inspection View and outlined in red in the Overview panel. A checkmark ✅ gets added to the Difference List to indicate it has been reviewed.
There are two ways to assign a level to a difference:
Select the difference in the Difference List. Click the Level drop-down list in the Difference Details panel and select the level. The color-coded level displays to the right of the difference in the Difference List.
Alternatively,
Double-click the difference in the Inspection View. The Difference Found window displays. Click the Level drop-down list in the Difference window and select the level. Click X to close the Difference window. The color-coded level displays to the right of the difference in the Difference List.
Note: Hotkeys (F1 – F5) may be applied to assign levels. Select the difference and click the appropriate "F" key (see below):
| 1 | Key | Function |
| 2 | F1 | Reporting level - Critical |
| 3 | F2 | Reporting level - Major |
| 4 | F3 | Reporting level - Minor |
| 5 | F4 | Reporting level - Ignore |
| 6 | F5 | Reporting level – None |
To assign a level to multiple differences:
Hold down the CTRL key while selecting the differences.
Click the Level column in the Difference List or the Level drop-down list in the Difference Details panel, and select the level.
Note: On a Mac operating system, to assign a level to multiple differences, hold down the COMMAND and SHIFT keys while selecting the differences.
To remove a level assignment:
Click the Level column and select None. The level no longer displays in the Difference List.
There are two ways to assign a pre-defined comment to a difference:
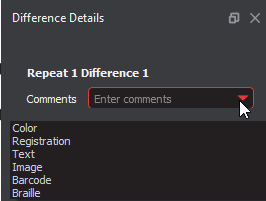
Select the difference in the Difference List. Click the Comments drop-list in the Difference Details panel and select the comment. The comment displays in the Comments text box. A sticky-note icon displays in the Difference List to the right of the difference.
Alternatively,
Double-click the difference in the Inspection View. The Difference window displays. Click the Comments drop-down list in the Difference window and select the comment. Click X to close the window. The comment displays in the Comments text box. A sticky-note icon displays in the Difference List to the right of the difference.
To assign a comment to multiple differences:
Hold down the CTRL key while selecting the differences, click the Comments drop-down list, and select the comment.
Note: On a Mac operating system, to assign a comment to multiple differences, hold down the COMMAND and SHIFT keys while selecting the differences, click the Comments drop-down box, and select the comment.
There are two ways to assign a customized comment to a difference:
Select the difference in the Difference List, click the Comments drop-down list in the Difference Details panel, and type in the comment. A sticky-note icon displays in the Difference List to the right of the difference.
Alternatively,
Double-click the difference in the Inspection View. The Difference window displays. Click in the Comments text box in the Difference window and type in the comment. Click X to close the Difference window. The comment displays in the Comments text box. A sticky-note icon displays in the Difference List to the right of the difference.
To delete a comment from a difference:
Click in the Comments drop-down box in the Difference Details panel and select the blank entry.
Note: Include difference only needed if the difference was excluded first by accident.
To include the selected difference in the report:
Press F11
Or,
Click Include in the Difference Details panel
To exclude the selected difference in the report:
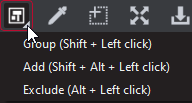
Click the Difference Review Actions icon and then Exclude.
Use the crosshairs that appear to select the difference in the Inspection View Sample panel to be excluded by left-clicking and drawing a red box around it. The difference gets crossed out in the Difference List and excluded in the report.
Note: You can alternatively select the difference in the Difference List and click Exclude. However, an administrator can configure the Application to force the inclusion of all differences, in which case the Exclude and Include options do not display in the Difference Details panel.
For repeats, once you select the difference to be excluded as a difference, a message displays:
To add a difference:
Click the Difference Review Actions icon and then Add.
Use the crosshairs that appear to select the area in the Inspection View to be added as a difference by left-clicking and drawing a red box around it. The selected area gets added as the final difference in the Difference List.

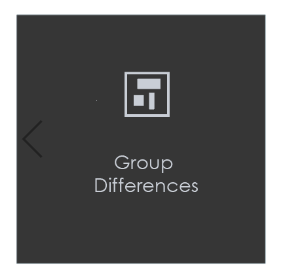
To group differences:
The Difference Review Actions drop-down list lets the user manage the differences detected, by grouping/excluding them or adding new ones.
Click the Difference Review Actions icon and then Group.
Use the crosshairs that appear to select the differences to be grouped by left-clicking and drawing a red box around them. A difference ID gets assigned to the group, which is added to the Difference List as a change. The difference count also adjusts accordingly.

Note: The new difference is automatically included in the report. To exclude it, click Exclude.
For repeats, once you select to group the differences, the following message displays: "Apply to all repeats?"
Click Yes to add the grouping to all repeats. Click No to add the grouping to the selected repeat only.
Overview Panel
The Overview panel displays the original Sample image. The difference that is selected is located at the intersection of the two red lines.
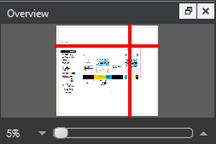
To zoom in or out of the Sample image in the Overview panel:
Slide the button in the middle of the bar accordingly to navigate to the appropriate location.
Repeats Found Panel
The Repeats found panels list the number of repeats of the Master image that were found in the Sample image after the inspection has been run. Repeats with differences display a red icon ❌ to the left. Repeats without differences display a green checkmark ✅ to the left instead.
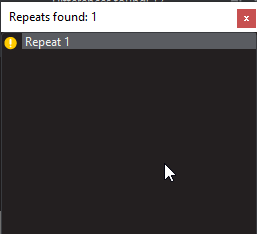
To navigate between repeats:
Click the desired number on the list. The selected repeat appears in the Sample panel.