5.9.0 - Braille Inspection - Post-Inspection results Viewing
Summary
This section describes the post-inspection results viewing process and steps, needed after running a Braille inspection.
Post Inspection Results
Review the Differences
Click on the Braille region to be inspected in the Braille Regions found panel. It gets highlighted and displayed in the Inspection View.
When running Braille comparison, missing (highlighted with a “minus” sign”) and extra dots (highlighted with a “plus” sign) get identified accordingly.
Modify the Dots (if Necessary)

To add a Braille dot:
Select the Braille region in the Braille panel. CTRL-left-click on the dot that is missing. A black “+” displays in the dot and the translation gets modified in the Braille Details panel, highlighted in red.
To remove a Braille dot:
CTRL-left-click on the extra dot in the Inspection View. A black "-" displays in the dot and the translation gets changed accordingly in the Braille Details panel, highlighted in red.
To cancel the Braille dot modification:
CTRL-left-click on the dot. The added "+" or "-" is removed from the dot and the translation gets changed accordingly in the Braille Details panel with the highlight removed.
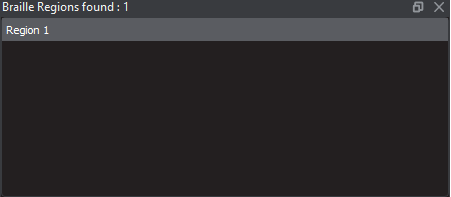
Braille Regions Found Panel
To navigate to a Braille region, click on it in the Braille panel. The Braille Details panel displays its translation and different parameters. The region itself gets highlighted in the Inspection View.
Braille Details Panel
The selected region's details display in the Braille Details panel for further review, with any differences between the Master and Sample files (during Braille Compare PDF to Scan inspections) highlighted.
If one of the Braille Parameters appears in red, it has failed the ISO Standard 17351:2013 for dot diameter and spacing.
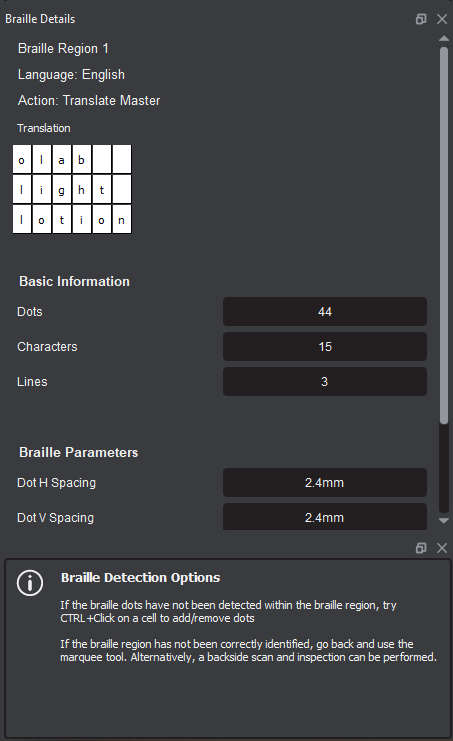
The following table describes the individual parameters found in the Braille Details panel:
| 1 | Braille Details | |
| 2 | Braille Region | Region selected |
| 3 | Language | Language of translation |
| 4 | Action | Selected action of inspection |
| 5 | Translation | Translation of Braille in the selected language; When the Master and Sample files are being compared, separate Master/ Sample Translation fields display |
| 6 | Dots | Number of dots |
| 7 | Characters | Number of characters |
| 8 | Lines | Number of lines detected |
| 9 | Height Information (inspections w/ frontside scans only) | |
| 10 | Dot Type | Type of dots detected (dome, bell, plateau) |
| 11 | % Acceptable | Percentage of detected dots above the set threshold (%) |
| 12 | Mean Height | The average height of detected dots (mm) |
| 13 | Min/Max Height | The Minimum and the maximum height of detected dots (mm) |
| 14 | Standard Deviation | Standard deviation in height of detected dots (mm) |
| 15 | Braille Parameters | |
| 16 | Dot H Spacing | Average horizontal spacing between dots (mm) |
| 17 | Dot V Spacing | Average vertical spacing between dots (mm) |
| 18 | Character Spacing | Average spacing between characters (mm) |
| 19 | Word Spacing | Average spacing between words (mm) |
| 20 | Line Spacing | Average spacing between lines (mm) |
Master Panel
Overview Panel
The Overview panel displays the image or inspection currently being viewed in the Inspection View. The Braille region currently selected is indicated by the intersection of the two red lines.
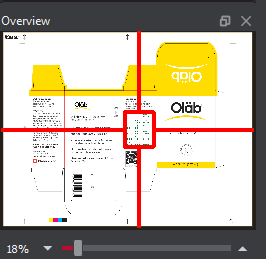
To zoom in or out of the image in the Overview panel:
Slide the button in the middle of the bar accordingly to navigate to the appropriate location.